Engineering Principles
We recently began hosting live training focused on explaining the engineering principles that are common throughout the construction industry. These live training events can also be used by students to gain CPD hours.
BluCem – Engineered Cementitious Solutions
About this Webinar
BluCem FSC – Fast Set Concrete is a high strength, durable, CSA based, cementitious binder which is blended with selected aggregates to form a high-performance pavement system.
In this webinar, Daniel Bosco describes the benefits, applications and challenges of BluCem FSC. Later he discusses the strength gain and ancillary products used to control the workability and set time in different conditions.
Downloads & Links
Video Transcription
00:04):
Welcome, everyone. Just letting every one of our guests into the meeting room. Thank you for joining us on this Monday for our second session, which is the latest session and designed for our partners up in South-East Asia. So, thank you to all of those who have joined us.
(00:22):
Today, we’re talking about fast-set concrete products. Just waiting for a few more people to pop into the meeting room there. It’s based on Calcium Sulphoaluminate Technology which provides its type of cement that provides rapid cure, long-term stability, a low carbon footprint, less energy to produce than OPC cements, it’s chemically resistant, and it also has worldwide usage over a number of decades now throughout USA, Europe and Asia.
(00:52):
FSC, fast-set concrete, what is it? What are we talking about? So, it uses that CSA technology. It’s a fast-set cement binding system. And we use that binder to form a range of products, products ranging from fluid grouts, which have really pourable, highly-pumpable consistency, available in 20-kilo packaging just to mix water with, micro-concretes as well with small aggregates that can be used for small repairs, also a pre-bagged product. Structural concrete, which is applied using weigh-batching units, which we’ll go through in this presentation. And we can also produce sub-base or lean-mix for road applications. So, there’s a range of products that can come out of this fast-set technology powder. It’s just a new type of cement system.
(01:40):
Looking at the Australian experience and what we’ve completed here, and this is for our South-East Asian participants, just to give you a bit of an update on what we’ve done. Back in 2005, it was probably one of the largest single applications of a fast-set grout in the country. And that was when we upgraded Sydney Airport in readiness for the A380s which were coming in. You can see there a picture of General Holmes Drive, which is a tunnel which runs across the main runways and taxiways. Quite a length to it and cost us quite a few taxiways. Had to all be upgraded over a six-month period for strengthening, and a fluid grout was used in that application to cast in pre-cast beams, which would strengthen the actual tunnel. So, that was the first really large application.
(02:29):
In 2012, there were airport slab replacements which were undertaken. And that was the first use of a volumetric truck. The volumetric trucks were a little bit in their infancy in Australia and have come a long way in the last few years, through to 2017, where we’ve had the first mobile weigh- batching units. So, they actually weigh the products as they come out, rather than relying on volumetric scales to measure. So a lot more accurate by the time we got to 2017.
(02:59):
Then on the back of this accuracy, in 2018, we saw a lot more application in airports, but also approvals by road authorities in Australia to use this for road slab replacements, these products, knowing that they could get the reliability.
(03:16):
So, why do we need fast-set concrete? Fast-setting cement products through acceleration already exist. They’re accelerated using calcium chloride and other types of accelerants. We want to avoid those because from a durability point of view, it’s not the best way to place concrete when you’re looking at long-term, 20, 30, hundred-year design life. We want to eliminate traffic management diversions. So, as you can see in the photo, the quicker we can return a slab to service, the quicker we can get traffic underway. And we want to do that upgrading without lane and runway closures, particularly in airports. You only have a very small window of time where you can do the slab replacements and that means that the concrete has to achieve its strength within a few hours, to be able to land a plane on.
(04:03):
The types of places that we use it, few photos down the side showing different applications, but it boils down to road repairs, widenings, new construction in roads, railway shutdowns, emergency repairs, airports, as we spoke about, bridges, stitch pours, maintenance, bearings, and other things that need to be completed with fast turnaround time, tunnel progress activities. So, where in a tunnel, you need to have fast turnaround times to progress the tunnel, a fast-set concrete system might be the solution. Really, any work that requires a speedy return to service involving a cementitious product.
(04:39):
Some of the advancements that have been made over the last couple of decades in this area is that the manufacturing process has improved a lot. So, we can get far more repeatable results out on site in terms of strength gain and durability as well. We can demonstrate a hundred-year design life for these types of products. We’ve shortened the mixing time, which makes these products suitable now for volumetric mixer application, I’ll talk about that as well. And we can achieve consistency in all conditions. So, the set times, the workability and the strength development, whether we’ve got cold temperatures in the south of Australia down in Melbourne or Tasmania, or whether we’re working in Singapore or the North West Shelf at 30, 40 degrees temperatures, we can still achieve the same sort of strength development and set times. And we’ll talk about how we achieve that as well.
(05:38):
Let’s have a quick look at the manufacturing facilities. So, the powder blenders that we use for this cement technology has to be capable of mixing multiple small ingredients very thoroughly. So, the types of cement blenders we use are actually from the pharmaceutical industry, not from the cement industry, because they’re more accustomed and better designed for mixing the product thoroughly. So, the type of mixing devices are really important. On top of that, we have a lot of controls in place over our raw materials that come into the factory upon delivery. But also, we do a range of testing, not only during manufacture, that’s an obvious one. Every time you manufacture the product, you have to do your full-range testing on each batch. But in addition to that, we’re going through the factory, every month we’re pulling out all the raw ingredients and we’re doing type testing.
(06:25):
Now, type testing is something you would normally do once when you develop a product, but we’re now doing this every month. And the reason for that is so that we can have constant data on the raw materials we’re using in advance of them being applied on-site. So, we will already have the 28-day strengths before that product is manufactured and sent to site, which means that we get much more reliability and can identify our trends and patterns in the raw materials over time. So, we’ve got that data which is being done monthly, and we’re also testing every single batch that comes out. And when we say every single batch, each batch would be around half a ton of powder. So that’s a lot of testing and the type of testing we’re doing, just to summarize some of those tests here, we’ve got powder consistency, we’ve got dimensional stability testing during the plastic stage, we’ve got shrinkage testing, lead and segregation, hardness, then obviously the mechanical properties of flexible strength and compressive strength. And doing that testing early gives us the opportunity to get that long-term testing before the product goes out to site and is put into application.
(07:30):
Durability for a longer design life. Now, I’ve got to say that 20 or 30 years ago, it was hard to believe that you could achieve fast-set and a highly durable product all-in-one. It seemed as though you either had one or the other, but now we can actually say that we’ve got fast-set products that are durable, will last the life of the structure. Previously, there were issues associated with fast-set. People would see that you would get cracking thermal and plastic. You’d get surface dusting, loss of strength over time, and they wouldn’t provide any protection to the reinforcement because either they had chloride-based accelerators, which would attack the reinforcement, or they wouldn’t be alkaline. So, they wouldn’t provide that alkaline environment to passivate the steel. So these are all issues that were associated previously, going back, maybe even 10 or 20 years.
(08:19):
Now, you don’t see that. CSA cements are very, very low shrinkage after initial set. We’re talking shrinkages of around 200 to 300 microstrain. Much, much lower than what you see out of concrete. But the standard shrinkage test in that regard isn’t fully adequate. It gives you an idea of the shrinkage that happens from seven to 28 days. And yes, CSA is a very low shrinkage in that zone, but what’s happening in the first seven days and particularly with something that’s curing so rapidly, you really need to know what’s happening. So, we do a volumetric stability test during the plastic stage, and we’re actually monitoring the volume movement and change during those early stages, because we know that that’s a high risk with calcium sulphoaluminate cement systems is that you can get plastic cracking in those early stages. Some of you may have had experience in seeing that out on sites. If the product is developed well, you won’t see that plastic shrinkage cracking.
(09:17):
So, all of this leads to us looking at how we can determine the hundred-year design life. And there’s a lot of factors that we’ve tested and put forward as reasons for making that assertion. So, the shrinkage on the product, as I mentioned, is less than 300 microstrain. We have a very low chloride content. So, we know that it’s good for the steel reinforcement, less than 0.05%. It’s low in soluble alkalis, and we have no residual sulfates. So, the lifetime outcome for those items is that you have no surface cracking, you have no alkali silica reaction, concrete cancer, and you have a high resistance to sulfate attack. So, we know that those bases are covered. We also complete NORD testing, and we know that we have the very slow migration chlorides through this type of cement system. We know that it’s very high density and we know it’s low in permeability. So, we also have no surface dusting and excellent wear resistance. So again, all lifetime properties that we know will lead to a longer life outcome.
(10:20):
On top of that, we’ve done long-term testing on pH. So, we know that the alkalinity is maintained for more than 900 days. And we also know that we have a 900 day strength increase, and both of those things lead to protection of the reinforcement and a durable hard-wearing surface. On top of that and finally, we know that we have no late formation Ettringite, which can be a question around CSAs and needs to be tested for prior to delivery of the product.
(10:50):
, what we look at is the long-term testing, and most people are only interested in fast-set cement, what’s happening in the first few hours? What’s my strength at two hours? What’s my strength at three hours? Sometimes, they might ask you what’s my strength at 28 days, but not very often because by then the product, the item, is usually put back into service and forgotten about, but long-term strength gain is actually really important in these products because the reaction actually continues over a reasonable period. In fact, the strength keeps gaining for many days. We’ve gone past our 28, 56, 112, 224, 448 days, and we’re still seeing a strength gain. So, there’s still something happening within the product, there’s still a reaction occurring. And we know that doesn’t level out until around 500 days when the reaction is complete.
(11:35):
So, what we want to make sure of is that the actual reaction that’s occurring between 28 days and 500 days isn’t having a negative impact because we know that that’s when the Ettringite is forming, and if you have an oversupply of that Ettringite crystallization, then it can break down your cement structure. And if that breaks down your cement structure, then it can lead to a reduction in strength over time like this. And this has been seen, if we go back maybe a decade, two decades ago, in some CSA systems, where the strength gain after a couple of years was noticed to drop off and there was powdering in the surface and a reduction. So, this is something we avoid by doing the long-term testing. As you can see, just tabulated the strengths, the testing was completed both at 0.2 and 0.25. So we went the high-end and low-end water ratios. And you can see that we’ve got strength gain all the way through to the 900 days. That testing is still ongoing. We know there are no changes now, but we still would like to keep testing that. And we’re about five years into that process.
(12:41):
So, looking at some of the application systems. I mentioned volumetric trucks earlier, and these have changed the way we apply fast-set products, but in themselves, they’ve also changed, particularly over the last five years or so. So, what it is is you have powder and aggregate bins, which are separate. So, you have your powder, your cement powder and your sand and aggregates, which are put into separate bins. They drop down into an auger, and then that’s mixed off a conveyor belt through that auger. And the mixing actually occurs at the point of placement. So, we’re not adding water to our powder until we’re actually ready to place the concrete. And what that means is you have unlimited travel time with the products. Whereas, if you were using a concrete agitator truck, you would have to put all your powders in, you put your water in and drive it out to site and hope you got there fast enough before the product went off in the truck.
(13:33):
So, that’s the difference with a volumetric-based truck, which has now turned into a weigh-matching units. Because there’s been some equipment advances in this area, we now have computerized mixed design and calibration. So it’s all controlled by a computer. The trucks can move and pour continuously. So you don’t have to stop the pour to move the truck forward. And that’s the really important feature, to make consistency of your pour and avoid cold joins. And we also have continuous weigh-matching on the powder bins, which is what I mentioned was the really big advantage and where we went from volumetric-type trucks to weigh-matching units.
(14:09):
And what that means is that on your powder bins, you have load cells which are continuously weigh-batching the powder as it’s delivered from the powder bin. And it gives you a really high accuracy on that powder delivery, which combined with electronic controls over your water delivery, gives you an extremely accurate water-cement ratio all the way through your pour. So you know you’re going to get the strengths you want, you know you’re going to get the consistency you want, all the way through the delivery of that product.
(14:40):
Besides the trucks being advanced, we’ve also had material advancements, as I touched on already. So, the total mixing time now is less than 20 seconds with these trucks, as opposed to, with an agitator truck which might have been mixing for even up to 20 or 30 minutes before the concrete was poured, or where you’re using a grout mix, so where you had three, four, five minutes of mixing time before you had to apply it. Now, you can see in that photo, the little black section there, which I’ll point to with my arrow, this section here, this is an auger bin here and the powder and the water all gets delivered into that bottom point there and then it gets shuffled up this chute. And as it’s getting shuffled up by the auger, it’s also mixing at the same time, but it only allows around 20 seconds of mixing time. So, we’ve had to put additives in the product and change the way it was designed so that we can improve the, let’s call it, mixability of the product. So, we’ve changed the ingredients to suit that application. And full mixing means that you achieve more consistent results, so you’re getting more consistent set times, you’re getting more consistent rheology, and you’re getting more consistent strength gain. And mixing is a really important part of that.
(15:58):
We’ve also added some changes to the raw ingredients. One thing we realized was that the product itself on mixing was changing in its rheology over time. So, as it came out, it had a fairly low slump. And then after about two or three minutes of vibration, it had a really high slump. And what we were finding is that the plasticizers that were being added in a powder format were taking a few minutes to dissolve. So, we actually converted those to a liquid plasticizer, which means that they were active immediately. They’re part of the computer-controlled delivery process with computer-activated pumps so that we know we’re getting the right delivery plasticizer and that allowed us to get a much more consistent product for finishability, workability, and spread as well in the slab. So, we’re getting much more consistent of results in our rheology now.
(16:51):
One of the biggest changes we’ve made, though, to the product is the liquid dose retarder. So, the product has always been retarded using a powder retarding agent which was added at the factory. Problem with that is, once it’s added at the factory, it didn’t matter whether you had a 40 degree day or a five degree day, which honestly can happen in Melbourne, just waiting for it to change. You were stuck with that powder that was delivered. You had no control over it. So, every 10 degree of temperature change in the ambient temperature would either double or halve your set times. So, if you were hoping for a 30-minute set time, and suddenly you had temperatures which were 10 degrees hotter than what you were expecting, you would only have 15 minutes of work time, and that’s a pretty big hit to take in terms of the amount of work time.
(17:37):
And then on the other hand, it could go the other way as well, where you don’t develop the strength in time. By adding a liquid retarder with controlled dosage through the truck, we can actually set the amount of retarder that we’re adding to the powder so that we can set the work time to suit the ambient conditions. So, whether we now have a five degree day or even closer to zero degree day with many pours, or a 40 or even 45 degree day, which we’ve worked in before, we can actually have a set time set at 30 minutes or 40 minutes, as per the contractor’s instructions. So, we can now modify the set time on the product to suit the ambient conditions, which has made a really big change to the way we use fast-set products.
(18:18):
Just a summary of the properties that we achieved in terms of compressive strength and flexural strength at the different times, just in this table here. Again, this presentation will be available for download, there’s a link on our website and Aiden will pop that link up now, just in a chat, as you can see there. So, you can click on that and then just request a copy of this presentation and other information as well.
(18:42):
So, moving onto site testing, just to finish up, and I won’t go into too much detail on this because we’re actually presenting in full on this topic tomorrow at the same time on maturity testing and why it’s required. But site testing does come with some challenges when you’re talking about fast-set products. One, the work is being done of an evening. So, your laboratories aren’t naturally open. They have to be open for the work. On top of that, you can have cold temperatures. It also means that you have to transport the cylinders quickly to the lab without damaging the cylinders or having an effect on them. And the chance of that cylinder being representative of what’s happening in the slab is pretty limited in this type of application when we’ve got such fast-set gain.
(19:29):
And what we’ll show tomorrow when we’re talking about maturity testing, is that there’s a difference in what you find in cylinders compared to what you’re seeing in the slab in terms of strength development and there are ways around measuring that. So, we need real-time data when crushing these samples is what it boils down to. The cylinders have low exotherm. They actually hold a lot of the cool, they don’t allow the concrete to generate its natural heat, which means there’s a lag in cylinder strength over the first few hours. So, the cylinders aren’t truly representative of what’s happening in the slab. Cylinder are old technology, and that’s why we needed this newer system, the two-to-three hour measurement, which is our maturity testing. And again, we’ll talk about this in a maturity testing presentation. It was developed in the 1950s. So, it’s got a long track record, but it’s really only been commercialized more recently, particularly with the advent of wireless Bluetooth technologies, which has allowed us to put probes into our slabs at a fairly low cost. And that technology can then provide real-time data in terms of the strength gain so that we can have reliable information on when to know to open our slabs to traffic. So, really interesting topic, this, and some great advances in the technology, which we’ll go through in the maturity testing presentation.
(20:55):
Just in summary and finishing up. High early strengths and durability are possible, all in the one product. We can achieve greater productivity, even though we have limited access by using fast-set concrete and cement products. We have a lower lifetime cost than using a calcium-chloride-accelerated product. And we can now achieve very consistent quality and delivery, and particularly with the backed-up of that onsite testing, which can be accurate and in real-time. So, a lot more reliability around fast-set products, whether you’re having them delivered by a weigh-batching unit for a larger application, or even if you’re just mixing a 20-kilo bag of a grout or a micro-concrete, you’ve got a lot more reliability in those products.
(21:41):
Okay, well, it doesn’t look like I have any questions. We’ve got the link there that Aiden has posted. Feel free to click on that and request some more information. We’ll have a copy of this presentation available, and also the video of this presentation will be uploaded for download on our website on the website webinar page.
(22:01):
Thank you very much for joining us. It’s been our pleasure to have you. Thank you.
Products
About this Webinar
In this webinar, Daniel Bosco discusses material advancements and outdated practises when using fluid PT grouts. He also discusses the versatile applications of PT grouts, including their use in rock bolting, post-tension cable grouting, underslab grouting and more.
Downloads & Links
Video Transcription
(00:03):
Morning everyone and welcome. Back for our Wednesday presentation, part of the isolation series. Thank you again, everyone for joining us and welcome back to everyone who’s been coming along to these webinars each day. If you’ve been enjoying them, certainly we have enjoyed putting them together. It gives us something to do and it gives us a way of feeling connected each day.
(00:30):
So today’s presentation is on structural fluid grouts. A bit of an interesting topic, but I liked this one. Maybe not everyone else does, but if you can get excited about a grout, this isn’t a bad one. Some pretty new technology to discuss. Okay. So what is a fluid structural grout? It’s a grout that typically doesn’t have any aggregate or sand in it… High strength, so reaching 80 or a 100 Mpa or even greater. It has certain properties which will prevent corrosion, give long term durability to the steel it’s encapsulating, and be there also for the longevity of the structure.
(01:08):
It also has a very stable cement particle distribution. So in other words, the cement particles are well distributed throughout the grout, and you have nice consistency and strength and density through the length of where you’re applying the grout. You can see there in the photo that’s a part of the Iron Cove bridge just at Rozelle, and that was an incrementally launched bridge. And the post-tensioning was grouted using a fluid structural grout.
(01:35):
A few years back. So where do we use these types of grouts? We use them on post-tensioning of high tensile steel. We use them in ground anchors, as you can see in the photo there. That photo was taken recently over at Barangaroo station, which is being built as part of the Sydney Metro project. We use it in the contact grouting. I’ll talk a little bit more about that in a while.
(01:59):
Foundation and ground stabilisation, and also just for critical filling applications where you need a high-performance grout to fill a void. So the material advancements that I mentioned, the superplasticizers have really increased in quality over the last 15 to 20 years. Particularly those that are available in a powder format rather than a liquid format.
(02:21):
We have stabilizers that can provide no bleed or segregation to the grout, and that’s what holds all the cement particles together. And we can now form shrinkage compensation systems without having to use aluminium powder. And I’ll talk about why that’s important.
(02:36):
And just a little video here, just to show you the sort of consistency we’re talking about with these grouts. As you can see, very, very fluid grout, that’s a flow cone test that is about to occur, but I won’t to show you the whole thing. I just wanted you to see the types of consistency. And if someone had told you 20 years ago, that that grout there would reach over a 100 MPA, create no bleed, and still be as fluid as it is you really wouldn’t have believed that. There’s been a lot of progress in the attitudes that enable us to achieve that.
(03:06):
So there are various standards that apply around the world.
(03:09):
The two that we see most commonly, particularly in Australia and also in Southeast Asia. RMS B113, here in Australia, particularly in New South Wales, obviously, is a common one. And EN445 and 447 for the European codes, which have been adopted particularly in Singapore and throughout Europe, and also make their way here to Australia.
(03:32):
And these form various project specifications and parts of specifications and slight modifications that we work to as well, when we’re talking about high-performance fluid grouts. So some of the outdated practices of what we had to do previously, we would add lots of water to fluidize the grout, to be able to make it flow.
(03:51):
We would add things like Methocel to stabilize the grout and to prevent bleed. And we’d add things like aluminium oxide expansion agents to create a hydrogen gas expansion, to compensate a little against shrinkage. Adding water to a grout to fluidize it has its drawbacks. It creates bleed. It creates additional shrinkage. You end up with lower strengths. The grout is more permeable. And in general, you end up with lower durability. So it’s not desirable to have a high water to cement ratio. You want to keep that as low as possible.
(04:26):
And adding Methocel, also has its downsides as well. So you get an early gelling and less penetration. So Methocel actually creates a gel structure with time as it goes on. So your product becomes less fluid as time goes by. So you don’t enjoy that high fluidity at time zero, as you did at time 30, when you’re still injecting and using the grout. So there’s a bit of a downside with that.
(04:51):
And then adding aluminium oxide expansion agents causes hydrogen embrittlement. You also get early expansion with large bubbles, rising to the surface, gathering, forming voids around your ducts. They’re also very temperature-dependent. So on a hotter temperature, you’ll get more gas produced. And so it’s not… the expansion isn’t as controlled when you’re using aluminum oxide, but with any metal oxide expansion agent hydrogen embrittlement is the thing that we’re most aware of occurring. So that’s where hydrogen will actually get into micro-cracks within the structural steel of a high tensile steel. And it’ll actually change the structure of the steel and make it more brittle and lead to failure of corrosion. So that’s why we don’t use the metal expansion agents that create hydrogen gas.
(05:41):
So just a bit about the void filling and encapsulation. So it’s really important to move all the cement particles evenly along the length of the void of the cross-section, no matter what you’re filling. Whether it’s a duct, a double corrosion protection bolt as you can see in the photo there, or even just a void.
(05:58):
You want to fill all the voids around the steel, full encapsulation. So you don’t want any gaps and you want to maintain that fluidity for as long as possible. So it gives you the best opportunity possible to keep pumping and not get blockages and with a double corrosion protection bolt, you can see in the cross-section in that photo there. The grout you’re actually trying to move up between the sheathing and the steel, and it comes up and around and flows down the outside. So it’s really important to maintain that fluidity to be able to achieve that type of thing.
(06:30):
And they can get very complex, that these structures. So you can see in this photo here, extra layers of corrosion protection in a duct in a very large anchor. And you can see there that the density of the grout is really important. You haven’t got any voids, that the steel centre there is completely encapsulated, and that will be well protected from corrosion. So you need that consistent particle distribution.
(06:51):
We don’t want separation of water from your grout when you’re pumping through things like press filtration. So when you’re pumping, you don’t want the cement particles to come out of it. And you don’t want voids forming or water channelling or air creating those voids either. And we also don’t want to see the hydrogen forming expansion agents, and we don’t want voids around the cables or any cracking of the grout.
(07:24):
So the grout properties we look forward to be able to achieve that. We obviously need very high fluidity, and this is where we need high range water reducing agents. So we need products that will actually grow a negative charge on the cement particles and create an electron cloud dispersion where it repels the cement particles from each other. I guess you could call it a little bit of social isolation for cement particles, where they become very highly lubricated, water flows between them and they can move freely and have really high fluidity, and eliminates shrinkage and bleed and will increase the strength and the durability of the grout as well.
(08:06):
So stabilization is another important part of it. So we don’t want thickening agents, which gel over time. We actually want to use pseudo-plastic modifying agents, we call them. And what that means is it’ll suspend the particles when you’re not mixing and it’ll form a structure that holds everything in suspension, but it’s ready to respond to shear as soon as you apply the mixing again. And that’ll occur for 45 minutes. So as soon as you mix it, it’ll become highly fluidized. As soon as you stop the cement, particles will stay there in suspension. And it prevents that separation and bleed, particularly when you’ve got very long ducts over a long, vertical length that you have to pour and you don’t want the water all coming to the top and the cement particles falling to the bottom, giving you, possibly, variations in strength and density over the full height of the grout pour. So you want to avoid that.
(08:59):
Corrosion protection is obviously really important, and we all know that a low water-cement ratio will always help you with this. So if you can get your water-cement ratio closer to 0.3, rather than 0.4, you’re going to get better corrosion protection. And you want even distribution of the cement particles. You don’t want your hydrogen embrittlement of your steel, which we’ve already spoken about. And a nitrogen gas expansion system will definitely help you there.
(09:22):
So nitrogen gas forms very small microbubbles, which don’t rise to the surface. It also supports an alkaline environment as opposed to hydrogen, which doesn’t, it’ll break down the alkaline environment and not provide as much protection to the steel and nitrogen isn’t as temperature sensitive. So in warm weather and cold weather, you still get the same gas expansion, which is important.
(09:50):
So different types of project applications that we have. So it can be used in post-tension cables. These are typically seen in bridge decks, buildings, slabs. We’ve seen large LNG plants, built with post-tension cables with very high specification structural grouts, which have to be fluid and have to be able to be poured over a 20-meter height, for example, without having any bleed at the top. So there’s really strict regulations around post-tensioning. As you can imagine, these hold the structure in place, for decades to come. And the standards in Australia, but also the standards in Europe are very high for this type of application. And we’ll talk about the type of testing that’s done on, on post-tensioning as well.
(10:36):
There’s also contact grouting, which is an application for the fluid structural grouts. You can see there, this is the Eastland tunnel down in Melbourne, which was built around 10 or 12 years ago. They’re precast elements that you can see there in the invert, which were laid and that’s on top of the membrane. And then it was grouted in between the rock mass and the structural element that was put down to create that contact from the concrete through to the strata behind. So it might be a small gap in between there and the fluid grout is poured in, and obviously you want really high fluidity and you don’t want any separation of your cement particles, and you need that high strength throughout, preferably at an early age.
(11:19):
So there’s also rock bolts and soil nails for application as well. So again, you can see there in the photo soil nails put into that slope there and then grouted into place. And that’ll be shotcreted over later. And that prevents slips and provides a connection of the structural element, which might be a GRP bar or a steel bar back to the soil or rock.
(11:44):
Because these grouts are also highly fluid, they can be used for ground stabilization and improvement. So you can see there in the photo and lots of tubes inserted below a foundation, which was settling and then the sandy, gravely soil below can be depths of up to five, 10 meters are then injected using the highly fluid grout, which will be really high strength and hopefully arrest that settlement that’s being occurring. So, it can be used for the ground modification as well.
(12:17):
And then there’s also annulus grouting, which is where you might be putting a pipeliner inside a preexisting tunnel or form shape. And then you want to grout the gap in between. And you can see there in the photo, the gap between the GRP liner and the brickwork there, the rock behind, and that will be filled with a high strength grout, which will form part of the structure and load-bearing capacity.
(12:42):
And then finally, there’s also marine pile grouting, it has been some of the larger applications of structural grouts over the years where large piles, as you can see in the photo there, are grouted into the sea bed and that’s for corrosion protection as well as structural capacity.
(13:01):
So just talking a little bit about the testing requirements, particularly when it comes to a PT grout, but these apply to… these types of grouts are used in a range of different ways. I’ll talk about the two standards EN447 and B113 which are the two that are most commonly referred to. So separately, they have different requirements, but there is a little bit of overlap.
(13:23):
So EN447, for example, has a sieve test as part of it. So you have to sieve the powder just to make sure there are no lumps in it. And that just shows that the product is fresh and you’re going to get good particle dispersion, pretty simple test, not difficult to do.
(13:37):
We also have a flow cone test. Some of you may be familiar with what a flow cone is. You can see there in the photo, the metal cone that’s been filled with the grout that has a nozzle at the end of it. And we time the duration for the grout to actually flow through that nozzle. And it’s a certain volume of the grout, depending on which standard you’re using at a certain height that grout is built to.
(14:00):
But effectively, EN447, you need a time zero test. So you’ll do it as soon as you mix the grout and you’ll do another test after 30 minutes, both of those tests must be less than 25 seconds through the nozzle. And also you need to have less than 20% difference between time zero and time 30. So in other words, what you’re testing there is that you’ve fluidity is maintained for the full 30 minutes.
(14:26):
B113, on the other hand, is a little bit more stringent. It actually wants to test at time zero, and then at time 45 minutes. So after 45 minutes, you have to be within plus or minus three seconds of that initial result that you achieved. So slightly different approach, but both standards trying to achieve the same thing, whether showing adequate fluidity, demonstrating no gelling over time, and we’re not affected by the high temperature.
(14:51):
And it’s particularly challenging to pass these tests when you’re up on the northern parts of Australia or in Singapore, for example, and having to maintain that fluidity to the 30 or 45 minutes.
(15:03):
Wick test is another test that we do. So here we’re testing for bleed. These tubes that you can see in a photo are a meter long or just over, and we’re filling them with ground and they have a steel strand down the centre. And what we’re checking is that water isn’t rising to the surface. So we need a bleed of less than 0.3% at three hours for 447, and 113 ask for bleed of less than 0.5% in total. So here we’re checking for no segregation, no formation of voids, no compaction. So your cement particles aren’t falling to the bottom and separating out. So the wick test is a pretty tough test, but it actually tells you a lot about the grout.
(15:45):
Incline tube test. This is part of EN447. So this is a scaled up version of the Wick test. So it’s a five-meter long tube that’s placed at an angle and we put two of those tubes next to each other, and we test them in slightly different ways. But again, we’re testing for bleed and separation, formation of voids and other things. This isn’t the type of test you do every time you’re out on site. It’s more of a type test which is done as part of the approval process for the grout and can be a tough one to meet. Five-metre length of grout to not seeing any bleed. You have to have a very, very special grout to be able to achieve that.
(16:25):
B113 doesn’t do the incline tube test, but it has a verification mock-up test, which is completed as part of the RMS approval. And this is a pretty stringent test. You can maybe see in the photos there. The tube has or the strand has a curve in it. So it comes up and down. You fill that with grout, pump it full, and then the strand will actually be cut up into sections and we’ll inspect each section to make sure that there aren’t voids. So we’re looking for voids, we’re looking for signs of bleed at the high points, and we’re just making sure that we’re getting full encapsulation of the steel strand inside that duct with the grout. And that’s also a tough test, but again, one that just gets done as part of the approval process.
(17:12):
There’s volume change, which is also important. This is read off the Wick test. EN447 requires less than a 1% shrinkage, but no more than 5% expansion at 24 hours. B113 just asks for less than 2% expansion at three hours. And here you’re just checking to make sure that you’re not getting an over-reactive expansion system or too much shrinkage in the grout.
(17:36):
Strength is typically pretty easy to pass. If you’re passed all the other ones, you’re going to be achieving much more than the minimum of 30 or 32 MPA at 28 days. You’re probably looking at grouts that are at least a 200 MPa, if they’ve passed all the other tests. So this one is usually just a final tick in the box. So just finishing up just a few words on grout mixing. And I won’t go into a lot of detail on this because we do have the entire webinar coming up in the next couple of weeks on mixing and pumping of grouts, but just a few pointers.
(18:06):
It’s important only to add 80% of your water when you first start. What that does is it creates a thicker grout and that thicker grout, actually provides more shear during mixing and that shear breaks down your lumps. If you try and add all of your water, first up, you end up with a really fluid mix. And you just… It’s more difficult to break those lumps down.
(18:28):
We also don’t want to mix for too long at high speed. So we’ve roughly calculated that every minute of mixing adds about three degrees of temperature. We need to keep that temperatures down in the grout, for obvious reasons. For shrinkage, and also the specification requires it. So you want to keep your mixing time as short as possible. And this is where adding 80% of your water first will speed up that mixing process. It’ll put more shear into it and reduce the time it takes to mix. You want to add your powder slowly to the water, but at a reasonable speed so that you don’t mix for too long.
(19:03):
And the next one there, measuring water using calibrated equipment seems obvious, but it’s something that’s always worth checking. See it very often that water meters used are out of calibration, even measuring cylinders that you buy from Bunnings or places can sometimes be out enough to throw out your water-cement ratio and cause other issues. So it should always be checked and calibrated before you start.
(19:28):
And then once you’ve actually mixed the grout, you should keep the grout under slow agitation until you need to use it so that it’ll maintain that fluidity for the 45 minutes, and it’s really important to give it a really high-speed mix just before your pump. And just before you do the test as well. That high-speed mix will allow the superplasticizers to reactivate and get everything moving again. And you should be able to get your grout back to the original fluidity that you saw when you first mixed it.
(19:55):
So they’re just a few tips. We’ll go into that in a lot more detail in a couple of weeks and that’s it. So that’s our presentation on fluid structural grouts for today. A bit of a light one compared to some of the other topics we’ve covered. If you’ve got any questions, feel free to type them into the chat there.
(20:16):
Tomorrow our presentation we’ll be covering waterproofing of TBM cross passages for anyone who is interested in joining us for that. And again, we’ll be back at it next week. So, 11 o’clock each day with a new topic. All of the topics are listed on our website. We’ll also be running a second session at one o’clock Australian Eastern standard time. That’ll be just going back to some of the old topics at one o’clock, just so that we can provide a little more sensible time of day for our friends up in the Asia Pacific region, Singapore and even in WA to join at a more reasonable time.
So, thank you again for joining us. It doesn’t look like we have any questions today and I hope to see you all again tomorrow. I hope you enjoyed that. Thank you.
Products
About this Webinar
Downloads & Links
Video Transcription
(00:05):
Right. Welcome everyone, thank you for joining us again. Hope you all had a great Easter. It’s a long weekend obviously here in Australia, coming back on Tuesday. So with everyone now in the meeting or on their way in, we might get started. So I’ll hand over to Greg who’s going to talk to us about ZeoCem. Thank you, Greg.
(00:29):
Okay. Thank you, Daniel. And welcome everyone for joining the webinar series again this week. Like Daniel said, I’ll cover off a new cementitious binder system that Bluey have developed called ZeoCem, which is an acid-resistant cementitious binder. So I’ll cover a bit of the backstory first about what the product is and the industries that we’re developing the product for, and how we got to where we are, and then how we’ve advanced it into other industries as well.
(01:01):
So what is ZeoCem? ZeoCem is a modified calcium sodium aluminosilicate technology, so it’s an inorganic polymer technology. It’s got a very high percentage of recycled materials within the binder, it’s got excellent acid resistance and chemical resistance properties. It’s got longterm strength durability and also provides an alkaline environment to passivate steel for corrosion protection. The image on the right there is a family of geopolymers where the product sits into, so just it shows you that there’s a very broad range of products that are called geopolymers, and this is one of these products that can fit into that family.
(01:45):
So how did Bluey come to develop products? So we’ve got a very good product knowledge, we’ve got 15 years experience within the wastewater industry. And this is where we initially decided to develop this product to suit this market. We’ve got our own in-house product development team with an industrial chemist to help develop this technology. And we’re utilizing up to this 60% recycled materials within the finished products, so not within the binder itself, but when we’re talking about finished products, that become our shotcrete and our grouts that utilize this binder.
(02:17):
And we’ve carried out very extensive in-house testing as well as external testing with water authorities and NATA labs to justify the performance of the product. So the industry that we’ve been looking at, the ZeoCem cement for, was the sewer rehabilitation market was the main industry we’re looking for. For the history of that, carried… for the sewer rehabilitation, traditionally Sydney Water used to carry out a 20 millimeter thick epoxy coating into this environment. So the photo on the right there is a live sewer where most of these applications happen. You can see it’s a fairly tough environment and to put on 20 millimeters of epoxy is very hard to do, you need a lot of experience, it’s very expensive.
(03:02):
Other areas, or other products that have been used are HDPE, which we covered off in previous seminars. In a live sewer environment it’s very tricky, you’ve got very different undulations in sewers, so it becomes very expensive to perform work and very timely to do the works. The most common application at the moment is using a CAC, and I’ll cover this material off in a coming slide, of what the CAC is. So it’s a sacrificial acid-resistant material that gets sprayed onto the sewer market and the live sewers. And then a new technology, which is the geopolymers, which has been very heavily tested over the last few years with Sydney Water and Sydney University, and a lot of people are trying to go over into these products.
(03:50):
So why do we need concrete corrosive protection? As we’ve covered previously, you got very turbulent in a sewer markets, we create hydrogen disulfide gases, which then turn it into a sulfuric acid. And this ends up attacking the Portland cement above the flow lines. So you lose this metal matrix which equals corrosion, and then you get a structure failure. So this is just a diagram showing where the attack happens, so anything below the water level we don’t get any attack to your concrete. It’s all above your water flow lines. So this is where all the corrosive protects and the rehabilitation takes place within live sewers.
(04:29):
So they’ll get the flow rate down to a level, go in there and work in this environment to spray the new coatings on there. So CACs, or calcium aluminate cement, this is the most common product used in sewer rehabilitation at the moment. It outperformed OPC concretes in the sewer environment. The CAC, what it is, it’s got the ability to stifle the metabolism of the acid-generating bacteria. So what it basically does, the acid grows onto the CAC and then it basically falls off. It doesn’t allow it to eat into the product itself.
(05:05):
And it’s a non structural application. And what we mean by that is conventional HACs, or CAC products undergo conversion, so what that means is over the design life of the product, it will lose compressive strength in certain applications, which allows you not to… which basically means you can’t use it for a structural environment. And if your product’s losing strength then it’s no good for a structural application. The product itself, a CAC, can be very hard to spray and finish due to… it’s got a fairly rapid cure, also because you’re utilizing a CAC aggregates to achieve the chemical resistance. If you just use the CAC binder with normal aggregates you don’t get the same chemical resistance, and because you have to use the CAC aggregates, they’re very one shape and very hard to get a good grading curve on your product to be able to spray it, to give you good rebound and also good finishing on the product.
(06:02):
The other disadvantage or issue with the CACs are when you’re doing a dry spray application, these are very fine particles that come from the product when you’re spraying it, and this damage the filtration systems when they’re doing their live sewer applications, which cost a lot of money to replace these filters within the sewers. So geopolymers, this is the new products that everyone is looking at to try and get into the sewer market. What are geopolymers? So they’re traditionally an alkaline cements consist of predominantly aluminosilicates or polymers, polymer bonds. Traditional starting materials for geopolymers are fumed silica, fly ash and metal slag.
(06:51):
And they’re alkali reactive on-site. This becomes very hard and very dangerous to activate these products on site. There are pre-bagged geopolymers that have been developed over the past years and are getting a lot of testing done through the water authorities around Australia and the university, but they don’t perform as well as traditional alkali reactive geopolymers. So geopolymers, it’s a polymer, but not all polymers are plastic. They look and feel like cement, they have a chemical structure like an actual stone which gives them an excellent chemical resistance.
(07:23):
But as we said, the pre-bagged geopolymers which are water activated, not alkali reactivated, don’t give you the same chemical resistance as a traditional geopolymer does in the university labs. They perform very well and outperform the CACs in that environment. So now we get to ZeoCem binder. So what is ZeoCem? Like we talked about before, it’s a modified calcium sodium aluminosilicate technology, so it’s a structural binder technology that demonstrates no risk of conversion. So it’s got a similar starting chemistry to the CACs, but it’s been modified with the sodium in there to give us the no risk of conversion.
(08:05):
It’s got very high chemical and acid resistance, like your CACs, it provides an alkaline environment for corrosion protection to your steel and can be used for multiple product applications. So this is the binder technology we’re talking about here, so we’re going back to that, and when we talk about using multiple product applications we can change or put it into one of our traditional products to create an acid-resistant grout or acid-resistant shotcrete, which I’ll cover off a couple of the products we’ve developed using this binder system.
(08:37):
So the binder technology also includes a lot of recycled components. So one part of it is kerbside powdered glass, fly ash, blast furnace slag, clay and silica deposits. The advantage, and I’ll cover this off a little bit later with the kerbside glass, because of the technology that we use, we can’t use normal glass or recycled glass into normal OPC cements, because they have an AAR reaction. But with the ZeoCem binder technology we can use the kerbside glass into the product. So the applications and products, so it’s structural sewer lining products, contaminated ground grouting applications, we can develop products for that. We can product acid-resistant repair mortars and acid-resistant concretes to take all in different environments.
(09:30):
So BluCem ZeoGlass, this is a product that’s been developed with the ZeoCem binder technology. So what is ZeoGlass? It’s an acid-resistant shotcrete for the sewer structural lining systems. So it’s going into that same industry of rehabilitation of sewers, utilizing the BluCem ZeoGlass. And within this product we’ve got greater than 60% recycled waste products, so that’s including the fly ash, your binder [cisms 00:09:58] as well as the glass aggregates and glass powder. And it’s a next generation of geopolymers.
(10:07):
So where are we going to use the ZeoGlass? For shotcrete sewer linings, manhole refurbishments, wastewater treatment plants, both new and old, culvert repairs and relining, so there’s the photo on the right hand side showing you a culver that can be relined with the ZeoGlass. And also in the chemical bunds into that environment. The properties of ZeoGlass, they’re very high ultra build in single pass, so it’s a dry spray shotcrete, it’s got very negligible rebound, less than 5%, and very high compressive and flexural strength in the product. Very minimal dust emissions, you got low dry shrinkage and a high acid resistance using the ZeoCem binder.
(10:48):
And this is just a little video, hopefully it works, showing the dry spray application of the ZeoGlass. So you can see there you’ve got a very high build, very quick build in your application with little rebounds, and very little dust as well. So you can see the build-up. On a wall we can get up to about 400 millimeters of build-out in a single pass, overhead you can get up to about 200 millimeters without any dropout. Some application techniques, like we showed you there, dry spray is the traditional application for the sewer environment.
(11:33):
We can do a wet spray application for your culver repairs, and that’s the image on the right hand side, is showing you a culver application using a wet spray. And then it can also do hand-applied piece wall applications, manholes, benches and the likes. So the BluCem ZeoGlass aggregates, like we talked about before, using the binder technology allows us to use recycled glass aggregates. Because the technology in the binder doesn’t have any issues with the alkali-aggregate reaction, which the glass will break down normal OP cement and cause this issue. We can put this into our binder system. We can also use the glass aggregates in other binder systems like our CSAs for a fast set concretes, it just gives us an advantage to take advantage of this opportunity.
(12:26):
And that’s a big issue in the environment at the moment. Another advantage of the glass aggregates, it’s got minimal water demand, which enhances the durability of ZeoGlass, and it also addresses the environmental issue of all the stockpiles of kerbside glass out there. And we’ve had a look at that with the current applications in Sydney Water, once if we can get this up and running and all the applications in the marketplace, we could probably take up most of the kerbside glass that is out there in the stockpiles in New South Wales for doing the sewer applications.
(13:04):
So testing program, like I said, we’ve done a very extensive testing on the ZeoGlass to prove that is an acid resistant product, and also to prove that it is stable and doesn’t have any conversion issues. So we’ve done a lot of testing alongside several leading sewer refurbishment products, the CACs, the geopolymers, which are the pre-bagged, also some acid-resistant cements. Also, in-house testing and Sydney University is currently doing a three year program carrying out testing on all different geopolymers in the marketplace.
(13:40):
So the Sydney University program, they’re putting in cubes up into the Sydney North Head digester tanks, which is a very aggressive environment. This will eat normal OPC cement, in about two years it will degrade normal OPC cement. So they’re doing a three year program comparing all different geopolymers against the CAC control, and the results so far, they’re about 18 months in with our ZeoGlass, all their results are online with the CACs and also in line with our in-house testing that we’ve done, which is over two years in progression at the moment.
(14:21):
So this is our in-house testing, like again, we’ve tested against all the current markets in the marketplace, the current CACs, acid-resistant cement, which is your Golden Bay up the top there, and then geopolymer, which is your geospray, and then the bottom one is ours there, a glass product. So currently we’re two years in, testing results are available. So every six months we’re taking out and doing measurements, and checking the products. So this is just showing you the current status. After six months you can see there, the images there, the bottom two, the bottom one is our ZeoGlass, and the Kerneos is the current CAC one on the marketplace. So both of them are very similar, it happened in the first six months.
(15:00):
It wasn’t much change, a little bit of the surface is gone away. You can see the geospray, the geopolymers are fairly heavily affected in this acid environment. After 12 months the testing on the Golden Bay acid-resistant cement and the geopolymers was stopped because there was almost nothing left of both samples, so they were taken out, where the CACs and ZeoGlass were still going. And as you can see there, there wasn’t much issues with the ZeoGlass, is performing very well compared to the CAC product. And then 18 months, ours is the ZeoGlass, performing still very well. Not a lot of issues and strength lost in there.
(15:42):
After the 18 months, the ZeoGlass has gained about 1.8% in weight life or gain, and it’s weld, about .1%, where the KERNIOS, the CAC, has lost about 7% in weight and it’s weld about half a percent as well. And then again, 24 months, so after two years, though these are still ongoing, and it’s performing very well. And like we said, the testing that’s being carried out by Sydney Water and Sydney University are at the same time comparing both products, is aligning with the results that we’ve been getting in-house as well.
(16:25):
Okay, so what we move onto now is another product that has been developed based off the ZeoCem technology, which is our HS400Plus. So HS400PLUS is being developed for a particular product that has contaminated ground, and our HS400Plus is a rock bolt grout designed to protect DCP bolts in a tunnel environment, which has come across some ammonium sulfate ground conditions. So what we’ve done, we’ve done a very extensive testing program for the project, so we accelerated aging and chemical testing in an ammonium sulfate solution, and we’ve tested this at 20 degrees, 38 degrees, and 60 degrees, just to prove that the product won’t go into conversion under these temperatures both in normal water and the ammonium sulfate solution.
(17:15):
And then we’ve carried out XRD testing on the control samples, the samples that were in normal water, and also the samples that were in the ammonium sulfate solution to check if there was any chemical decomposition of the binder, and then we did a Schmidt hammer testing as well. The Schmidt hammer testing was more just to check the surface hardness of the product to make sure that we were still getting the same grout bond to the rock in a tunnel environment for a rock bolt.
(17:42):
So the BLUECEM HS400PLUS, again, it’s based off the ZeoCem binder technology. It’s basically an acid-resistant thixotropic rock bolt grout, the same as our traditional H400, which is a normal OPC cement rock bolt grout, which is done for most of the tunnelling bolts here in Sydney. We then just change the cement binder technology from OPC and adapted our ZeoCem binder to give you the same product performance. It looks and feels like normal cement, or the normal rock bolt grout, but it gives us acid resistance.
(18:19):
So where we can use this, for rock bolting and contaminated grounds. It’s a cementitious system, but it’s not a polymer, so you don’t need any special pumping equipment, you can use a traditional mixers and pumps that are on the jumbos for the rock bolts in the tunnels, which is a big advantage for this application, not having to bring in special equipment, training operators and the likes, and gives you an acid-resistant rock bolt grout. And the other advantage is, like we talked about, it gives you an alkaline environment for your corrosion protection of your rock bolts. So that’s the photo on the right hand side there, is just a cross-section of a rock bolt, DCP rock bolt that’s being grouted both inside and out the sheathing, and then cut in half so you can see the corrosion protection with the bolt grout.
(19:04):
So the testing program, like we said, we’ve covered the compressive strength at the start, one, three, seven, 28 days. We’re doing NORD testing on the product for durability, also dry shrinkage, water penetration, and bleed testing, and then we did the age testing as well. So the product itself, these are just the results, just an overview of the results that we carried out on the product. So it’s giving us grade on the 60 MPA days, as our control sample, so we wanted to make sure after all that chemical testing and accelerator testing that we weren’t losing any strength in the product.
(19:37):
So dry shrinkage specification called for less than 650 microstrains at 56 days, which we achieved. Water penetration is the British Standard or the European standard, traditionally used to be the DIN standard with Germans. So we achieved 14 millimetres andS17 millimetres penetration for the water penetration. So this covers across all the RMS standards for… which BA specifications, which called for less than 25 millilitres, so it’s a very, very good performance in that product. Bleed test, there’s no bleed on the products being a fixture of the grout. And then the age testing, so the chemical and age testing that was done at 60 degrees, 38 and 20 degrees all achieved greater than the 60 MPA, so we had no strength loss at all in the product.
(20:25):
And then the XRD testing on the product, so this was done on the control samples as well as the chemical samples. We tested this five millimetres in from the surface and also halfway into the samples as well to make sure we had no chemical change in the composition of the product binder systems, and that’s what it proved in the product. And that’s the end of the seminar today. Just in summary I guess, on the BluCem, like we talked about is, with ZeoCem, we can modify most of our traditional grouts and repair mortars, and adapt the ZeoCem technology to create a range of products. So we can do high flow grouts, we could thixotropic grouts of just certain applications, repair mortars and the like.
(21:07):
So it’s not just limited to those two applications. So thank you. And I hope that was informative. And if there are any questions, you can either unmute yourself or there’s the chat feature down the bottom, you can type in a question as well.
(21:21):
Thank you, Greg. That’s a really good presentation. As Greg mentioned, this is a pretty new field for us and new technology. We’ve been really strongly supported by New South Wales government and governments here in Australia, including the Environmental Protection Authority, also Sydney Water have got right behind it. As an example, the Environmental Protection Authority just awarded a grant for $1 million to our aggregate supplier, who’s able to crush, grade and clean the glass aggregate for us, because it’s become such a burden, the stockpiles of glass accumulating here in Australia and the lack of practical usage for that glass.
(22:03):
They see this as a really good up valuing of waste products, not just glass, but also things like slag and other materials which aren’t so easy to dispose of. So pretty exciting area for us going forward. Welcome any questions if you’ve got any. I’ve also uploaded a technical note there which you can see in the chat if you just click on that, and you can download the technical note, and that just gives a bit more background on some of the testing that Greg referred to as well just for your interest, so you should be able to see that and download it.
(22:39):
And again, the video of the presentation will be online later today. I’ll also be presenting at 1:00 today on fluid grouts for post-tensioning. Some of you may have seen that last week, but we’re doing that at 1:00 for some of our international guests, at a better time that suits them. And then we’ll be back again tomorrow at 11:00 and 1:00, so basement waterproofing tomorrow, and chemical resistance lining for wastewater treatment plans, so look out for those if they’re of interest.
(23:12):
So it doesn’t look like we have any question, so I’ll thank you all again for joining us and I’ll either see you at 1:00 or maybe 11:00 tomorrow. Thanks again.
Products
About this Webinar
In this webinar, Daniel Bosco, Greg Sieders and Guest Speaker Dan Rowley from CE Construction Solutions, examine on-site, non-destructive maturity testing.
Using ConXedge Bluetooth Technology, Bluey approved contractors are able to generate live, non-destructive accurate test results. The non-destructive maturity test instrument allows contractors to record direct measurements of concrete pavements based on past and current curing temperatures.
Video Transcription
(00:05):
So today we’ve got a pretty special presentation, interesting topic, actually, some newly applied technology. I wouldn’t say it’s new technology, of maturity testing of cementitious products, but some really big advancements in the last year or two on that. And I’d like to welcome Dan Rowley who’s joining us, so Dan from C.E. Industries. He’s the GM of C.E. He’s also the ACT chair of the Concrete Institute and a past president of ACRA. Certainly knows his stuff and has been doing a lot of work in this space on maturity testing. So he’ll be co-presenting with Greg Sieders on the topic today. And I think we have most people in the room now, so I might hand over to Greg and he’ll kick us off with the presentation. Thanks, Greg.
(00:50):
All right. Thank you, Daniel. And welcome Dan for joining us on this presentation today, this webinar. What Daniel said, we’ll be covering maturity testing for cementitious materials. I’ll do the first half of the presentation where we’ll cover the applications where Bluey have been involved over the last couple of years with the maturity testing, in regard to our fast set concrete technology and why we’ve seen a big advantage of using them in maturity testing.
(01:19):
So I guess, firstly, what we look at is why do we cast concrete? We test concrete for reliable information about in situ properties. There’s also testing to make decisions about the performance of the placed concrete. And this is for either opening to traffic or loading times or buildings, so they can… and also using it for stressing of PT structures. So that’s why we test concrete and it’s about getting the right performance done and the real time data from the testing.
(01:50):
So from Bluey’s point of view, like we’ve talked about previously, we’ve now got a product, our fast set concrete, which we used on the RMS road networks and in airport structures for critical applications. So every 20 minutes can make a huge difference in these applications, so we need to have real time data. And our asset owners, the airport and the roads rely on these test results to open the infrastructure. So if we don’t have any information at hand and accurate, it can delay opening roads and can cost a lot of money. For instance, in airport shut down, there’s a lot of liquidated damages that can apply if you’re not opening at five o’clock in the morning.
(02:30):
So why is fast set concrete different? And why do we need this new technology? A lot of the reaction happens in the early hours. So in the first one to two hours in where the concrete is setting, we’re getting all our strengths. So we need to know the information at the time of application. The site conditions are critically important and temperature plays a key role. Most of the time we’re utilising our fast set technology is at nighttime. So temperatures can be colder, middle of winter and having cylinders testing, which are very cold, delays the reaction time of your concrete in those cylinders and doesn’t give the real time data.
(03:07):
So with the fast set concrete, like we talked about, the product sets in 30 to 40 minutes. Our slabs are getting fully loaded within two to three hours of application. We’re utilising mobile batch plants for the application. So we’re using utilising the latest technology and equipment to mix and place these fast set concretes. So we need to make sure we have the latest technology when we’re testing our concrete as well.
(03:33):
And a big reason, so we’ve been utilising the maturity testing for the last two years with our fast set concrete, and these are the reasons why we’ve changed over to the maturity testing. The site challenges for testing the concrete, because we’ve only got a very limited time to cast the samples and transport the sample to the labs. We were working in cold conditions in the mould to cold. So what happens there is you’ve got one litre of concrete in the cylinders and you’ve got a slab that’s got 30 to 40 cubic metres of concrete generating a lot more heat and actually going up a lot quicker and not stalling in those molds.
(04:08):
And because we’re doing night works, it’s very difficult these days to get the lab to open. They’re a long way from where we’re doing our work. So the mold has to be transported, which can take an hour away from two hours away drive. It’s very expensive to open up labs. Other reasons are there’s a lot of inexperienced testing technicians coming at the site that are used to using fast set concrete. So making sure that they know how to get those molds cast properly. We have no issues with testing them and they’re actually giving us the right information.
(04:42):
So the solutions required. So having the direct measurement using the maturity testing gives us real time data on site and on time. And we’re not subject to any human error. You can see there, the photos on the right hand side are some cylinders that have been cast by inexperienced technicians costing the cylinders. So you can say clearly they’ve been too slow in casting the concrete. And you can have two different layers that you can see a little arrow there, where you’ve had the first layer of concrete then the second layer’s in a cold joint. So when you’re crushing that cylinder and you’re getting inaccurate results on your concrete. And we’re relying on misinformation to open up roads.
(05:22):
So now we’re getting into the maturity testing, what it is. So I’ll hand over to Dan now at this point, so he can take all the screen and give you a run-through of what maturity testing is, the calibrations and equipment used to test this material on site.
(05:37):
Thanks very much, Greg. And thanks for having me along today, guys. I guess start by saying the concept of maturity testing, we want to look at it is a test methodology for anything less than, I would say seven day action that we want to take on concrete. So definitely fits in the field of fast set concrete, but also plays a role in a number of other critical things we want to do in concrete construction. So we need to be aware that we’re keeping in practical construction terms, 28 day cylinder crushes and seven day cylinder crashes at this point in time, in place for QC control of our concrete. What we’re looking at maturity testing for is an opportunity to really understand safely and efficiently concrete strength in those early action periods.
(06:27):
And I’ll just learn to drive your screen, and I’m on. So again, what maturity testing is, it’s a non-destructive method of testing concrete. What we want to look at with maturity testing is we want to understand the function that temperature and time play in strength development of concrete. So the method of maturity testing is it’s reliant upon understanding that specific relationship for a specific concrete mix. And each mix has its own relationship with temperature in time. The way I could, I could best describe that is a little picture shown here. If we think of mass one and mass two as both having a value of 15 MPa, when the concrete is subjected to a higher temperature profile, it takes us a shorter period of time to achieve that mass. And when we’re subjected to a lower temperature profile, so we’re saying in winter, it takes us a longer period of time to achieve the same mass of temperature and time. And understanding that relationship’s core to allowing us to move a function of maturity into monitoring filled concrete.
(07:39):
So the method of maturity is, as Dan mentioned early in the presentation, it’s not a new test method. It’s a method that was developed during the fifties and sixties when the initial work was done on understanding this relationship of temperature and time and strength. It was formalised in the ASTMs C1074 standard in 1980. But what’s bringing it to the forefront of testing internationally and in Australia at the moment is we’re continuously developing construction methods and ways of engaging with concrete that allow us to do things faster, and in a more streamlined process on one hand. And then on the other hand, we’ve had technology advance so rapidly in this space that what used to be a computer the size of a car with wires running through a concrete slab is now minute devices dropped in concrete, and mobile devices for interaction.
(08:39):
So the ability to cost effectively and practically access the test method in conjunction with the way we’re building things is what’s making this really popular right now. In Australia, we don’t really have a provision for it in AS 3600 at the moment. And I guess that’s just a factor of joining a timeline of standard development and standards being updated. What we do commonly fall upon here is the ASTM C1074. Internationally, that would be the most recognised standard. You find a lot of solid provisions for this test method in a number of our road authorities. So VicRoads have a really good grasp of and provision for maturity testing in their section 610, but also RMS and Main Roads are incorporating this test method and allowing for this test method a number of their structures as well. For me, I always find that movement from a road authority that can act faster into a standard tends to be a way a lot of these things move into concrete standards, especially in the Australian market. But internationally that ASTM standard’s a great one to refer to.
(09:51):
When we look at the issue with concrete testing and why maturity testing is so important, and Greg touched on this earlier. Our method of crushing cylinders is a really great 28 day QC control. The issue when we bring that relationship back to early age concrete is we cast a cylinder, as you can see in the image, and we have a very low volume of concrete with a very large surface area. And what you’ll find is when you monitor that temperature profile, the temperature which the concrete leaves the truck and is put into the cylinder is about the maximum temperature we’ll achieve with that sample without artificially dealing with the sample. So we’re doing a site cured cylinder, you might see it come out of a truck at 22 to 24 degrees and immediately begin to slowly lose heat. And that loss of heat has a direct relationship to our loss of heat of hydration and the ability of the sample to kind of strength.
(10:50):
When we look at our element 200 thick concrete slab, or 400 thick section, we have this thermal mass of concrete held in formwork that’s able to generate its own heat and protect itself from the environment. So what we see is the heat in our elements retained longer and generated on a much higher rate. And in early age concrete strength gain, that heat is critical in the ability of concrete to gain strength. So what we’re seeing is when we crush the cylinder, we’re seeing a very poor or low representation of what the element actually does. So what we’re trying to do with maturity testing is find a balance between safely interacting with our testing results and efficient re-interacting with our test results.
(11:40):
So with the calibration process we mentioned, it’s really important to understand when maturity testing that the process of calibrating a mix is critical to each mix. And if we make changes to a mix that affect the profile, we need to reunderstand that relationship. So to establish it, what we would do under these standards is take a sample of 17 cylinders. In two of those cylinders, we would place probes or thermocouplers that would record temperature and time moments of the concrete. And the other 15 cylinders provide us with a sample for crushing.
(12:16):
What we’d see here is the 15 cylinders would form five groups of three. We would crush two cylinders under the standard. And if we have a greater than 10% variation, crush a third and take the average. In many cases, the calibration is just crushing all three and taking an average at that point. You can see in the graph on the right-hand side, what we’re doing in that calibration process is we’re taking an MPa value of a cylinder crush and relating it back to a mass of temperature and time. So we’re saying that for this specific concrete mix, this mass of temperature and time being achieved has a value of let’s say, 15 MPa. When we move this test method to the field, when we record that mass of temperature and time in our element, we can strategically relate that back to a concrete strength.
(13:11):
So when we’re taking our calibration, there are a number of approved equations or functions that we utilise. The two most common ones that are shown here, the Arrhenius or the equivalent age, the Nurse Sal, which is also referred to as the temperature time, or TTF. These would be the two most common ones used internationally. On the market, broadly the Nurse Sal is the more commonly used one. And it’s commonly used because it’s easy to engage with, it has, I would describe as somewhat of a safety factor built into it. The Arrhenius method or the equivalent age method, it’s designed certainly to get us a lot closer, a lot more accurate result. But the energy and effort required to utilise this calibration requires some more work. So again between these two methods, it’s about exploring them and understanding which is most relevant to what you’re trying to achieve with your mix or your project. But both are accepted underneath those standards.
(14:12):
I will drop a link into the notes and we’ll explore that a little e-maturity book that’ll explore those methods for you a lot further. But it’s a way of us taking that test result and translating the data live in the field.
(14:29):
It’s also important when we’re generating data to understand that calibrating, our mix is important, but validating it in the field for practical use is just as important. What Greg’s shown here is a sample of a validation process which they undertook. What they were able to do is take their data, record the temperature and time profile of a one metre by one metre, 100 ml thick section, call that section itself and crush the cylinders from the section to relate them back to the data that’s seen. What you’ll find, and we look at those results a little bit later on, is the accuracy of recording equal masses of concrete with maturity testing to validate our results.
(15:17):
What you can see here in the results from the test, which they guys of Bluey have conducted, is an overview of concrete cylinders and the concrete panel, and a measurement of compressive strength and maturity from both of them there. The one which I’d probably draw your attention most to when we want to understand the downfall, all the hurdles for cylinder testing with concrete is the one in between the two blue columns, which highlights cylinders versus maturity. You can see here, the value exchange or the difference in value being shown between what the cylinders achieved and what maturity testing shows. And see here with the fast set concretes, at four hours as an average was a 13 MPa difference between what the element was achieving and what the cylinder that we would have traditionally used for achieving was.
(16:13):
We’re talking about with the fast sets, some pretty insane numbers per minute on returning an airport runway back into action. You can see why understanding the element as opposed to a cylinder is so critical in this early age testing methodology. An example here, and it’s one which I’ve stolen from one of the businesses we work with, Elvin Group. What they’re displaying for us here is understanding another example of a validation process, and another way that highlights the difference between what cylinders are telling us and what material testing is telling us is going on with our element.
(16:56):
So on the graph on the left hand side, the blue line represents a probe placed in a cylinder to measure maturity testing. And from that same sample of concrete, the yellow line is showing us what the probe for material testing is telling us out of the element. The results that are recorded on the right hand side of the samples of the cylinders cast at the same time, from the same concrete that was crushed. So you can see the time interval here of one day. The cylinder that we would use for testing was achieving a value of 10.4 MPa in the graph, while the element itself had a strength value of 16.1. When we crushed the cylinder, which was of equal size and mass of the cylinder we were recording, we had an MPa value of 10.5 MPa. So within 0.1 MPa of what the maturity tested cylinder was saying, which clearly shows here that the calibration of the mix that we did was accurate, but also highlights the dramatic difference in MPa and value that our elements are achieving for critical action.
(18:04):
This test goes out to a four day test. You can see there where we’re seeing 29.3 being achieved and a crush value of 29.5, about the equal mass of concrete in the cylinder, while the element itself was sitting at 35.1 MPa. So pretty considerable variations in strength value and would count for a lot of delays in processes in construction when we’re waiting for a cylinder result to come through, not only in accessing that data, but waiting for it to achieve its strength value.
(18:38):
This one here, it’s a pretty simple one from some very early stage works we did. What I’d like to highlight here is that conversation around the relationship of strength and temperature. Down the bottom, we have the temperature value drawn out of a cylinder that was used for testing and the temperature value drawn out of the element itself. The cylinder reached a maximum temperature of 22.8, which would have been the heat of the concrete when we poured it into the cylinder. And that was about the highest temperature value that it achieved, while the element itself in its top section was hitting up towards 51.8.
(19:18):
And with this specific example, we were after a 25 MPa at five day result for some post-tensioning works. The element itself achieved that five day result 36 hours earlier than what the cylinder would allow us to believe that it achieved it. And furthermore, the cylinder achieved that result of 10:00 PM at night. So we actually wouldn’t have access to that data until probably seven to 9:00 AM the following day. So it’s about a two day lag when the structure was ready to be actioned for its critical moment. And when we were actually seeing those results under traditional text methods.
(20:00):
We want to look at some of the field applications in which we can utilise maturity testing. Again, we’re looking at anything which we wanted to concrete in a less than seven day period of time. So jumping cause is one which certainly leads the construction process on a site. What we achieve here is we have immediate access to the data we with maturity testing. So when our construction crews are turning up at 5:30 in the morning, before the cylinders are even collected for testing, they have access to data and knowledge of how to safely move forward with their construction and scheduling of works.
(20:38):
And see here with post-tensioning, I feel like in Australia, the Oceania markets, we’d certainly post-tension more so than a lot of other places in the world. Understanding and accessing data for early age strength gain is critical to safely action this, but also efficiently action the element for time. So what we’re able to achieve with PT now is site-specific location. So we can take recordings of the moment throughout our element at critical areas of action. We’re also placing the results in the hands of our contractors rather than waiting for test results. And again, we’re seeing those achievements in timeline savings. We were talking about earlier on being able to apply it to move scheduling forward in projects.
(21:27):
Loading with decks is the number one and again, it’s about safely engaging with this work and scheduling this work in an efficient manner. Loading decks is another one where we’re able to find that the following morning we can access data again and understand our ability to work on an element before cylinders even would have been collected from sites, and then before we even take into account the efficiency of understanding the MPa value that maturity testing offers us. A couple of quick examples of project, and I’ve highlighted some infrastructure jobs. This is a launch form bridge in New South Wales, an RMS structure which was being constructed or recently constructed by Georgio Group. The guys were utilising maturity testing for that engagement with early age strength on the construction of this bridge, that conservatively allocated a 10 day plus saving in their construction works by implementing this method and being able to understand the true strength value of their bridge structure.
(22:35):
Again, the actions that we want to undertake being critical and early age. Th
(23:19):
And the civic quarter, which is highlighted here in Canberra, it’s a fantastic building which was constructed by Construction Control. For me, it’s an interesting building because for us, the journey with this structure was how I find a lot of early engagement with maturity testing. When we initially talk to people about… Hi, how are you? We’ve got a really interesting probe that we want to put into your concrete. And then you’re going to use your mobile phone to collect data and tell you the strength of your element you’re got to make critical decisions on. It was one of those ones where the contractor was, I would say, willing to engage, but somewhat concerned about how this would work for them.
(24:06):
By halfway through this project, they rolled this test method out onto all of their projects and have become one of our biggest supporters and engaged with the industry saying, this is a serious test method that you need to be exploring for efficiencies and safety measures in your project as well. So again, anything we want to do with concrete in that early age that’ll allow us to move timelines forward safely is a great interest in the marketplace.
(24:33):
So we want to have a look at how we can engage with the system. And in our local market, there are two technologies which seem to be at the forefront at the moment. This is the Smart Rock system. It’s one which I would put my hand straight up and say, it’s one we have a commercial interest in in our business. What you’re seeing here is a probe shown at the top there. Inside that black box section, we have a data logger that holds 56 days worth of data, logging that temperature and time moment every 15 minutes. We have a battery that lasts four and a half months and a Bluetooth emitter.
(25:13):
And what that Bluetooth emitter allows us to do is tie this probe within the structure, bury it completely within a concrete element, and then use the Bluetooth signal to communicate to a mobile device and give us the real time moment of what our structure’s doing. And then reportability of program management tools that come off the back of that as well. What we’re basically doing is burying these probes throughout an element, and then giving the contractors the ability to understand real time test results any point in time they require it within their structure.
(25:51):
And another system that’s very popular in our market is the ConX systems, which is shown here. A couple of ways to engage with this one is wires for tele thermocouplers that run through the element to an agent. The agent then communicates to cloud based software to provide the data out of this in real time, out of our element. And also a wireless version of a probe, which is shown here that uses a ZP signal to communicate to that agent box, which is shown here. Again, that data’s relayed out to cloud based software to share with stakeholders.
(26:27):
I think one of the important things to look at with these two technologies is the data sharing that takes place here. When we might have a project that has five stakeholders engaged from different organisations that all require this data to safely and efficiently move actions forward, we’re moving away from waiting from a test result from a lab to be collected, tested, approved, data to be sent out to a stakeholder, and then that stakeholder to share that data onwards again. What we have with maturity testing in these systems is the ability to instantly access the data on our element when we need it, and instantly share it with endless numbers of stakeholders that are required to safely and efficiently engage with our structure. I think that data management is really critical to remember as an important factor of engaging with this method as well.
(27:23):
So in summary, what I would highlight is the maturity method, it’s not a new method. Around for 50 years, in our official international standard for over 40. It’s a proven technology that’s utilised on all sorts of infrastructure and major building around the world. It’s a much more accurate way of understanding your elements, and giving you real time access for your critical moments.
(27:52):
Savings of that a few of the key takeaways to bear in mind here are this test method is specific to a concrete mix, so you may require multiple calibrations for your mix. It’s important to validate your data throughout your process. So the VicRoads standard sets some pretty good guidelines on infrastructure saying, validate every three months to make sure that data that we’re using is true and relevant to the mix and what we want to do with it. But definitely, it’s the ability of technology to make this test method usable and user friendly, that’s making it very accessible to us and very exciting for our market at the moment.
(28:33):
So if I rampaged through that too quickly for you, I’d say that’s me at an end, and I’m happy to have a chat off the back of that now.
(28:41):
No, that was great. Thank you very much for that, Dan. I was just thinking to myself as you were going through that, I’ve always felt like a pretty good understanding of maturity testing, but I’ve never seen it explained so well. That was really clearly communicated on how the system works and the science behind it. So thank you.
(28:59):
[crosstalk 00:29:00].
(29:00):
We’ve got a question here from Eddie10, will strengthening be the same if we add waterproof additive mixture into the fast set cement? So how does adding a waterproof additive mixture impact their results, Dan?
(29:12):
Yeah. Look, I’d say that you’d need to understand anything that affects the profile of how our mix changes under that AXTM standard. It’s a little broad in what it says, but it would say that anything that affects the ability of the concrete to gain strength in that period of time should be understood. So you can simply validate a mix. So take equal masses of concrete, crush the cylinder and see if your data is still relevant. A greater than 10% discrepancy says start again and recalibrate. But for me, with the many ready-mix producers we work with, they would recalibrate a mix if they made such a change until they had enough data at their disposal to clearly understand the effect that it has.
(30:01):
Okay. Good answer. I was going to ask as well, Dan, you’re from the ACT, Canberra region. How helpful is it having maturity testing available to you in a cold climate? It seems to me, that’s the area where it adds the most benefit, right?
(30:19):
A hundred percent. The issue in cold climate environments, and the Victorian market was probably one of the leaders of engaging in maturity testing in the Australian marketplace. The issue is what happens to those cylinders we’re leaving on site overnight. So we’ve already had an issue with the temperature profile dropping so low. When we’re moving that cylinder into super low temperature conditions, we’re literally putting it to sleep while our element is still moving along nicely in it’s mass. So you see the work that we do up in Cairns, we see a marginal improvement. The work we do in Canberra, Tasmania and Melbourne through winter, we see a huge improvement in accessing that data.
(31:04):
It really leads me to another question. Does it ever get to a point where it goes the opposite, where rather than there being a lag, there’s actually an acceleration in a cylinder because the heat can get to it? Are you getting unreliable data in hot weather at the other end of the spectrum?
(31:21):
Yeah. Absolutely. The way we look at it, and it’s going to sound very salesy, so I apologise for it straight up. If your cylinder is outperforming the data out of your element, you’ve moved from an efficiency concern to a safety concern. So what it’s saying is that, I guess if we look at the current practices for handling cylinders in Australian standards, it’s a bit grey. And if you were to analyse the way that the multitudes of ready mix producers and labs are currently handling say a three cylinder, it’s a little bit different from company to company.
(32:00):
So some will take a cylinder, leave it on site for three days. Some will pick it up at one day, bring it back to a lab. Some will put it in a water bath. Some will leave it in a moist cure room. Some will leave it out. All these variables are taking place. Now, if I took a cylinder back one day and place it into a moist cure tank, or sorry, a curing tank at 24 degrees Celsius in this beautiful lime rich environment. And then I subjected my 150 ml thick PT deck to a Melbourne winter. My three-day result of my cylinder will outperform my element. But I’ve moved from efficiency to a safety concern that I could be pulling PT strands if I action that element. So that exchange to move from efficiency to safety, quite quickly.
(32:49):
Yeah. That’s a really issue even on roadwork that we’re interested in. I guess, the same thing where you’re looking at four hour results or 24 hour results. If the cylinders aren’t exposed to the same conditions, you could be overestimating the strength and overloading those slabs as well.
(33:03):
Absolutely.
(33:04):
So I can see the benefit there. I’ve got another question here from Justin Hampton. If concrete was poured in orange and cured at around three degrees, average ambient, and the cylinders that were taken off site to another location that was six degrees higher. Would that be representative of the site result? Similar to what you’re saying now, but what’s your opinion?
(33:24):
Yeah. I just think the issue when we artificially heat cylinders or cure cylinders outside the environment, we run a risk of moving to that safety concern. So again, you could run data for days until you found a match up of what does my lab environment for my cylinder need to be to equal my element of this mass of concrete at equal temperature? It’s just been our experience that the data that comes out is more accurate from an element with maturity testing than you’re ever going to achieve with an early age cylinder crush.
(34:02):
Yeah. And at the end of the day, we’re not interested in what the strength of a cylinder is. We’re actually interested in what the strength of the element is. And I think that often gets forgotten. There’s a lot of focus on what the cylinder information is giving us, but it has to be relevant to what we’re trying to-
(34:18):
Absolutely.
(34:19):
Learn from the structure. And then safety is an issue as well as efficiency. So that’s a really good point you make. All right. And Justin’s just asked, do you have any data that shows this type of example? I think you’ve shown that pretty well in the presentation there, Dan.
(34:41):
And look, I’m happy to provide additional information and direct you towards some other resources offline as well.
(34:46):
Okay. So if anyone wants to make a request for more information, you can just do that through our website. Aiden’s just popped the link up for that. So you can make a request for more information and we’ll make sure that that gets to you and anyone else who’s interested, from Dan as well.
(35:06):
Our email addresses are there. So if you want to email either myself or Dan from C.E. Industries, we can provide you with information, technical data on the calibration process and the validation process as well. And that’s where those slides came into effect back here. I’ll show you quickly. That was these reaction slide here showing that your element is doing different to your maturity testing. So this is where the information, we can provide that for you.
(35:34):
I like more data. That’d be great. Thank you again for joining us today. Thank you, Dan. Thank you, Greg. That was a great presentation, really enjoyed it myself. And hope to see you again either tomorrow or next week for our presentations. Thank you.
(35:50):
Thanks very much.
(35:51):
Thank you.
(35:52):
Bye.
Products
About this Webinar
In this webinar, Daniel Bosco examines the different types of defective concrete and explains the methods to repair and increase the durability of concrete structures.
Downloads & Links
Video Transcription
(00:04):
Morning everyone. And welcome to our Monday webinar on defective, concrete and repair strategies. Just letting everyone into the webinar now. We’ll give everyone a minute or so to, to join. As you know, we host these daily webinars twice a day now, so the 11 o’clock session and also our 1 o’clock session. Check on our website for updates on what the topics are throughout the week. And this is all part of the isolation series, where we try and offer the opportunity to connect while you might be isolated and stuck at home, and maybe pick up something new about the civil engineering industry. So just a bit of housekeeping, as you know, you’ve been let into the meeting room and you’re just on mute at the moment. So if you want to ask a question, just take yourself off mute and feel free to interrupt.
(00:56):
Otherwise you can use the chat feature and, just type a question in the directly to me or to the entire group. And also to let you know, this, this meeting is being recorded. So it will be available later today on our website on the webinars page. So it looks like most people are in now. So we might, we might get started if that’s all right. As I said, we’re talking about effective concrete and repair strategies, a bit of a long one today, I was contemplating dividing it up into two presentations, but instead of going with the slightly more concise version, covering two parts of this topic in one go, so let’s see how that works out. All right. So what is defective concrete? So it’s any concrete which doesn’t meet requirements. So this can be at the point of construction due to poor placement techniques, or it can be due to damage that occurs during the life of the structure from chemical attack, a fire for example, or otherwise structurally overloaded elements.
(02:02):
It can also be just due to aging and environmental effects. So any concrete that doesn’t meet the design requirements or the specification requirements would be considered to be defective concrete. So why do we repair concrete? Again, broken up into three categories. Aesthetics or appearance and safety. So we might want the concrete to look better. We also may want to prevent slips and trips or mold growing. So that would be a set of reasons. There’s also durability and durability comes in two parts. You’ve got the current visible corrosion that you can see on the surface, you know, through spalling and concrete, starting to fall off and signs of corrosion, but you also have future corrosion protection that you may want to take care of. So in other words, you know, because the concrete is defective, is it going to increase the susceptibility to corrosion in the future?
(02:53):
So do we need to make a repair now to prevent that occurring and then finally to increase structural capacity? And that could be because either it’s, the structure is not adequate or we’re upgrading the structure. So we need to increase its capacity. So repair methods will include removal and replacement of defective, concrete strengthening, injection techniques. We’ve had a whole webinar on that topic previously, and then applying to loadings and toppings as well. The types of structures that require repair are very common in Marine infrastructure, obviously because of that saltwater environment, very aggressive, same with sewer and wastewater, very aggressive environments where concrete really is pushed to its limits. We also see it in bridges, underground structures and buildings, very commonly requiring upgrading and repairs.
Of course, everything we do relates to civil infrastructure. So we see those types of structures, a lot in the type of work that we do. So just running through some of the common defects and what you might see when you’re out on sites. So honeycombing is a pretty common one. This is where the aggregate and the cement paste aren’t evenly distributed. So the aggregate may have fallen out of the, out of the mixed and it ends up with, you know, voids between the large aggregate, as you can see in the photo. And it ends up being porous and weak in that area. And obviously you can have accelerated corrosion as well, simply because contaminants can migrate into that concrete a lot easier. And this occurs due to poor placement techniques. So the concrete is dropped from a height. You can get fall out faster, over vibration, things like that can create honeycombing.
(04:37)
Cracking. So, as we’ve seen in previous webinars, concrete is designed to crack but that cracking must be controlled. Cracking can occur due to structural overload, drawing shrinkage, thermal effects or even poor placement. Again, we’ve covered this topic. So I’m not going to go into this in a lot of detail today,
(04:56):
Cold Joints. As you can see in the photo there, non-continuous concrete placement. So where we place, say a truckload of concrete. And there’s a delay between applying the next load of concrete. And what can happen is you have discontinuity in your structural elements and that results in a weakened structure or greater exposure to corrosion. So you can see there a little bit of honeycombing, forming all around that cold joint. And you can see that the concrete is going to be more porous in that area. And you’ve got discontinuity in the structure. So that will require repair.
(05:29):
Spalling. This occurs when pieces break away from the concrete. Typically seen in concrete cancer, as you can see in the photo there, but it can also be a result of a fire in the structure as well, where you have expansive pressures, which push away that surface of concrete. And you can see there in those little illustrations, how the corroding reinforcing bar expands as the iron oxide is formed, and that expansion creates pressure internally and eventually leading to spalling creating that concrete cancer. And by then, it’s, it’s usually too late to try and prevent the corrosion occurring. We’re now dealing with a whole new property because it wasn’t addressed early enough
(06:12):
Steel corrosion, which is part of that process can occur because the concrete isn’t providing enough protection to the steel. So concrete and steel are great friends. You know, they work together in unison, one’s putting compression and the other one’s putting intention and concrete provides a nice alkaline environment to passivate corrosion in the steel. But when concrete isn’t doing its bit to protect the steel, then that’s when corrosion starts occurring. And this can happen because of cracks occurring in the concrete inadequate cover. So if he’s still reinforcement and he’s too close to the surface, whether you’ve got carbonation and that carbonation tacks, the concrete and reduces the alkalinity corrosity in your concrete, or even just the presence of chlorides and other contaminants. So in a Marine structure, those chlorides from the seawater will migrate and attack the steel and correct corrosion.
(07:00):
We can also have brain damage, so where the slab or element is placed. And while it’s still in the plastic stage of rainfalls, they can wash out the cement paste from the surface to create that weakened layer. And then the surface ends up chalky, soft and rough and that will require repair as well. And just one of the last ones I’ll touch on is, is fire damage. Obviously there’s a lot of ways concrete can be damaged, but just covering the main topic, see fire damage causes micro concrete cracking, and spalling can reduce the compressive strength that reduces the modulus of elasticity. So it makes it more or less weakened softer. You can lose the bond between the concrete and the steel reinforcement because of that heat. And you can also lose and do lose the prestress in prestressing tendons. So that will change the way the structure reacts to, to loading. So it can be quite detrimental to the structure, having a fire, as you can see in the photo there, and that can require quite extensive repair or rebuild.
(08:08):
So, material structural properties. There’s two components to picking a material for repair. There’s the mechanical properties, and there’s the corrosion protection properties. I feel that the corrosion protection properties obviously get a lot of focus, but not so often do we get a lot of focus on the mechanical properties? And when we do, it tends to be the wrong items that get focused on. So I just want to talk a little bit about that. So really importantly, when you’re repairing a structure, the structure after it’s repaired, it needs to respond to loading as per the design. So the mechanical properties of the repair mortar are crucial here. So as it’s loaded up, it has to deform and spread the load in the same way that it would have when it was originally designed, because uneven loading and stress concentrations could occur if the material properties are compatible with the host structure.
(08:59):
And I’ll just go into that in a little bit more details. So when we’re talking about the various properties that we look at. The mechanical. So compressive strength is the first one that most people turn to. So what is the compressive strength of the repair mortar and how does that relate to the original construction? So when we talk about compressive strength, that’s just the failure points. So you can just see my little arrow there pointing to the failure point. This is a stress-strain diagram for a material. So as the material is put under compression it’ll strain, so it will deform in order to form evenly as that stress is applied, then eventually it hits a point which we call the yield point and it starts to yield and then eventually you’ve got failure. So compressive strength is just the maximum stress capacity that the material will take.
(09:50):
So it’s not how the material will respond to the actual load. It’s only the failure point. And it’s only important that that failure point is a minimum amount. So it has to be at least as strong as the original concrete that it’s replacing. On the other hand, modulas is the deformation relative to the load. So that’s how much the, the repair mortar is deforming in accordance with the load that’s applied to it. So this is actually the most important property. It’s actually the slope of the stress-strain curve. And you require the repair to the form at the same rate, under load as the original concrete would have. And just to illustrate that when you bend a beam, so your gray box, there is a beam and it starts to bend. You can see it bends evenly, and it bends all the way along the length of that beam. And we don’t have low concentration. So this is the original structure under bending.
(10:52):
The other hand, we use a low modular repair mortar. So we use a very elastic repair mortar. So say we use an epoxy or a low modulus grout, and we put that same structure under bending. But what happens is that we end up with stress concentration. So what’s happening there is the flexible repair mortar isn’t taking any load. And the bending is all occurring through that narrow section. So they end up with more compression in the bottom of that repair area. And you end up with tension over the top. So you end up with higher bending forces. It’s going to become particularly problematic in columns because you end up with eccentricities, which means that you’re introducing, bending into a column that would have been under compression previously. So we’re getting very engineering-focused here on this one, when you end up with a higher module as repair.
(11:39):
So you put a very stiff repair mortar in, the mortor itself will end up taking more load than what otherwise you would have seen. And because of that, you end up with stress concentrations adjacent to that repair. And you end up with high tensile behavior across the top of the repair mortar and in columns again, that can cause eccentricities which caused problems, X pretense of horses in the whole structure, which can cause damage. So really important to match that modulas. When you’re talking about a repair mortar, more important than matching the actual compressive stream. Other properties we move forward in terms of the durability of the repair, chloride diffusion is an important one. So you want to repair mortar, that’s going to resist the ability to chlorides to migrate that suddenly that you don’t get a chloride attack on the steel reinforcement.
(12:33):
There’s a couple of ways of measuring fluoride diffusion. One is an estimate only, and that’s the rapid fluoride diffusion test. So when we estimate how fast chloride ions can diffuse by doing another electrical test, and that’s just through correlation where estimating how fast they’re going to diffuse, the more accurate way to measure, and it takes more time to do this test, but it’s worthwhile doing where it is, whereas you can see in the diagram then, we actually put a sample into a sodium chloride solution and we leave it there. And we actually expose it to that solution for a certain amount of time. We take it out under the NORD to test, and we actually measure how far those chloride ions have migrated through into the sample. And then we can extrapolate what that means over the lifetime of the structures. This gives us a real accurate and measured solution for the chloride diffusion.
(13:27):
And it’s a better way to go. Electrical resistivity is another property in a repair mortar that you would look for. So it measures the conductivity of the repair mortar, and this is really important for cathodic protection. So this requires a current to be passed through the concrete so that that cathartic protection can work well. Just one point on that is that the measurement at seven days will be very different to the measurement after 28 days of QRP, different again to 56 days of QR, always better to have the data on at least 56 days of QR to give you an accurate representation of what the electrical resistivity will be for the product.
(14:07):
Okay. Shrinkage is Another property that’s important. Obviously you want the volume metrics stability to reduce cracks forming. once you find the repair. Shrinkage testing, isn’t always representative though. So expansion systems within a repair mortar can sometimes disguise the volumetric stability. In other words, if we’re measuring the shrinkage at 28 days, it’s not really telling us what’s happening up until that point. So are we having expansion in the first few hours? Which then compensates for the shrinkage that occurs later? If you had a grout or a mortar that reacted like that, then what would happen is you would have expansion in your repair mortar, which wouldn’t be in the direction that you needed it. So that expansion wouldn’t be useful to you then when the shrinkage kicks in after one or two days, and then he’s all going for the next 56 days, that entire section shrink back and cause cracking. So it’s important to make sure that the type of testing we’re doing is representative of the actual application. That way I’m using the mortaring. And I’ll talk more about that on Wednesday, when we talk about volume metric stability of grants and mortars and the type of testing that’s available.
(15:18):
So just talking about the repairs themselves now, so concrete preparation, it’s really important just to note here, to remove all the damaged concrete. And it’s not always visible immediately, which concrete is failing to perform and not protect the steel reinforcement and testing is often required for that. So if it has lost alkalinity, or if there are fluorides that have been migrated into the concrete, you’re not going to see that just by looking at the concrete, there are tests that needed to be done. So just to make a comment that if still reinforcement is corroding, rather than looking at the steel and saying, what’s wrong with the steel. We should always be saying, what’s wrong with the concrete and why isn’t it protecting that steel?
(16:01):
Then in removing that concrete, there are a few methods available. We can use the pneumatic hammer, a jackhammer to break it away. We can use hydrogen ultra high pressure water blasting. As you can see in the photo, you know, 30,000 PSI of water pressure to blast away that concrete. We can saw cut it out. We can shock blast or scarify surface, and we can also grind a surface to remove defective concrete. Surface profile is one of the things we look for once we’ve done the preparation. So surface profile is the roughness. If you like of the surface and the larger, the profile, the greater, the key we’re getting between the mid repair material we’re applying and the host surface. And you can see there that the ACI guidelines, which I’ve just copied in, actually provide different gradings for the different levels of surface roughness.
(16:50):
And you’ll often see that referred to in our own technical data sheets and repair methodology, the type of surface roughness we required for that material. Because different materials will require different levels of roughness. So for an example, an epoxy coating may require a CSP1 or a CSP2, whereas a concrete patch repair key may require says a CSP5 to give us that bit of key into the surface. Replacement of reinforcement. There are guidelines on this. Typically, where you have more than 20% of the diameter lost in the reinforcing bar. It needs to be replaced. We also need to replace bars or move bars where the cover is inadequate. So we need to move those back into a spot where the cover will be adequate. We need to cut those out and replace them. There are guidelines for lap length that need to be referred to, and we need to remove the concrete, at least 20 millimeters behind that bar. So that that bar is encapsulated with consistent concrete all the way along its length. And it’s fully enclosed and protected from corrosion later down the track, we need to claim remaining reinforcement that hasn’t been replaced, and we need to make sure we break back that concrete all the way along to expose all of the areas of reinforcement that have been affected and wherever the concrete isn’t protecting that steel anymore.
(18:12):
Concrete priming. Concrete priming is important. It prevents moisture loss. When you’re putting your repair mortar on. So it ensures that in the contact zone, we don’t have moisture being drawn in and out of that repair mortar, because if moisture gets drawn out of the repair mortar, it might not have necessary water in there to create full hydration and curing and strength development of the repair mortar. And then it can result in a lower strength bond to the surface. So priming improves the connection to the host surface. The primer leads to be vapor permeable. So we don’t use epoxies. There was a period probably back in the eighties and nineties where epoxies were proven to give really high bond to a surface. But we now know that the epoxy doesn’t allow the vapor transmission. So while it may give really good strong short-term results in terms of bond. It’s not great in terms of long-term performance, particularly in the Marine serene environment where you have that money for transmission requirements. So now we use acrylics or even plain water saturation is good enough. Whatever it is, it just has to be low enough viscosity to provide the highest amount of permeation back into the structure, providing that really strong key to the host structure.
(19:30):
Steel priming is another topic. We don’t recommend steel priming at all with any of our own motors, you can see across next to that photo in the diagram there. And it’s pretty obvious why when you look at that. Why you wouldn’t want to prime the steel and then why you wouldn’t want to have such a heavy primer also on your concrete. You’re actually isolating the repair by doing that. The repair mortar you use usually is very high performance outgoing, and it’s designed to protect your steel. If you go and isolate your steel bar by applying a coating or another primer, then you’re isolating. And you’re stopping that repair mortar from doing its job. On top of that, you can add to the incipient corrosion effects. So what that means is that it can accelerate corrosion adjacent to that repair by applying things like zinc coating. So we really do want to avoid applying any coatings at all to our steel reinforcement. We just want to clean and we want to coat it well with our repair mortars. Cathodic protection. That’s another topic altogether. It’s a very specialised science. There are effectively two types. This effect active and passive cathodic protection, active just means you’re passing a voltage through the steel reinforcement to prevent corrosion. Passive means that you’re fixing in at the type of metal analytics you can see in the photo to pass a bait corrosion and both work well. And there are specialists in that area that can provide advice and design on that.
(21:08):
So looking at repair mortar application, few different types, and again, we’re going to more detail on this in the next few days, there are upcoming presentations about dry spraying, but dry spraying is one method of applying our repair mortar. The powder is actually pumped dry to the point of the nozzle. And you can see in the photo there, the nozzle that the applicator is holding and at that point is where it’s mixed with water. So you can see just on that nozzle there’s a little water inlet in his air that comes in as well, and that applies and mixes right up the nozzle and gets applied. So what it means is you’re moving the powder dry, which means that you can mix it up the nozzle with less water than you would typically need. And it means that you end up with a low water-cement ratio with dry spray, and you end up with better compaction on the surface as well. It’s also really suitable for large volume applications because you can apply a lot of product very quickly because the powder is just being pumped through the system, mixed with water and applied in pretty decent volumes per hour.
(22:10):
Wet spray on the other hand, it’s premixed with water, then it has to be pumped along the hoses, and then it’s sprayed onto the surface. So you need a little bit more water to make the mortar pumpable and you end up with a slightly lower density on your final product, and probably not as compact and impermeable and resistant to corrosion in the future. So dry spray provides a better outcome, wet spray, a little bit higher water content. And we also have the hand troweling as another way of applying. It’s a pretty slow process. Obviously you’re mixing it in small batches and trapping it to the surface. So these are good for small repairs.
(22:53):
Self leveling is another type of repair applied to floor surfaces. You can see there are very fluid grouts, which will level themselves can be applied across the surface and govern repair surfaces, which have been damaged from rain during casting, chemical attack, or poor finishing.
(23:13):
These could be either in a format and a epoxy format, or a range of other materials or resident materials that are available for self leveling. Different curing methods should be applied after the repair for cementitious repairs. So adding a curing compound will provide a higher quality surface. You’ll be maintaining moisture at the surface, which minimises plastic cracking. We can use water-based wax emulsions or acrylics over the surface, and they should be applied as soon as possible after finishing the concrete. And that’ll just stop that moisture evaporating out of the surface and any micro-cracking occurring. Structural strengthening is another form of repair. This increases the load capacity with reinforcement, which is applied typically to the surface. It’s usually externally applied to beams, columns, and slabs. We can use carbon fiber, as you can see in the photo or steel plates, and these can either be mechanically or adhesive fixed. So carbon fiber is usually adhesive fixed by epoxy, and we’ll strengthen that slab. Typically the surface fixed structural strengthening is done only utilised for, to improve the structures, ability to resist deformation rather than actually strengthening the structure under load. And that’s because the strengthening is exposed to fire. So in the case of a fire, if that strengthening did break down, then obviously it wouldn’t be able to support the structure. So usually we’re only using it for, for lifeboats and defamation,
(24:55):
Surface coatings. These kind can be applied after concrete is placed for the purpose of chemical protection, slip resistance and safety or aesthetics or signage and line marking. Surface preparation is critical for this type of application. And it usually is applied 28 days after curing of the concrete, particularly for a resin-based coding.
(25:19):
So, just in summary. Yeah, there’s a range of repair mortars, which can be adopted for repairing concrete. Materials available included mortars, resins, injection chemicals, and grouts. Engineering advice should be sought, but for structural repairs in particular, and understanding both the corrosion and structural issues is really important when repairing concrete. Both should be factored in when selecting your materials and your methods for the repair. So that’s it for our presentation on concrete repair. Thank you again for joining us. Really appreciate it. Hopefully, we’ll see you this afternoon or tomorrow. Thank you.
About this Webinar
To determine once and for all if ‘non-shrink grout’ truly exists, Daniel Bosco deep dives on the topic of shrinkage and expansion in cements. He also discusses the effects of shrinkage in common applications and demonstrates how modern test data presented by material suppliers should be interpreted.
Downloads & Links
Video Transcription
(00:05):
Welcome everyone. Thank you for joining us. Just letting a few more into the webinar now. And today’s topic we’re covering grout, mortar, shrinkage control, and measurement. We have an interesting topic, can be somewhat controversial with different opinions on it. Probably been sitting in my “too hard” basket for a little while, this one. But definitely a topic that I’ve wanted to present on and get some conversation going about grouts and mortars and shrinkage and testing and how it’s viewed in the engineering world. So, it looks like we had most people on board and in the meeting now, so we might get started.
(00:45):
So shrinkage, what is it? It’s a measurement of change in concrete dimensions after casting. So the dimension change is recorded as a difference between two points in time. So it might be a shrinkage at 28 days, for example. And it’s usually specified in accordance with the conditions that it was tested at, so the temperature, the moisture available, was it a humid environment, the types of restraints that were placed on it. So shrinkage should always come with notes on the environment that that was tested at because it becomes relevant later, particularly when we’re working out why we measured shrinkage.
(01:22):
So the reason why we measure it is to understand how a cement product is actually going to perform in the field. So when concrete shrinks, those displacements will apply loads that need to be considered as part of the structure, tension can develop and form cracking as you can see in the photo, particularly where the shrinkage is restrained. So movement joints and other mechanisms can be applied to a structure to reduce cracking, so it all becomes part of the overall calculation and assessment for a structure. So what causes shrinkage in cement? We’ve covered this previously, but plastic shrinkage, which is moisture loss, which occurs prior to setting of the cement product. Then there’s drying shrinkage, which occurs after setting, and that’s the evaporation of moisture coming out of the cement product. And there’s thermal shrinkage as well, which is the cooling after setting of the concrete. So concrete and cement products have an exothermic reaction when they’re placed in last volumes, they gather deep. And then after setting they’ll cool down and shrink, which is another form of shrinkage.
(02:27):
There’s a fourth type, which is autogenous shrinkage, which is related to surface tension of capillaries. It’s very minor. It occurs as part of the reaction. But we generally don’t measure for it or consider it because it’s so minor compared to the other three.
(02:45):
So let’s talk about non-shrink grouts and mortars. There is a bit of a myth about shrinkage. You often hear the term “non-shrink grout”, but we know there’s no such thing as a non-shrink grout. All cement products will change in volume over time. But what we can do is we can limit that change with attitudes and modifications. And we can also compensate against that change and we’ll talk about how that works as well. So those two things working in conjunction with shrinkage can limit your shrinkage, but you’ll never have a non-shrink grout. Some of the challenges with this and with the compensation mechanisms, is that the various forms of shrinkage are difficult to estimate, obviously because environmental conditions play a really big part. And then also the timing of when that shrinkage occurs, because of all of the compensation mechanisms that we apply have to happen close in time to when that shrinkage phase is actually occurring.
(03:44):
And then also on top of that, the compensation mechanisms aren’t necessarily consistent in all environments. So gas expansion agents, and other things may be more reactive in a hot environment than a cool environment. So shrinkage, timing and magnitude are both variable depending on temperature, water addition, and the environment, which makes it very difficult to get the magnitudes equal and also the timing of those two things equal at the same time. So it’s a real challenge in compensating grouts and doing it consistently to a range of environments. So there’s a few ways of achieving shrinkage compensation. We can do it via additives. So there are gas expansion agents, which we can apply to expand the grout during the plastic stage. There’s also crystal growth mechanisms, such as ettringite formation and others, which create expansion in the cement paste during the drying stage.
(04:39):
So two phases of compensation that can potentially be added, simplifying things a little bit there. There’s also shrinkage reduction agents. So you’re not just compensating, you’re also reducing the amount of shrinkage in a cement product by reducing the amount of water, so ending up with a lower water cement ratio by applying water reducing agents. And they’ll reduce the amount of shrinkage during the drying stage. We can also use things like SRA, (shrinkage reducing agent), pore blocking chemicals, which will hold the moisture in once the concrete is cured, block the pores, and they’ll actually stop the moisture from escaping and reduce some of that drying shrinkage as well. So that’s more of a shrinkage reduction agent, rather than a compensating agent. And just going back to it, successful compensation occurs when the expansion occurs at the same time as each phase of shrinkage. The magnitude of that expansion should be equivalent to the predicted shrinkage for each phase. And then the most important part is actually maintaining your volumetric stability over time in the applied environment.
(05:44):
So what we want is to make sure that we’re not getting large expanses, large shrinkage, which offset each other and then yes, the net result is zero expansion. I’ll just show you what I mean by that. So I’ll come back to what a class A and a class C type grout is, but just for illustration purposes here, I’ve just drawn this graph. And it’s just a typical, I mean don’t pay attention too much to the numbers, but we’re looking at what types of grouts we’ll do over a 7 and 28 day period.
(06:15):
If you look at the blue line there, that’s what we’d call a class A type grout, so that has an initial plastic expansion in it, but no backend compensation. So it’s only got the gaseous expansion during the plastic stage. And what you can see there is that blue line goes up, so the product expands. That compensates the plastic shrinkage. And then the drying shrinkage phase starts kicking in, and you can see that grout shrinking and eventually will end up probably with a net negative size. So some shrinkage to it, and the extent of that will depend on the type of grout, the amount of shrinkage and the amount of expansion agent that we add. But that’s typically the way that curve would look in terms of the volumetric differences.
(06:57):
When you compare that to a standard cement, which is the gray line below. You can see there’s no expansion of the early age, you just have that shrinkage. And then at a certain point after a day or two, those two lines are pretty much parallel because the drawing shrinkage in both a class A and a standard cement are the same, and there’s no compensation in either of those.
(07:15):
When we look at a class C type grout on the other hand, which is a dual shrinkage compensated grout, you have the initial expansion upfront, which might not need to be as much as you have in a class A. And then you have less shrinkage during the drying phase because you’ve got ettringite formation, crystalline growth, and other things occurring that will keep that grout from shrinking too much, up to 28 and then 56 days and beyond that crystal growth will continue to occur. So what you’ve got there is a much more volumetrically, stable grout over the entire period. You’re not getting a lot of expansion, you’re not getting a lot of shrinkage. It’s actually maintaining its shape for a longer period over its life, which is important.
(07:55):
And I’ll talk about the different types of grouts and the classification now, which will give you a little bit more background on how we come up with those terms. But just looking at the timing of shrinkage in cement first, plastic shrinkage usually occurs in the plastic phase with most grouts would be between zero and eight hours. And cement tissues products in this, and they’re accelerating or with different types of cement, but in the early stage essentially. The drawing shrinkage occurs mostly from one to 56 days. It does occur beyond that, but the majority of that shrinkage will occur during that phase as the moisture evaporates out of the concrete. And thermal shrinkage will depend completely on the shape of the structure and the size and the bulk mass. But let’s say it can happen anywhere between first and seven days, just while that structure cools down after that exothermic reaction from the cement. Imagining very large structures with large cross section, that heat generation is a lot higher and the cooling process is a lot longer. So, that’s a bit of a rule of thumb there.
(08:58):
So where do the terms class A and class C come from? Anyone picking up any of the current standards wouldn’t have a clue where these terms come from, but they’re so commonly used. They were actually part of a standard, ASTM C621, which was withdrawn back in 1993, but the terminology still lives on. ASTM C621 was superseded by C827 and C1090 test methods which covered by C1107 back in 1993, so 20 odd years ago. And ASTM C621 are referred to this class A type grout, which is the plastic expansion type and a class C, which had plastic and drying expansion systems. And classified the two grouts, amongst a couple of others as well, that it classified. But these new standards that have superseded, 827, 1090, and others, they have no reference to class A and class C. But it’s important to point out that the ease of comparison, we still use that terminology and I’ll still be using that terminology today, because it just makes it so much easier to describe. And I think that’s why that terminology has leaped on for all these years afterwards.
(10:11):
So C827, often referred to in technical data sheets as a type of shrinkage compensation and data, but it’s important to point out that this is only an early age test. And it’s done prior to hardening, so it measures the amount of plastic expansion in a mortar or a ground. Okay, it doesn’t actually measure anything to do with shrinkage. So all it’s doing is you can see the set up there. There’s a light source that’s beamed across a sample, which has a ball bearing in the top of it that’s projected onto a wall and measurements to take in an early stage. And what it’s doing is it’s measuring that expansion of the grout in its plastic stage. So how much expansion are we getting? And that typically relates to a class A type grout. But then we stopped the test, nothing further is done.
(11:01):
There’s a second test, which is C1090. And you see this one referred to a lot for pre-packaged grouts and it’s a drawing shrinkage test. The problem is that as you can see in that set up there, there’s a cylinder where the grout is put into. And you can see that glass plate in the photo. That glass plate is placed over the top of the cylinder and the cylinder is completely sealed. So there’s no moisture loss from the grout. Completely encapsulated, no moisture is allowed to escape. Then we take the glass plate off and we measure the amount of shrinkage that’s happened at 7, 14 and 28 days.
(11:36):
Problem is, this is quite reflective of what might happen in a completely enclosed environment, but it doesn’t actually help us when we’re looking at a open face concrete repair, for example, where moisture can be lost. So C1090 has its place, but it doesn’t tell us everything we need to know about a grout for every type of application. So it’s one to really be aware of, if you’re looking at that in terms of classifying your grout as non-shrink, just be wary that shrinkage cracking still will occur where drying shrinkage is allowed, where the evaporation is allowed to happen.
(12:09):
And I’ll just illustrate some of the issues where you use say a class A type grout in the wrong type of environment. So a class A type grout as we now know, has initial gas expansion in the plastic phase and that expansion offsets later drying shrinkage. The expansion and contraction occur at different times, which we already know is a little bit of a dangerous thing. And when we have unrestrained expansion in a class A grout, it’s really not useful to preventing shrinkage or offsetting that shrinkage. I would just make a final point before I illustrate these, that we need to also be aware about the type of gas expansion system that is used in a grout. So if it’s metallic based, it will form hydrogen gas and that hydrogen gas can create hydrogen embrittlement in high tensile steel. So when we see a specification for a grout used for post-tensioning and other things, we just need to make sure that it’s not using a metallic gas expansion agent.
(13:10):
Anyway, that’s a side note, coming back to the unrestrained expansion. So if you asked for example, as you can see in the diagram here, that blue section of grout, as part of the repair, if you allow that expansion to occur, the expansion is actually occurring in a dimension that’s not really going to help you very much. It’s expanding outwards. That’s after 24 hours, you’ve got that expansion to gravel, mortar has set, and then the drying shrinkage will start to occur. The problem is that the drying shrinkage will start occurring in different dimensions. And by the time you get to 28 or 56 days, this is what can happen. So you end up with cracking in your system. And even though it was a non shrink grout in accordance with class A, it maybe they compensated it with enough gas expansion to offset that shrinkage. It still didn’t work because it wasn’t applied in the right environment. So it’s really important to be aware of that when using different types of grouts with different types of expansion systems.
(14:09):
Drying compensated class C type grouts are considered to be dual shrinkage compensated. So they had that initial gas expansion in the plastic phase, but they also have that ettringite formation in the drying phase, which compensates the drying stage shrinkage. So the timing of expansion and shrinkage are closer match, then you have better volumetric stability with this type of grout. So a class C is usually a more high-performance grout, but more difficult applications and challenging applications.
(14:38):
So if C1090 isn’t the ideal type of test, what else can we do to learn more about our grout? Well, there are other standard concrete and grout measurements that can be applied, but typically don’t get looked at because let’s say they give a result, which might not be favorable. Yeah. They actually do show that a non-shrink grout does have shrinkage when it’s applied in the environment, but it is important to know this and to recognise it. So often you will see some suppliers referring to drying shrinkage using AS1012.13 And ASI478.2 which means that you moisture cure your specimen for seven days. You can see there, the sample is then taken out, it’s put into a humidity chamber and we take final measurements, which calculate the shrinkage between seven and 28 days, which is more reflective of having it completely enclosed of what you might get out in the field.
(15:30):
It still is not only measuring the shrinkage from seven to 28 days. So you just need to be aware that there will be shrinkage prior to that seven days, that probably isn’t being considered. The shrinkage after the 28 days, you can take a measurement at 56 days for example, which will give you more thorough results. And then there’s also things like thermal shrinkage and other things occurring on top of that. So all of that just needs to be considered. I’m not saying there’s anything right or wrong about the different test methods. I’m just saying that we have to be aware of what we’re actually measuring and how that applies to the field.
(16:02):
ASTM C157 is kind of the equivalent of those two tests and it’s used throughout Asia and obviously the U.S. Very similar to our standards here in Australia, but it starts measurements at 24 hours. So you’re getting a broader view of the shrinkage that’s occurring on the sample. So that’s just slight difference between the C157 test, which makes it a little bit more comprehensive. There’s other test methods available as well, which will tell you a lot about a grout. There’s the volume change tests, which can measure volumetric change all the way from the fluid state, through the plastic, the hardening, and then the drying. And that’s what you can see in that bottom photo there with the blue and the dial gauge that you put in your mortar, as soon as it meets, and you’d actually be measuring the volume change. And we implement that test with quite a lot of our products to check the volumetric stability over time.
(16:57):
There’s also a more holistic test which can be completed, which is the ring beam test. So this one really is an overall measurement of how shrinkage creating during a plastic phase, drying, and all the different components will work together within a repair mortar or a grout to resolve team shrinkage and then cracking. The problem is that it’s usually just a black and white, yes/no answer on that test. Did you get cracking or not? It doesn’t give you an actual, bigger of how much shrinkage you’re going to get. So it’s been difficult to apply the results to real world situations. So yeah, just other tests that are available that can also be referred to and implemented.
(17:39):
Now I’ll just come back to that graph that we showed earlier now that we know a little bit more about class A and class C type grouts, just to have a look at those again. So you’ve got the blue line there, which is a class A. You’ve got that expansion in the early stage, you’ve got the grout mortar growing in size, and then you’ve got drying shrinkage coming in, and it starting to shrink. And what the supplier of that grout is trying to do is offset that shrinkage with some expansion at the early stage. Class C on the other hand, a lot more volumetrically stable, less expansion agent required in the initial phase. And you’ve got back entry each compensation, which is slowing down that shrinkage. These are only out to 28 days. Don’t worry too much about the numbers, note that shrinkage will continue to occur for a very long length of time in a concrete and cement product, but it is very minor up to 28 and 56 days.
(18:33):
So what do suppliers say about non-shrink, how are we held accountable for the products we’re supplying? So I’ve just picked up food products off the market there that are available. And these are just cut out straight off technical data sheets on existing websites for some of the more popular products that are out there that are put forward as, as non-shrink. And you can see there that the claim for non-shrink, it exists. And it’s used a lot even by the major suppliers, and there’s still references there to some standards, which probably aren’t giving the entire picture in terms of what non-shrink actually means.
(19:13):
And there’s references to standards there that haven’t been in existence for more than 25 years. So it’s a little bit difficult to apply some of this information when the testing isn’t completely comprehensive. Another way to look at it is to have a reference to the ASTM C1090 standard. So you’ve got that completely enclosed shrinkage, and you get the change in height, data and information and volume change. But then also look at it together with drying shrinkage and have both standards, so that then the engineers can make real decisions about the type of grout that they’re using and the type of shrinkage that they might see out in the field.
(19:59):
So some of the institute considerations when you’re thinking about shrinkage, obviously environmental conditions as we’ve discussed are really important, temperature, wind, and humidity, the amount of moisture that can escape from the grout or mortar or concrete that you’re applying. So think of it as the differences per the two photos there, the difference between a PT duct, which is completely sealed and an open slab, obviously you’re going to get a lot more moisture loss in the open slab than you will in the PT duct. So you have to make sure that you’re looking at the right test methods for both those different circumstances. Geometry also plays a really important part of it. So the size of the poor to create the exothermic reaction, the shape of the poor and the surface area for drying shrinkage and also cooling, and then stress concentrations created by changes in shape.
(20:47):
So how does that impact shrinkage and then later cracking? You can see there a very large section, which would obviously generate a lot of heat during curing. So the restraints are also important. If you have an unrestrained section and put strings, you won’t see any damage. But if you have restraints that causes tension and that’s where you need movement joints, and even in grouts and mortars, when you’re applying them, sore cutting, and other measures can be put in place to ensure that that doesn’t result in uncontrolled cracking. Walls and columns can create restraints on slabs. And then also walls cast on top of slaps, which have already been cast prior, that slab which is holding the wall will create a restraint and you can end up with crack propagating off that base up through the wall.
(21:36):
So selecting the right product, I’m just going to go through a few typical situations, just so the types of things we look for when we’re recommending a product or trying to select the right product for an application. So with a concrete repair project, you have large exposure to drying shrinkage because it has a large open face. There’s a long section that’s restrained on the rear side, so there’s really high risk of cracking. And there’s also a high consequence of failure as well, because you don’t want the cracks to form and then the steel reinforcement to corrode again. So in that case, we’re looking for a dual shrinkage compensated grout type Class C. Obviously C1090 isn’t going to be useful for that type of grout, so you need to be looking at other types of test methods to have a look at the drying shrinkage as well.
(22:21):
PT duck grouting is fully confined, no moisture loss. We have steel strands, which control the crack widths. So there’s negligible risk of cracking in that situation. Although there is a high consequence of failure, we don’t consider that cracking is going to occur in a way that will impact the durability of those steel strands. So we usually look to a non-metallic expansion agent for a class A type grout. And we’re usually looking at minimising the water cement ratio as low as possible. Typically down to 0.3 or 0.33 in that type of application to again just minimise the amount of shrinkage that’s occurring.
(22:57):
Confined base plate grouting, mild exposure to drying shrinkage with the open edges there. It’s a long section which is restrained top and bottom. So there’s a medium risk of cracking, pretty low consequences of failure because it’s acting in compression. You get a fine hairline crack. It won’t affect the performance of that grout. So we’d usually be looking for a plastic expansion type class A grout, the packing mortar with a low water cement ratio for that.
(23:22):
A similar application, but probably more critical is a bridge bearing. They’ve got really high loadings. You’ve got a very thin section, long restraint, top and bottom, medium risk of cracking again, but very high consequences of failing. So here we look for a dual shrinkage compensated type class C grout, and you usually see a very much higher performance specification required for bridge bearings. There’s underslab grounding where moisture loss is sometimes less, but in the end it doesn’t matter too much because the consequences of failure, you can get some small cracking when you’re doing underslab grouting isn’t that high. Medium risk of cracking, so we would typically just go for a plastic expansion type class A grout for underslab grouting.
(24:08):
Pipe annulus and marine pile grouting, these are fully confined applications, so we don’t have a lot of moisture loss. We have a long section around the perimeter. Yes, reasonably high risk of cracking, but pretty minimal consequences of failure. A couple of little hairline cracks in that situation, isn’t going to affect the performance of the grout. So for cost reasons, you’d probably be heading towards a class A type grout as well. Ground anchors and rock bolts, fairly similar to PT grouts, and again a non metallic expansion agent type a grout would used.
(24:45):
So, just a few different scenarios there, that I thought I’d cover and might be useful in showing how we select the different types of grouts. And in summary, just to finish up, keep in mind, there’s no cement product that exists which is non-shrink. We can provide compensation to improve volumetric stability, the timing and magnitude of that expansion and shrinkage really should be matched to provide the best outcome. And the application environment will determine the type of grout that you would select for an application.
(25:20):
So thank you for joining us on that one, I hope you enjoyed that presentation. I’m happy to take some questions. If anyone has any, you can also submit those directly to me via email, and I’m happy to get back to you. And Aiden has just posted a link on the website there that you can go to. You can download the video from today. You can request a copy of the presentation as well. And if there are any comments back on that, I’m more than happy to hear. It’s not a topic that’s covered very regularly I don’t think just because of the complexity in it. And I won’t say that I think I’ve covered it in the detail that it probably deserves, but hopefully it just gets you thinking about concrete and grout shrinkage and how it impacts what we do.
(26:12):
All right, I’ve got a question coming through. Is there a risk of stressing the host concrete by expansive grounds? Yeah, of course, that really is a consideration and knowing the amount of expansion and when it occurs is really important. You often see in data sheets or technical data sheets from suppliers that the expansion is, and they just use the word positive. They don’t actually give the amount of expansion. So it really is an engineering concern depending on the application, how much expansion you’re going to get. In particular with things like ettringite formation, it can be more reactive in warmer temperatures. So what works at five degrees may not necessarily work at 30 or 40 degrees. So definitely something to be considered.
(27:04):
Hi Daniel.
(27:07):
Hey Justin.
(27:08):
Sorry, I had some questions there for a second. Look, this is a great topic. I really appreciate again, you guys covering it. Unfortunately, I missed a lot of the conversation because I got another call while I was watching the screen and seeing the great material you were presenting so you may have covered this. But the measurement of total shrinkage has been a bugbear of mine for a long time, in Transport for New South Wales for example. I only specify shrinkage based on the drying shrinkage, we all hopefully know only is really part of a story, in fact, what’s happening in the plastic phase can be quite different from mix to mix, but you might not see it in the drying shrinkage behavior. So was the issue of shrinkage reduction or compensation is also of interest. On first, I’m fascinated to know if you are involved at an Australian Standards level, in affecting some change in the way we measure shrinkage, total shrinkage concretes or mortars?
(28:13):
No, not involved in it. And it really is a topic that, and this is why there’s very little discussion on this topic, Justin, you and I know, and I don’t want to speak out of score here because everyone knows bluey is a material supplier as well. But, all of us material suppliers and the concrete suppliers will always look for a way of providing results that will suit us best. I mean, let’s be honest about this topic and that type of information sometimes people don’t actually want the answer to that, Justin. So if you have a test that says your shrinkage is 600 microstrain, but you’re only testing your drawing shrinkage from seven to 28 days and you were testing that in a completely humid environment. How representative of what you’re getting out of the field is that? I would say not very representative at all. But if you’re missing all the thermal shrinkage, everything that’s occurring really. I mean,
(29:09):
It depends on the story because the movement of the slab, for example, was dictated by, I mean, away from its original joints is dependent on the plastic shrinking phase, potentially autogenous shrinkage, and then a drying shrinkage phase. And then on top of that, from day to day, it’s dependent by thermal movement. So we’re really flying blind here and people with transport hold on really, really tight so you comply them with drying shrinkage where any mind about what’s happening in the plastic phase. So I’d love to see you guys get involved and agitate at Sam’s level, or at least industry level, to push it along.
(29:47):
So you’ve obviously got a very good grip on the subject matter, and I’d be happy to help out in where I can, that way. I know Steven Bernard was doing some work reading tests that didn’t see that with one of your slides, but you probably covered it. I noticed you had some other instruments there for measuring.
(30:08):
Yeah, I had the ring beam and Justin, I was actually thinking of Stefan when I put that photo in because I think it’s actually a photo of his equipment. But I mean, nobody understands shrinkage like Stephan does, and it would be good to get his perspective on some of this at some stage. I’ve had many discussions with him and other people.
(30:28):
Maybe we could pick up this topic offline because I think there’s a better, a certain amount of energy to capitalise on. RMS transport is why we find this issue.
(30:41):
More than happy to have a chat about that. It’s a little bit of a passion topic, I’ve got a few of those going at the moment. A lot of good things about running these webinars, you get to stand on your soapbox every now and again.
(30:52):
No, I really appreciate this. I wish I had more time. That’s all.
(30:56):
No problem, I appreciate you joining us and they’re always available online if you want to go back and have a look at them as well for anyone on. I’ve had another question come in there. Have we done any studies on shrinkage values in the first week, in relation to 1012 or 13? We’ve done a lot of testing in the early phases of grout and as part of that development. And particularly for our fast sets, because we know that calcium sulfur illuminates actually have a lot thicker zoning terms of volumetric changes within the first few hours, just because it’s reacting so fast, you’ve got the ettringite formation, you’ve got a lot of moisture being absorbed by the cement system. So we do a lot of work in terms of the shrinkage, even though we may quote 1012, you will see a lot of other data that we have available in the early phases as part of the product development. So hope that answers that question.
(31:46):
All right. It doesn’t look like there are any further questions there. Thank you for bearing with me on my soap box there for that one. I hope you enjoyed that presentation. We’ll be back again at one o’clock covering today defective concrete and repair strategies. So it kind of follows on from this topic. And then tomorrow Greg will be presenting on pumping and mixing of cementitious products, which will also be an interesting one. So hope you can join us for that. Thank you again for your time. Really appreciate you joining us for these webinars. Thank you.
About this Webinar
Low TR grouts are commonly used for the dissipation of heat from high voltage cables. In this webinar, Daniel Bosco examines low TR grouting techniques, technical specifications, as well as a project cost example comparing a low TR grout vs a standard fluid grout.
Downloads & Links
Video Transcription
(00:00):
All right. Welcome everyone. Thank you for joining us. Just letting everyone into the webinar. Now we’ll give them a minute or so just to join. My name’s Daniel Bosco, for those of you who haven’t joined us previously. This is all part of our daily webinars series, which we run at 11 o’clock and one o’clock Sydney time each day. Today, we’ve got a bit of a bit of a specialist, niche topic, I guess you can call it, on low thermal resistivity grouts and how they can be used to increase performance and reliability of high voltage electrical conduits. If you’ve got any questions during the webinar, feel free just to type those into the chat area, and we will do our best to answer that. Also, just to let you know, this meeting is being recorded and that means it’ll be available on our website later in the day, and also available for sharing.
(01:07):
We might get started on this topic, which is a new one, of course. A product that we’ve been working in an area we’ve been working in now for close to 15 years, so a little bit of experience in the field. It covers low thermal resistivity grouts. What is a low TR grout? TR as we call it, short for thermal resistivity. It’s a pumpable cementitious grout. It has high heat transmissivity, which means that it can actually conduct heat very well. It has high strength and very importantly, a low exothermic reaction on curing. These are usually placed in fairly bulk quantities into large conduits, say one meter in diameter.
(01:53):
That volume of concrete or grout could actually generate quite a bit of heat and has the potential to damage cables as we’ll talk about in a moment, if it’s not applied correctly. So where do we use low TR grouts? We use them in enclosed underground conduits, typically. Underbores, which are required to carry loads, HV cables with high heat output and both new and existing systems. So we might use them for new systems to increase the capacity, but also an existing cable could actually backfill the underbore or the encapsulating cable so that we can improve the capacity.
(02:31):
So why do we use these low TR grouts? They’re used so that you can transfer heat from that actual high voltage cables to the surrounding environment, to keep them cooler. It adds reliability and capacity to the electricity network. It increases the structural load across underbores. Underbores often go across under roadways or rail infrastructure, which could have quite high loading and also, they can be quite shallow as well. So they do actually take quite a bit of load, so it’s important have a grout in there that’s strong enough to support that and not damage the cables, and that adds to protecting the cables and plastic conduits as well.
(03:08):
So that’s typically why we use a low TR grout. The types of product features that we’re looking for, for this to be successful is we need high fluidity instability, so we don’t want segregation in the grout when it’s applied. We want minimal shrinkage and bleed because we don’t want the water and air to surround the conduits. It’s really important to have completely closed contact with the conduits. We want low porosity and moisture absorption, because as you’ll see, moisture will actually have an impact on products that are used to backfill high voltage cables. We use a special blend of aggregates and cementitious compounds to be able to achieve all of that.
(03:50):
So thermal resistivity is actually a material’s capacity to resist heat flow. It’s measured in units of temperature, distance and wattage, and it’s actually the opposite of heat conductance. When we talk about thermal resistivity, it’s the resistance to heat flow. In other words, a lower number of thermal resistivity means that the grout will conduct more heat into the atmosphere. So we’re looking for lower numbers in this case. Thermal resistivity is measured to ASDM D5334, using the type of equipment that you can see in that slide. So just looking at a comparison of various materials, air is actually a very poor conductor of heat. It has a TR value of 45. As I mentioned, the higher the number, the less conductive, so more of an insulator it is. Water at 1.65. Sand at 1.5, and then we have a range of low TR grouts, which can be well below 1, even as low as 0.5.
(05:06):
Just looking at conductivity and how we can improve electricity networks using these types of grouts, it’s commonly known the electricity network is prone to fail on hot days. You can see an extract from the Sydney Morning Herald there off to the side. That article goes on to explain why the grid melts down in hot weather. It’s partly due to the additional load from air conditioning and refrigeration units because of the hot day, but the other reason, and the primary reason is because the load capacity of the copper cables actually reduced to the elevated temperatures. So the hotter the temperatures, the less load or the less power those conduits can conduct. The ability of heat to escape into the surrounding environment becomes a really key element in keeping those cables cool enough to transmit more heat.
(06:00):
The effect of backfill on cable rating. Materials surrounding cables will influence heat transmission to the environment. So depending on what we encapsulate those cables with, will determine how much heat we’re actually transmitting. You can see it there in the photo. You’ve got four high voltage cables really close together. If that was left with air, as you can see in the photo, you’re really going to struggle to transmit the heat from those cables back to the ground, because air has that TR value of 45. Water has a TR value of… It’s 1.6 actually, not 1.0, which lowers the TR value of sand and bentonite while present. So moist sand will actually transmit more heat than dry sand. So we like damp sands. Then a low TR grout, as we said, well below one, will result in increased load-carrying capacity of cables. So those cables, if they were backfilled with a low TR grout, would actually transmit the heat to the ground a lot more effectively.
(06:58):
So looking at the impact of TR value on cable rating, it’s actually a logarithmic scale. So the lower you get the TR value, exponentially more power can be transmitted through it. You can see there in the graph with a low TR grout, you could have a rating factor on that cable of, let’s say for example, 1000 amps. If it was sand and water, you would have to derate that cable right down to 80% so it would have a lot less rating and a lot less transmission of power. Because once you get down to that TR value of 1.0, you might only be able to conduct less than 800 amps through that same cable. You can see how it drops off really quickly there in the table. From one, it’s at 755 amps. By 1.5, 638 amps. Once you start approaching 2, you’re down to 562 amps, so a really quick drop-off in the power that can be transmitted through a copper cable.
(08:03):
So just looking at the fill compaction and moisture content. So air in any material which surrounds a cable is going to be bad for the thermal transmission, because the heat will transmit through solid particles and water a lot more efficiently. In that first diagram there, where you have lots of air, there’s lots of air gaps and not many paths for the heat conduction to occur, whereas in a lower thermal resistivity product, compared to that, those gaps are filled with smaller sand particles or water or whatever it is. There’s a lot more opportunity for the heat conduction to occur.
(08:41):
And then this is really verified by this graph, which has a range of testing that was done looking at different compaction ratios of sand and also the moisture content. You can see here to this side, when you have zero moisture content in the sand, you have really high TR values in a sand. That drops off really quickly when you have moisture content. So as soon as you start hitting about 4% moisture content, those TR values start heading down towards one and then even lower with a higher moisture content, and then with a higher compaction ratio. That light green cable is the highest possible compaction ratio. And then you’re going to see the impact of moisture has as it improves. A grout on the other hand is consistent, no matter what the moisture content is. That’s one of the advantages, is that stability that it has through its design line.
(09:31):
So there’s a bit of unreliability that comes with compacted fills like sand, which are used quite often in open trenches. So thermal instability of sand can start occurring at about 35º degrees Celsius. What happens is, you see this circuit that occurs. The cable produces some heat because it’s transmitting power. The soil starts to dry up, which means that the TR value goes up as we’ve seen. The cable load increases, the cable produces more heat, the soil dries further, and this circle continues until you end up with no moisture in your surrounding soil and sand that’s been used for backfill. We know how big of an impact that can have on the TR value. That’s what leads to failure and unreliability of voltage cables.
(10:20):
Ground temperature is also really important. People who are doing calculations engineers, who do calculations on this, will start with a specified ground temperature as part of a standard. As you can see in the two comparison diagrams there, at 18º degrees Celsius, you can obviously conduct a lot more heat through a cable before it hits that maximum temperature of 90º degrees, which gives the cable a rating of 300 amps. If you had a ground temperature as a starting point of 25º degrees, you would only be able to run 285 amps through that same cable. Now, the difference between the two temperatures is, if they were designing this for Brisbane, for example, the ground temperature they would use would be much higher, particularly in summer, compared to a winter scenario in for example, Melbourne. There are standards that exist that will provide the information for different regions and the type of ground temperatures that should be assumed when working out these cable ratings. Where you are will actually determine how you treat those cables.
(11:22):
Just looking at some of the structural and geotechnical concerns with this. As we mentioned, it’s important for the grout to have a high strength load-carrying capacity. They’re often installed at quite shallow depths, these conduits, and they need to be able to carry the load of road and rail infrastructure, which might be above as you can see in the photo there. We also need to make sure that we protect the conduits during placement. So we want to control pumping pressures, and the grouts must have low heat generation upon curing. We’ll talk about that heat resistance a little bit more, because it’s a really important point. We want a low exothermic reaction of the cementitious product. We don’t want it generating a lot of heat as it’s curing. Because they’re applied in quite a bulk quantity, you need a special blend of those pozzolanic cementitious compounds to reduce the heat and reduce that peak.
(12:20):
As you can see in the graph, there’s a comparison between two different grouts here, which were poured into certain size cubes and the temperature was monitored. You can see that under exactly the same conditions, how differently the two grouts have performed. One has hit a peak temperature of more than 140º degrees, which has shorter damage to any type of plastic conduit when it’s curing at that temperature. Whereas another grout using different pozzolanic cementitious compounds was able to maintain a much more stable and low temperature throughout the curing process, which is obviously going to protect those conduits a lot more, which means that you don’t end up with this type of scenario where the softening temperature of those conduits has been breached.
(13:02):
You’ve got the different types of conduits there. PVC can be as low as 60º degrees. You can see there in the photo, you can see a collapsed conduit where that grout has heat too high a temperature and actually collapsed the encasement, which means that the entire bore has to be redone. So really important to select the right type of grout for this type of application. You can’t use any type of grout.
(13:26):
Pumping and placement. Some of the grout properties we need, we need high slump, low flow properties. We need the grout to be stable when pumped, we don’t want the sand and cement paste separating out. We don’t want segregation, so we don’t want all the aggregate falling to the bottom because remember, aggregate is the best conductor of heat. So we want that to be evenly spaced over the entire cross-section. We don’t want bleed because that’ll create voids around the conduits, which later will result in air pockets forming, and it means lower conduction as well. We need it to be highly durable so that it maintains its properties throughout its service life.
(14:01):
We don’t want moisture coming in and out of the grout, so we want it to be stable. We don’t want cracking to form and other things which might reduce the performance of the grout over time. The grout needs to be able to be applied in bulk application, so it has to be designed to be applied on a large scale. Bulk bags are really important for this type, and we want to be able to mix and place from the concrete agitator truck. Concrete agitators have very good mixing capabilities and they’re ideal for this type of application, which means that the grout can be delimiting bulk and pumping bulk as a large-scale concrete pour would happen.
(14:42):
Just finishing up. The question that often gets raised is, why would I use it? What are the actual savings? Why don’t I just use a larger copper cable? Obviously, copper is very expensive. So when a cable is buried at 750 millimeters, we’ve already seen that the rating on that cable can vary a lot, depending on the TR value of what is surrounding the cable. So just comparing a TR value of 2 compared to a TR value of 0.5, you’ve got 800 amp capacity versus 1400 amp capacity. So quite a difference. What does that mean in terms of copper savings? If you’re looking at a standard bore, a 9 by 150 millimeter conduit, I’m assuming that using a low TR grout or not using a low TR grout, you’re still going to build the same size bore, which isn’t actually the case.
(15:36):
You would actually build a small one, but let’s just look at the copper difference and what the savings would be as an example. So where you don’t use a low TR grout, you would need nine cables to transmit the equivalent amount of power, which at the copper value, which would’ve just been quoted in a report has $16,000 a tonne. You would end up with two and a half thousand dollars or $2,520 per meter worth of copper. By using a low TR grout, you could actually reduce the number of cables down to five, which would result in $1,400 per lineal meter, which is a saving of $1,120 per lineal meter, just on the copper. So you can see there that just by looking at the copper difference, there’s a real advantage to using a low TR grout, which is why they do get used so often in these types of applications.
(16:28):
So just in summary, low TR backfill will increase the capacity of new and existing cables. The backfill TR value will vary with compaction and moisture content if you’re only using a sand filler. The grout though, on the other hand will maintain the stable TR value for its service life and it can be much lower than what you can achieve with a backfill material. You can achieve upfront savings and long-term reliability as a feature of using a low TR backfilling grout. Thank you again for joining us. We really appreciate your time on this one in particular. We hope to see you again at one o’clock. Thank you.
Products
About this Webinar
Did you know that when mixing grouts, you should add 80% of the water when mixing first begins? Or, did you know that every minute of mixing adds an additional 3ºC to the grout?
In the webinar above, Greg Sieders details the correct methods to mix and pump cementitious materials.
Downloads & Links
Video Transcription
(00:00):
All right. Thank you, Daniel. And welcome everyone to the Bluey Webinar Series. Today we’ll be covering mixing and pumping on cementitious grouts. So the mixing and pumping basics, what we need to look for. One, product selection, the mixing equipment selection, pumping equipment, your site setup, the temperature, and PPE. So we’ll cover across all these topics throughout the presentation and go through everything in a little bit more detail. So the first part is product selection. So it’s critical to understand the project performance specifications before you select your product, so that’s in your strength, your setting time, to how fast, do you need a fast set, a slow set product?
(00:48):
What’s the design life of the product tool for the project? And all those sort of aspects. We’ll also need to understand the application requirements, this can influence your product selection. So do you need to pump the product a long-distance? Is it a very large pour element? So that will make a difference to the product selection and everything like that. So you got to look at all the aspects from the product specification to the project requirements before you choose your product.
(01:16):
And all products have a very different mixing and pumping characteristics, so they’ll influence what type of pump and mixer you use for the product. So now we look at the mixing of the product. Once you’ve chosen your product, there’s a lot of things to consider before you start mixing. Water has an influence, your temperature both in the atmospheric temperature and the subset temperature. The yield and volume, your curing requirements by setting times, as well as your curing of the product, any additives to add into the products, and then your mixer selection.
(01:50):
So water, water’s probably one of the most critical aspects for mixing grout. There’s a lot of different water addition rates for every single product on the marketplace. And the water addition rates will have a big influence on your durability of the product, the viscosity of your product, the stability, and the strength gain, because you can see the image on your right hand side there, and it’s showing the success range. So every product on the datasheet will have a lower limit and upper limit for the addition to your grouts. And this will make a big difference for your product itself.
(02:21):
So you can see there in the red zone is either too wet or too dry, so it’s not going to be pump-able, or it’s not going to give the performance requirements of that grout you’ve chosen. And you must use potable water when mixing grouts. Don’t use water from a river, don’t use dirty water and anything like that. So with the water, like we talked about, the higher volumes of water can produce weaker grouts, they can produce a less viscous grout, and they can also cause segregation. So what we’re talking about there, if you go outside those limits of your water addition to your grout, what will happen is that your grout, your cement particles, your sand that is in the grout to help it be a non-shrink grout, can lose suspension, drop out, and this can cause issues with getting pump blocked, mixers blocked, and not having a great performance in your grout.
(03:10):
And then on the other end, lower water volumes can affect pumping as well, and they’re not being as vicious a grout. They can also hurt your hydration of the grout, so if you don’t have enough water in your product, then this can cause the strength gain to stall over a certain period of time. So you need a certain amount of water to hydrate all these cement particles. The temperature plays a key role when mixing and pumping cementitious materials. Every 10 degrees increase or decrease in your temperature, that will either double or half your working time of your cementitious material. So what we’re talking about there is on the TDS, or have a product that you chosen, and that will have a working time, a set time for the grout.
(03:50):
And these are generally tested at 20 degrees in a lab conditions. So if you’ve got a typical grout you’re working with and it said you had 30 minutes working time, that’s based at 20 degrees. So what we’re saying is if that becomes 30 degrees in temperature for your application, what happens is that 30 minutes working time will become 15 minutes. And if you go the other way, if you’re down at 10 degrees, that 30 minutes will become 60 minutes. So you need to consider this when you’re doing your application, because if you’re looking at a faster grout then you need it to be back in the service quickly. When it’s in colder temperature, you need to allow for that extra working time.
(04:25):
So water temperatures should be kept as low as possible when you’re doing your mixing so you don’t cause heat of hydration happening quicker in your grout. Also, in very high temperatures, you can use chilled water, or you can also air condition containers before you powder the storage. You can see the image on your right hand side, keeping the powder underneath a tarpaulin to reduce the heat of the powder, because the powder will have a great effect on reducing the temperature of the grout. Are you looking at the volume you’re putting in there, a 20 kilo bag of grout can be having two to four, maybe five liters of water add into it.
(04:59):
So there’s a lot more heat in that cement then there is in just the water. So yield and volume, this is I think to consider when you’re looking at your mixing of your grout and pumping. There’s no point in mixing more material than you can pump before it sets. This would just cause issues of blocking your pumps, the material going off in the mixer. So ensuring you have enough product on-site including wastage, that you have a continuous pour, whether you’re not stop starting. And ensure that the size of the element you’re pouring is suitable for the grout. If you have a pour that’s outside of the limits of the grout, you’ll cause cracking in your element and everything like that, which is not good for your structural performance.
(05:41):
So curing times, like we talked about, the temperature will have a big affect on this, so you need to understand what you’re working within those aspects. And the curing of a grout goes through four or five different phases. So first you have your product will start getting increase in viscosity, so it’ll start to get a little bit thicker and lose its workability. And then you’ll have the gel phase and then you go into initial set, and final set for the product in your curing phase. So it’s critical to know these aspects so you’re not moving the grout or working a grout when you’re hitting the gel phase. It can cause issues in performance, segregation of the grout and particles if you will start working or try to finish a grout once it…
(06:20):
One thing you can manipulate is if you keep the grout moving in the mixer, it will reduce, it will onset the gel phase and prolong the curing time. This is important to know for fast setting grouts. Curing compounds are recommended for most standard cementitious materials. Most fast set grouts don’t typically require curing compounds, because most of the reactions happen in a very short period of time, and you have a full cure within an hour to two hours, but are used when you have very challenging temperature conditions with high winds and high temperatures.
(06:55):
So the curing methods, why we cure the grouts. It provides a high quality surface and maintains the moisture within the product to give you correct curing of the grout and getting all its properties. It minimizes your plastic cracking, and there’s different ways of doing a curing. You’ve got curing agents, water-based wax emulsion or acrylic. You can also use a wet cure by putting wet hessian bags over the top of the grout or your concrete pours. And they apply as soon as you finish processing and hitting your initial set.
(07:31):
So when we’re looking at additives for grouts, most proprietary grouts in the marketplace have all the additives added into the product already, your superplasticisers and retarders. So the superplasticisers, these are water-reducing agents, so allowing us to add less water into your mix to get a more durable, more flowable product without the addition of extra water. So there’s no need to add extra products, extra additives to the products on site. Retarders are in there for your set control, and mainly for your fast set grouts these are more critical for. And then your stabilisers, these help with your segregation and keeping your cement particles and additives in suspension, so you don’t get segregation and pumping issues.
(08:15):
Now the mixer selection. There are different types of mixers for different applications and for your different grouts. These are the main products, the main mixers on the market. You’ve got a pan and paddle mixers, colloidal and high shear batch mixers, continuous mixers. You’ve got volumetric, which is a bigger version of a continuous mixer, then your concrete agitators. So I’ll just give you a run-through of all the different types of mixers and what they’re good for, and the application of these mixers. So a pan and paddle mixer involves stirring action that generates a minor shearing forces.
(08:50):
So these are suitable for products that have a design for higher proportion of solids and require low shear forces, so the high performance grout are very fluid grout and not suitable for using pan and paddle mixers, because they don’t give you enough shear and they’re very slow mixing application. So you can see the photo on the right hand side is a typical pan mixer. They’re generally suitable for micro concretes or concrete mixers, thixotropic grout because you’ve got blades that go all the way to the outside and mix and move these grouts, and mix them properly.
(09:23):
You can see the image on the right hand side there, you can actually include back force on the side of the pans to give you more shear forces in these pan and paddle mixers. Good for non-shrink grout and screeds, so more viscous products. The thicker they are with aggregates, is perfect these type of mixers. Then you move to your colloidal and your high shear batch mixers. The mixing process for the colloidal mixers creating high shear forces and moving different ingredients at different speeds. These are very efficient mixers and designed for your high performance PT grouts and high flowable grouts. They mix very quickly and very efficiently.
(10:00):
You can see the type of colloidal mixer on the right hand side, and you’ve got your mixing element here, which is mixing it, then you’ve got a holding tank on the other side. So once it’s all been mixed and placed, it will then transfer into a holding tank which can then be pumped from those applications. So then you’ve got a high shear batch mixer. These are a smaller version of a colloidal mixer, so similar application. You’ve got a mixing vain in the middle which creates a vortex when you’re doing your mixing, and very good shear capacity. So again, good for your post-tensioning grouts and high fluid grouts, and good for mixing high volumes.
(10:36):
So there’s just what the type of grouts we’ve been talking about for these types of mixers are. There’s another mixer on the right hand side there which is a typical post-tension grout mixer, so it’s known as a Dipman pump. You’ve got a vain in the middle creating a good shear capacity, and that’s a mixer and pump in one. Continuous mixers, these are usually constant feed of dry product into the hopper, and then you have an inline static mixer where water is added automatically into the mix. So you have your powder addition up here, drops into the hopper, does a worm drive, and this is where your water addition gets added into your mixer.
(11:13):
It’s a simple operation used commonly within tunneling and mining. It’s not suitable for high performance grouts like your PT. With our PT, you’re very, very… a lot of plasticisers in there which takes two to three minutes to dissolve in your mixing. IN these sort of mixers you’ve only got a very short mixing window, so you don’t get a lot of shear capacity in there to dissolve all those plasticisers, so you can be added as effects to your grouts.
(11:41):
Volumetric mixers are a bigger version used for high volume grouts, micro concretes and large concrete pours, used for fast setting grouts as well. So same sort of operation, you’ve got different powder and aggregate bins all getting added into them and mixing in the auger, so mixed onsite to suit the application. So you have no travel times, you’re not having the product going off in the mixer, and you can get it enough as required. So concrete agitators, most people think that concrete agitators are only used with concrete mixers. These are one of the most effective ways of mixing all types of grout, from high fluid grouts, post-tension grouts, micro concretes, non shrink grouts.
(12:23):
Over the years, Bluey have done a lot of work mixing and delivering grout to the back of agis. We find it one of the best ways to do it. If you’ve got the access, you’ve got a large pour to do, then this is the way we try to do it, using bulk bags or even from a batch plant as well. So they give you very high shear, you’ve got the quality control because everything is going into the mixer. If it’s getting done at a batch plant, you’ve got them way batched, so the water addition and everything else is done very well. So don’t be scared of using a concrete agitator for doing the mixer. If you’ve got the access onsite and the ability, and large pours, this is one thing to consider.
(13:00):
So just a little overview for the mixers, there are various types of models of each type of mixer. So there’s plenty of different pan mixers, colloidals, so for batch, using the one that it’s suitable for the product and your application. So match your application specifications with your mixer, and that’s the size of them, the power requirements as well for these sites. So some of these mixers are three-phase power, so you need a lot of power to run some of these bigger mixers. Mate, if you don’t have free access to that onsite, so just make sure you’re choosing the right mixer to what you have onsite.
(13:33):
Now the best ways for mixing the products. You got to look at pre-planning your work area, so making… try to mix as close as possible to where you’re going to be doing your work. You don’t want to be pumping a long distance. Having ease of access to water supply, this is generally one of the slowest part of doing grout mixing, is getting your water into your mixer or into your agitator bowl. So having a good access to the water is critical. And again, like we talked about before, having good power supply to match your mixers, and allowing for the disposure of your waste material and washout. Making sure you’ve got an easy access area you can put all your bags into, a bin close by so you’re not having them lying around on the bags.
(14:13):
And then also looking at planning your lifting equipment. If you’re using bulk bags then you need a working platform to work from, a crane to be able to lift these up safely. So mixing basic again, if you’ve got a high production rates, a big volume pour during the day, you might need multiple mixers and pumping stations set up. So you got to look at the application on site and that you plan this, so might not just need one mixer, you might need two or three stations set up. So having them planned out, having your product there so you can easily access it all.
(14:46):
Checking the mixer is clean and working correctly before you start, and then checking that you have the correct product. I’ve seen it plenty of times, sometimes there are two-part products where you’re doing a part A, part B, making sure that they’re both… you have the correct part A and part B. Nothing worse than putting in the wrong product and having an issue going on site. We’ve all seen it gone wrong before. And one of the critical things is adding the water, calibrating the water addition. So a lot of flow meters, you’ve got measuring vessels that you can get, buckets that have measurements on the side from Bunnings.
(15:19):
Just checking that these measurements are correct before you start. So if you’re using a measuring bucket that has things, then weigh the water to check that they’re actual… accurate. Some of these buckets we’ve checked before can be out by 10% to 20%. And then the flow meters as well, these can go out of calibration very quickly, so these should be calibrated every day or twice a day, making sure that they are still accurate. We always get calls from people onsite saying that your grout hasn’t achieved strength, will we go out there and double-check?
(15:50):
The first thing that we want to do is check the calibration, how they’re adding water to make sure that they say they’re putting in four liters, you check the calibration, they could be putting five or six liters in there. So that will have a huge affect on the strength, again, of the product, and on performance. So the best way of mixing your grout is adding in 80% to 90% of the water first into the mixer. If it’s four liters a bag, don’t add in the full four liters, add in three and a half liters a big first so that you can add the balance in at the end. And then you’re adding the powder in slowly to the bowl, not too slow and not too fast.
(16:23):
If you add it in too slow it takes too long to mix, then you’re adding more heat into the process. If you’re going in too fast you can cause it not to mix properly, causing a buildup on the side of the mixer and everything like that. So once you’ve added in all the powder, make sure you give it a good mix through for a minimum of three minutes or depending what the TDS says for the product you’ve chosen. And then you can add the balance of the water at the end to give your desired flow characteristics. So if you add all the water at the start then you’re stuck, you can’t take water out. If you add in more water then you’ve gone over your limits, which will cause issues.
(16:55):
So it’s always best to mix it a little bit thicker at the start, that will give you more shear in your mixing process. So quality control onsite, so testing of your grouts once you’ve done all your mixing. So these are the standard testing that gets done, you got your compressor strength for your cube molds. You have a mud balance that you can do for checking your density. A flow cone for your fluid grouts, so that’s the image on the right hand side, he’s doing a flow cone check. And then you have a cup test, which is a simple little test for thixotropic grouts, where you put the grout in a cup, turn it upside down, make sure it stays in there. This is a test we do for rock bolt grouts onsite to make sure they’ve mixed it and added the right water.
(17:38):
Now we’re moving onto the different types of pumps and pumping procedures. There’s a whole heap of different pumps that you can use for pumping grouts, and they all have different requirements. Different grouts are not suitable for all the different types of pumps. So the main pumps that gets used are piston pumps. The photo on the right hand side there is showing some Clark mining piston pumps, useful for good fluid grouts, non shrink grouts. Not good for grouts with aggregates.
(18:04):
Then you have a mono/worm pump, a squeeze pump, diaphragm pumps, and then you get your traditional concrete pumps. So these are just some images there. The image on your left is a diaphragm pump, these are very versatile pumps and good for a wide range of different applications, good for fast setting grouts. They’re very simple, not much can go wrong with them, and good for the high volumes as well. So the one in the middle there is a mixer and pump, with piston pump. So these are good for your fluid grouts, they can be used for fast set grouts as well. Not good for grouts with aggregates. You can use a non shrink grout with a small sand content, but anything with a higher sand content, they’re not good for.
(18:45):
The photo on the right there is a worm drive pump, so you’ll have the two mixers on top, which are pan mixers, and then you have your worm drive in the middle. So these are good for most grouts, even after aggregates up to 3 to 5 mm, depending on the supply of the worm drive pump. The breedle pump there on the left hand side is a squeeze pump. These are good for pumping long distances, good for post-tensioning works, for high volumes and low pressures, and also pumping for long distances as well. And then you have a traditional concrete pump in the middle, these can be used for a wide range of grouts, for fluid grouts up to a grout with large aggregates.
(19:26):
And then again, on the right hand side is just another version of a worm drive mixer and pump. So with the pump, choosing the correct pump for your product must be chosen. So no point using a piston pump if you’ve got a grout with an aggregate in there, so choosing this is critical. Keeping the pumping distance to a minimum, if you don’t have to pump at 100 meters to get to the location, keep it down to as low as possible. This will reduce your pressures, your risk of blockages, also and your loss of pressure over that distance. Have your hoses running straight. Try to eliminate as many bends as possible and also eliminate reduction in hose sizes, so the more reductions, if you’re going from a four-inch down to a three and two inches in hoses, every reduction is more pressure and more risk of blockages. So if you have to have any reductions, make sure they’re a conical reduction in your hoses.
(20:25):
With your hoses, make sure you’ve got the right pressure rating on your hoses to be greater than the maximum anticipated pressure you have for pumping. It has to a hoses and connections, you have any issues you can quickly change out a hose and put in a new hose for your pump. Inspect and test your pump prior to starting, making sure everything is working and all your connections are done properly and in place. And then prime and flush the pumps with water and a grout slurry, this will reduce your pressures in your pumping lines.
(20:59):
And a critical part is the safety. Ensure the correct PPE is worn, you’ve got gloves on, eye protection, dust masks, everything like that. The alkalinity of grouts can cause skin burns, so if you’re mixing and pumping all day, make sure the guys have all their correct PPE in place. Allow for appropriate washout areas, and don’t run the pump dry with no material. This has a lot of different issues, you can cause air pockets within your line which will then create pressures and blockages, and even blow lines. And they’re also not good for your pump, running them dry.
(21:36):
Make sure all your safety connections on the pump are in place, so hose clamps and clips so you don’t have any blowouts if you’re using very high pressures, having change on there so you don’t… that all, and extra safety issues. And make sure your pumps and mixers have safety covers and cutoff switches, so if there’s no way of putting hands into moving parts and causing any safety issues onsite. Nothing you want to have is any of your guys coming home and causing damages to themselves.
(22:03):
So that’s the end of the mixing and pumping. I hope that was a little bit of an overview of the different types of mixers and pumps. If you have any questions you can either email myself directly, or if you have any questions now you can unmute yourself or type it into the chatbox. Thank you.
(22:20):
Thank you, Greg. Appreciate that. That was a good summary and overview of pumping and mixing. Often we get a lot of questions in that area, so it’s good to have something where we just cover those topics, and it does vary a lot depending on the grout and the type of application. So we’ve got a question here from Ryan Young to you, Greg. Is there a stipulated size of grout cubes for compressive strength testing?
(22:45):
It depends on the grout you’re using. If you have a grout that has no aggregate in there, the standards call for a 50 mil, is the most common, 50 to 70mm, and then there’s 75mm. If you’ve got aggregate in your grout, depending on the size of the aggregate, if you’ve got less than a five mm, you can still do 75mm cubes, but any larger, then you can go to 100mm cubes. But don’t use cylinders for testing your grouts, that can have-
(23:13):
The reason we don’t use cylinders is because it introduces shear into the test, and you’re not actually measuring compressive strength then, you’re measuring shear and tensile forces, where it’s not symmetrical for length and width. So that’s why we don’t use cylinders for grouts without aggregates, or large aggregates like concrete. So cylinders are really only for concrete. And just to clarify as well, Greg was talking about using steel molds and steel cubes. What we’re saying there is, “Steer away.” There’s a lot of polystyrene cubes on the market that you can buy, they’re really cheap, easy to fill obviously, and disposable.
(23:52):
But rarely are the sides perfectly parallel, so that’s why you get that reduction in strength, because the quality of the cube you produce is lower and also it sucks a little bit of moisture out of the surface of the grout, so you’re not getting representative strengths of those cubes as well.
(24:08):
… Also, the other issue with the polystyrene cubes is that you can’t tap your cubes, you can’t get your air out of them, you can’t put a steel rod in there to rod your grout to make sure you’ve got all your air voids out of it. So yes, the polystyrenes are cheaper, but we’re relying on that data for opening priorities, or putting light onto these areas. So use steel cubes wherever possible.
(24:34):
Got another question there from Eddie Tan, can we still add admixtures to a grout using the pumps where the cement and water is added at the final stage of the pump? So if you’re talking about the systems where you’re moving dry powders and then adding water at the nozzle, then the additives would have to be added in a powder format, which is definitely possible. We do that all the time. So rather than using a liquid additive, so a liquid superplasticiser, you’d be using a powder superplasticiser, which would be mixed in with your powder.
(25:06):
So the answer is yes, it’s still possible to add additives. They would just be in a different format.
(25:12):
You’d want to just check as well, Daniel, just to make sure that with your grout supplier, that whatever you are adding is suitable and compatible with the grout, it doesn’t have any adverse effects.
(25:22):
Yeah, typically if it’s a powder add mixture it would be added by your supplier and supplied as a pre-packaged mix anyway, I would assume. But yeah, you should always check if you’re adding anything extra. So thank you again for joining us. We may see you again in a couple of hours. If not, hopefully you can join us again tomorrow. Thank you again for your time, I appreciate it.
About this Webinar
In this webinar, Greg Sieders reviews the history of shotcrete, technology advancements and product capabilities. He then finishes up the webinar with a highlights reel of some of Bluey’s largest shotcrete projects from across Australia.
Video Transcription
(00:00):
All right. G’day everyone. Welcome. Just letting a few into the meeting room now. This is our last webinar presentation, as we mentioned previously. We’ve been doing this for five weeks and covered quite a lot of ground and a lot of topics, and really appreciate your time in joining us. Today we’re covering shotcrete materials and equipment. Greg Sieders will be presenting on that. I might hand over to Greg now and he will take us away with the presentation on shotcrete and mortars. Thank you.
(00:37):
All right. Thank you, Daniel. And like Daniel said, welcome to our very last webinar for this five week series. So it’s been a lot of work and a lot of fun and I think we’ve connected with a lot of people in and around the world over these five weeks, which has been a good little learning experience for everyone.
(01:00):
So what I’ll cover today it shotcrete materials and equipment. What is shotcrete? Shotcrete is a generic name for cements and fine aggregate concrete, which is applied pneumatically and compacted under very high velocity against your wall or your surface that you’re spraying against. There are two classifications of shotcrete. There’s dry spray and there’s wet spray. And when we’re talking about wet spray we are talking about wet spray concrete, not wet spray mortar, in the most incidents.
(01:31):
Little bit of history for shotcrete. It was invented in 1907 by Carl Akeley in the U.S., which is the very first dry spray machine. In the 1950s is when wet mix shotcrete was introduced. Also, it was firstly introduced into Australia in the 1950s, with wet spray and dry spray. And one of the very early applications was in the 1960s for the Snowy Hydro Scheme, where they use the spray concrete for tunnel lining. Now Snowy Hydro 2.0 is starting up this year in Australia, there’ll be thousands more cubic meters of shotcrete spray over that project’s life.
(02:11):
Now what is dry spray shotcrete and wet spray shotcrete? The differences between the two. So dry spray is pre-blended materials which are fed into a hopper with continuous agitation. The materials can be slightly pre-dampened to reduce your dust on the application. Then compressed air is introduced to convey the materials through the hose to the nozzle where water is added for your mixing element. Material is consolidated by a high impact velocity against your wall.
(02:36):
So this is just showing the basic operation of the dry spray equipment, and I’ll go into the different types of equipment in the coming slides. So what you have, you have material being fed into your hopper with the agitation in the hopper. And then air is fed through the bottom section of the mixer there, through your hose, and your water is added at your nozzle, like we talked about.
(03:05):
So advantage of dry spray. It’s a very easy start up and shutdown and clean up. Because you’re dealing with dry materials, there’s no mixing so there’s no clean up. There’s no wash out. You’ve only got to clean out your gun at the end of the day. You control of materials on site is very, very good, because it’s all coming pre-packaged and pre-blended, so there’s no mixing on site. And the product can be pumped long distances, both vertically and horizontally. Unlike wet sprays which are limited in their distances they can pump.
(03:36):
So wet spray concrete, not wet spray mortar. So all ingredients, including the water, are thoroughly mixed and introduced to the shotcrete pump. So generally they’ll come in the back of a concrete aggie, delivered to site. So all your water ratios, your aggregates, are already in there ready to go. And then the wet material is pumped to the nozzle, where compressed air is introduced to provide your high velocity. Where a dry spray, all your materials are coming in dry and water’s at the nozzle. With the wet spray, you’re introducing the air at the nozzle. So wet spray shotcrete is done with premixed mortar or small aggregate concrete.
(04:10):
And this is just showing the two operations there. So you’ve got your big ready-mix truck, which will deliver your wet spray concrete, into a concrete pump or shotcrete pump, and then having your air at the lines, at the nozzle to create your velocity. The image here, on your… there. That’s where you’ll be doing a wet spray mortar. So which will be a pre-bagged mortar which will be mixed and pumped through the lines and then air again to purge it.
(04:39):
So advantages of wet spray concrete. It’s little or no formwork is required. It’s a very cost effective method for placing concrete over large areas. It’s very versatile, ideal for irregular shapes and surfaces, overhead applications, and some very unique bits of work that can be done with a wet spray shotcrete. Allows for easier material handling areas with difficult access, compared to doing a form on pour concrete.
(05:05):
So this goes into a bit more detail of the differences between a dry and wet spray concrete. So with the equipment, you’ve got a lower maintenance costs when you’re looking at wet spray concrete, but a higher capital cost in the equipment. Where you have a dry spray materials, machines that need a lot of maintenance because you’ve got dry materials going through the machines, but a very low capital cost. So you can have more equipment to do the work. Mixing, you get very accurate mixing because it’s coming from a batch plant with your wet spray, and can utilised bulk premix. Now, with a dry spray like we talked about, you’ve got your mixing your job site, your batch planet and premixed mortar can be delivered in bulk dry. But it’s a lot harder to control.
(05:48):
Your output, so with a wet spray, you’ve got a moderate to very high placement rate of 3-10 cubes per hour and you can go up to 25 cubes if you’re doing robotic spraying. So with the dry spray, it’s a very low to moderate, about 1-5 cubic meters an hour. So it’s a very small output.
(06:06):
With a wet spray, you’ll have generally a lower rebound, typically between 5-15%. And with the dry sprayer, we’re talking 30% depending on the product and applicator. We’ll go into that with your product selection later on, when a lot of that can be reduced down to very low with a dry spray, depending on the product you’re using, the mix design and your nozzle person will have a big impact on that application.
(06:31):
So with the comparison there again. So with your dust, because being wet mix, there’s no powder to create dust. And with dry mix, it’s notably higher. There’s been a lot of advancements over the years when the equipment, the nozzles and the product themselves to reduce this dust with your dry spray. So they are very negligible these days, again, compared to a wet spray where there’s no dry powder, the wet spray has no dust at all.
(06:57):
So in-place quality, it’s very consistent with the wet spray because it’s already been premixed and blended. Can be variable with a dry spray because you’re having your water added at the nozzle and it’s operation.
(07:09):
So with your pumping distances, a wet spray is very limited to how far you can pump. It’s like concrete. You can only pump about 100 meters unless using very special lines and equipment are used. Where comparing to a dry spray, you can go 500 meters greater. The longest I’ve seen dry spray being pumped at the moment is about a kilometer, down into the sewer applications. And for typical applications, the wet spray shotcrete designed for high application volumes to replace your form and pour concrete’s onto slope stabilities and all of those sorts of applications. Where with your dry mix, it’s suited for low volume , stop-start operations, limited access, remote access locations. So when we’re talking about start-stop, you’re looking at concrete repair under wharfs. And I’ll cover a couple of these projects later on today, so you can get an understanding of the right environment for a dry spray.
(08:06):
So we’ll cover across the equipment here now, at the moment. So with the dry spray, there are two types of draws shotcrete equipment. You have a single or double chamber machines and you have continuous-feed machines. So with the single and double chamber, these are intermittent operation. So they’re putting on a single chamber, material into the chamber, which gets pressurised and pumped, and then you have to repeat the operation again. A double chamber allows for continuous operation. And these are used for when you’re doing your long distance pumping. These are the type of things that the guys used to pump up to a kilometer.
(08:43):
So your rotary machines. There’s two types of rotary machines. You’ve got your rotary-barrel machines, and then you have a rotary-feed bowl. So the image on the right-hand side there is your rotary-feed bowl. And these are the most common two machines that would be used for dry spray shotcrete on the market. Both use gravity feed for the material. So the material will be dropped in, these have a continuous agitation running around your bowls and these are your wear pads. So what will happen, the product will feed through the wear pads into your feed bowl, where the air is operated into there to feed it out your lines. And then water out at your nozzle.
(09:18):
So your wet spray equipment, they can be defined as a positive displacement or pneumatic feed machines. Positive displacements make up the majority of the equipment used in the industry. And there’s two types of positive displacements. You’ve got your hydraulic piston pumps or your squeeze pumps. So your image on your right hand side there show… Your top one is your squeeze pump. This will deliver a lot more consistent pressure of material to the nozzle. Whereas your pistons, depending on your mix design and your operation of your equipment can be surging, but if you’re using your pistons to deliver the material.
(09:55):
So now we’re moving into applying the shotcrete onto the face of what you need and the little techniques, basics, for applying shotcrete. So these are just the basics. You need the power, you need water, ventilation if you’re doing a dry spray into basements or underneath wharfs, so you make sure you’ve got good ventilation. Having the right amount of compressed air for both your wet spray and your dry spray to deliver the materials. And then training operator is probably the key element for a quality finish in shotcrete, for either wet or dry spray. Probably even more critical on a dry spray to get the water variables right, the compaction right, and a quality finish. And then safety, of course having the right safety equipment and PPE for the operators.
(10:44):
So spraying techniques. The distance of the nozzle to the face should be 0.6 to 1. Little bit over one, depending on the velocity and product itself. So the ultimate distance is influenced by the aggregate size and grading curve of your product and the air pressure and the speed of delivery. They nozzle should always be perpendicular to the face at all times, and we’ll cover the reason why this is the case. And once you’re spraying, you manipulate the nozzle in a circle to oval shape. As you can see there on image on your right hand side, rotating your nozzle there so you get good compaction and coverage in and around your steel reinforcement.
(11:24):
With the application, you should always commence from the ground and move upwards, and never start from the top and move down. You’re never going to hold up the product. On the right-hand side there, this is where we were talking about previously with your nozzle being perpendicular to your face. And this is one the reasons why. If you have it facing on the angle, a 45 degree angle, you’ll get extreme rebound of your product. Even on a slight angle, you’ll get a higher rebound than having it directly perpendicular to your face. And this considers for both on a vertical and overhead operation. And with rebound, the skill of the operator can have an even bigger influence as well. Your mix design of your product, how far away you are, the type of equipment and your nozzle that you’re utilising.
(12:09):
So a little bit of troubleshooting and some testing that gets carried out for you shotcrete. So with higher rebound, there’s quite a few reasons that can cause this, like we’ve talked about. The velocity is too high or too low of the material delivery. Your water pressure, again if that’s too low then you’re getting a lot of powder and no water, so it’s not going to hydrate the material, it’s not going to stick to the wall. It’s just going to fall on the ground. And then again, like we talked about, the angle of the spray. If you have the wrong angle, it’s just going to be bouncing off and going onto the floor. So with incorrect slump of a dry spray shotcrete, means you’ve got way too much water in there. It won’t hold up. It’ll just be running down and very poor quality product. If you’re getting very poor compaction, again, you’re not going to have enough water or velocity in your delivery of your material to guarantee you’ve got the good product on the wall.
(13:04):
So it’s a little troubleshooting. So for wanting to air line using a dry spray shotcrete, generally 100 CFM air pressure is required to convey the materials through the line. The bigger the line, the more the pressure. So go to a one and half inch, you pretty much double your amount of air pressure you need to deliver your materials. And water pressure for your mixing of your product. You’re generally looking 90 to around 120 PSI for your water out your nozzle to give you a good hydration and delivery and eliminate your dust on your delivery of your product. It’s good to use water booster pump to generate high pressure of your water. Now if you’re just using water from your tap, you can get surges and loss of pressure of your water, which will then affect your water pressure at your nozzle. Then it’s going to give you more dust, less compaction and cause those issues on site.
(13:52):
So with dust, there’s a few issues with the dust. You cannot have dust at the bowl, as you can see there on your right-hand side. And what can be causing this is one, your mix design of your product. Also for you wearing pads within the mixture itself, if they’re not aligned properly or they’re wearing out, this will cause the dust at the hopper. And if you’re getting dust at the nozzle, then one, it’s not going to have enough water or too much product getting delivered there to the face and causing the dust on the product.
(14:26):
So, testing. Test panels for compaction and strength are done at the start of the project, before you start spraying onto the walls. You can see the images on your right-hand side there, they’re usually a 1×1 meter box and 200mm thick. So what will happen, you have your reinforcement as you will have on your project, and have them on a slight angle to be able to spray them, you can check the compaction around those reinforcements, take cause for your strengths and the lights. You can also take in situ cause from the elements, as well, to get your in situ performance.
(14:56):
It also a good way to check your water ratio that your nozzle training is working and you’re getting a quality product on the wall. Other test methods are a round test with panel. These are generally for a wet spray concrete mix. And then there’s adhesion testing. So this should be done by cause on site, to check you’re getting the correct adhesion of your product.
(15:21):
So, product selection. So this is more around your dry spray shotcrete. so high-quality dry spray shotcrete is made up of graded aggregates, including your particle shape. So this will have a big impact on your rebound, your dust or your product performance. But your particle shape and size has an impact on your wear equipment as well, so if you’ve got a very angular product or aggregate in your mixer
(15:43):
EPA, your particle Stripe. And so size has an impact on your way of equipment as well. So if you go to very angular product or aggregate in your mix design, it will cause a lot of wear and tear on your hoses. Instead of getting 20 ton value out of your hoses, you can have them wearing out in one to two tons. Which then adds a lot of cost to your equipment and materials.
(15:56):
So it also has a big impact on your high compacted, your dense final mortar, having the right mixers on. Ultra low shrinkage and volume stability. So this is for when you’re utilising a dry spray shotcrete for concrete repair and your marine environments, you’ve got to make sure you’ve got all these sort of elements in place so you have a quality product. And having the right mixes on graded aggregates allows to have very high building on pass. So I’ll show you, this is a photo of a… or a bit of a video showing you a good quality dry spray. So very little rebound there, you can see there’s no dust at the end of the nozzle and an easy, quick build up of product.
(16:38):
So other aspects to look for from a high quality dry spray shotcrete. Low chloride permeability for your marine applications. So you don’t get any ingress of lines. You’re obviously repairing shotcrete or concrete on a marine structure, you want to make sure you’re replacing better than what was there to start with.
(16:54):
So low electrical resistivity. For when you’re doing egress currents, this was covered previously by a webinar from Daniel a little while ago, about your prepared mortars and lots.
(17:05):
Modulus comparability with your host concrete. You’ve got to make sure that when you’re shooting shotcrete to your concrete repair that the modulus of the repair material is very similar to your modulus of your host concrete. And then again, a result of all the other elements we’ve just looked at, this will give you a high compressive strength and high flexural properties, and it’s going to give you a good product at the end of the day.
(17:32):
So this is covering now, coming towards the end, some project applications. So these are some applications that we’ve utilised our dry spray shotcrete for doing marine and port upgrades. So Appleton Dock was one of the early projects we carried out with our HB55. A lot of under-deck repairs there. There was about 800 ton of shotcrete that was applied. Very limited access. You can see there, the guy standing up there, that’s good access for that one. Most of the time they’re working from their knees to be able to spray the shotcrete in there, so. Rebound on a job like this, getting down to 5- 10% in these applications. Which is very critical when you’re working underneath a wharf like this. The less that goes on the ground, the less you have to pick up, less chance of getting product into the water as well.
(18:20):
So Webb Dock was a form, the next product after doing the Appleton Dock in Melbourne. Again, a very large project doing very similar applications underneath the wharf there. So you can see the image on your left hand side is the scale of the repairs, all the way along that dock there. Again, this one was about 500 ton of shotcrete application.
(18:39):
Other types of applications, silo repair. This is a cement silo in New Zealand that was done. I think there was four silos that concrete repair was done on them. Overall about 160 ton of product were used to reinstate the performance of the silo. So you can see them breaking out the defective concrete, and then replacing, again, with the shotcrete on there.
(19:10):
And a very common application is rebuilding sewer applications as structural repair in the sewers. Not the nicest environment to be working in, but again, they’re very critical to have a high performance dry spray shotcrete in these environments. The less that falls into the sewer, the less you have to then clean up and get back at it and de-muck after you’ve done your application. So this is the new sewer refurb project, which is an ongoing 25 year program that’s been carried out. Our shotcrete’s being used on a couple of sections there, up to about 80,000 bags of dry spray product before they then put the acid-resistant coating over the top. So you can see what they started with before they started cleaning out the sewers, to the application and then your right hand side there is the finished product in the sewer.
(20:02):
And then some jetty repairs. Again, you can see different applications that you can apply for your dry spray shotcrete. That one there was getting build out about 200ml in one single pass application for a jetty repair in Queensland.
(20:19):
And that’s the end of our dry spray shotcrete. If you’ve got any questions there, you’ve got my email address down the bottom. If you have any questions, you can unmute yourself now and ask a question. Or feel free to put into the chat line there and we can answer your questions for you.
(20:35):
Thank you.
(20:37):
Greg, I have two questions. You have a slide showing the application of the dry spray. And is water booster pump a must when you do a dry spray on site? What happens if we do not have a water booster pump and they are just drawing water from a tank? Is it sufficient?
(21:05):
That’s a good question. It can be sufficient, but the advantage of having the water booster pump is that you’re going to have the consistent pressure of water. Where you’re drawing from from gravity or out of a tap and you start to drop pressure, then you’re always going to be adjusting your water at the nozzle. So you can have inconsistent quality when you’re doing your delivery, which can then increase your dust, your compaction rate and also your rebound at your face. So, having a water booster pump is a very simple way to eliminate any issues of water pressure.
(21:35):
Okay, thank you.
(21:39):
It’s not a necessity, but it does improve your quality of your product. So for a very small cost, it’ll eliminate a lot of issues.
(21:47):
Okay. And the second question I have is in the sewer rehab project, what is the diameter of the pipe?
(22:01):
They vary. The NSOOS project, I think, was a four meter diameter pipe. But they can go down to, I think, three and a half, three meters. It’s depending on the sewer application. So a lot of them are working from pontoons in there, in live flow. So you can see, if I go back to that image there. You can see on the left hand side there, they sewers are live, but they’re just doing them at low flow zone. So, it’s a very hard environment to work in and not a very nice one to work in as well.
(22:42):
Okay, thank you.
(22:43):
Thank you, Celia.
(22:46):
So again, thank you very much for your support over the last five weeks, we really do appreciate it. We hope you’ve enjoyed the series and just because we’re not doing webinars, doesn’t mean we’re not going to be here anymore. So we’re still always here for you. If you want a private webinar or you want us to present something in particular, please, please just ask. We’re more than keen to do that whenever there is interest there. So look forward to seeing you again soon when we can all travel and hopefully we can meet face to face sometime. Thank you again.
(23:18):
Thank you everyone.
Products
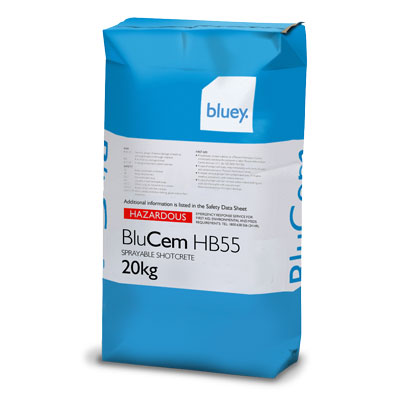
About this Webinar
Downloads & Links
Video Transcription
(00:04):
Morning everyone, and welcome to our first presentation of the day. Today we’re covering pre-packaged, fast set grouts and mortars. I know we’ve spent a bit of time previously on fast set products, but that’s mostly related to concrete products, so we’re hoping to cover in a little bit more detail today, the pre-baggage products.
(00:30):
So as I mentioned, this presentation will focus on grouts and mortars, which are mostly pre-bagged. And when I say pre-bagged, that’s either 20 kilo bags or 1.2 tonne bags preformed in a factory, and then sent out just adding water. That’s what we’re looking at today, and the fast set technology, which revolves around that. There’ll be some repetition of that fast set concrete, when we talk about your durability, but I’ll do my best to skip through that a little bit quickly and talk about specific items relating to pre-bagged grout.
(01:01):
So just refreshing, calcium sulphoaluminate technology, it’s all about rapid cure, long-term stability, has a lower carbon footprint than OPC products, highly chemically resistant, and already has worldwide usage and acceptance. But it’s all about usually that fast set cure.
(01:23):
So what are fast set grouts? As we mentioned, we’re talking about pre-packaged products. So these are flowable and pumpable cement products. They do use that CSA technology. They’re fast set, very volumetrically stable, so very low shrinkage and expansion, and really suitable for the high performance applications. Highly durable, and the grouts are typically pre-bagged.
(01:46):
So where do we use fast set grouts? We use them for very commonly, airport lighting upgrades. We’ve been using it in that application now for 15 to 20 years, bridge repairs, road and rail shutdowns, freeway under slab grounding, tunnel construction, where you need fast turnaround times and in any emergency shutdown requiring fast turnaround times on repairs.
(02:14):
Some of the advancements that have been made in these products, they can now demonstrate a hundred year design life. We talk about projects where that’s been demonstrated. They’re manufactured for reliable and very repeatable results, even though they’re pre-bagged. Suitable for mixing and pumping, and we have much greater control over the set times now, and we know a lot more about how to manage that on site, regardless of the environmental conditions.
(02:38):
And I just thought I’d summarise. When we say early strength, a common question is how strong did they get and at what times? As you can see in this table, we’re talking about quite high strengths in very short periods. So within two hours achieving up to 20 MPa, four hours, 40 MPa, 60 MPa by the next day, and then long-term strengths are somewhere between 80 and 100 MPa depending on the water addition. So as you can see, hitting 20 MPa in two hours can make the product quite trafficable very early.
(03:10):
Now, let’s just recap a little bit on the manufacturing facilities. As we’ve mentioned in previous presentations, the powder blenders have to be capable of mixing multiple small ingredients, has to be very thorough and consistent, the blending. We need a dust contamination to minimise losses, and we need to have the capabilities of putting the product into 20 kilos or 1.2 tonne bulk bags, and the blenders that you see there in the photo there, have been designed for the pharmaceutical industry rather than for the cement blending industry, just because of that need to have the more thorough mixing and more accurate measurements.
(03:49):
Quality control, as we know, is a really important part of this. We have to test the raw materials upon delivery. We have to do monthly type testing. So every month we’re going in, we’re grabbing raw materials out of the factory and we’re doing a full range of testing. The reason we do that is so that we have 28 day results and seven day results, well in advance of the product being delivered to site. And then we also do comprehensive QC batch testing on every single batch that goes out. And in that table there, is just a bit of a summary of the type of testing that we’ll do on every product that goes out. So it means that we have really good intel on the product performance before it heads out, and we understand things like how long will it take to achieve certain strengths, how long a pot life you would have at different temperatures. And we can then share that information with the contractor.
(04:39):
Talking about durability now, for longer design life. You can achieve both fast set and a durable product. This hasn’t always been the case when we go back longer term. Accelerators were used that used to impact durability, but that isn’t the case with a calcium sulphoaluminate. Previous issues associated with fast sets were cracking, both thermal because of the heat generation, plastic cracking, surface dusting, loss of strength with time and lack of protection for reinforcement. So not having that alkaline environment, which protects your reinforcing steel. And these were all the things that were commonly associated going back maybe 10 or 20 years with fast set products.
(05:22):
Volumetric stability is a really important part of these products. They actually have very low shrinkage, we’re talking less than two or 300 microstrain shrinkage in 28 days. They also have very small amount of expansion. So volumetrically they’re very stable. It’s very important though, to be able to verify that during the plastic stage of the grout, these products, because they actually use a lot more water in the reaction, during the plastic phase, can go through a little bit of expansion and contraction if they’re not formulated correctly, and if the raw materials aren’t monitored. A lot of the shrinkage data, as you would have seen from other presentations that we’ve done, tend to monitor shrinkage from either 24 hours or seven days onwards. The type of testing we do looks at the expansion and contraction during the plastic stage all the way through to setting and in 28 days and beyond.
(06:14):
So, part of the claim of having long-term durability requires a lot of testing to be done and verification of certain properties to achieve this. So as mentioned, we do know that we have very low shrinkage, less than 300 microstrains, so we avoid things like surface cracking and other cracks, which might result in a breakdown of the product. So that low shrinkage is a really important part of durability. We have a very low chloride content. And the reason we make that point is that a lot of accelerated products actually have a very high chloride content. So that’s not the case with the calcium sulphoaluminate. Actual has a very low chloride, low in soluble alkalis, and no residual sulfates. So we don’t have an Alkali-Silica reaction or concrete cancer as it’s known, and we also have a very high resistance to sulphate attack, which makes these products really high-performance, particularly when it comes to marine environments.
(07:10):
We also measure for migration of chlorides doing Nordtesting to 443, so we’re actually doing direct testing of chloride migration. Again, really important to know that. We have a high density product, low permeable, and that means that we don’t get the surface dusting and we end up with excellent wear resistance.
(07:30):
We also do long-term testing, which is a really important part for any cementitious products that often gets overlooked, but particularly important for calcium sulphoaluminates, which have Ettringite formation. And that Ettringite formation is part of the reason why you get that volumemetric stability. But if you do have late formation Ettringite, where it continues to grow over time, then that expansion can break down the cement paste. And that will end up in a reduction in strength in your cementitious product.
(07:58):
So we actually complete a long-term testing. You would have seen this slide previously and how we get there, but the testing we do goes well beyond 900 days. And we know that at 500 days, our reaction is complete and we’ve actually had strength gain, as you can see in that blue line over time. So this is the products that we supply as calcium sulphoaluminate. If you have the Ettringite formation occurring after that 28 days, it may not be detected if you don’t do the long-term testing and that can result in a reduction in strength, as you can see by the green line. So it’s important to verify this with your product, which we’ve done.
(08:36):
Just a summary of some of those longer term results. You’ve seen the short term results and the high strength gain. You can see some of the longer term results here, way out to 900 days and you can see that strength gain all the way through at the two various water ratios.
(08:55):
So looking at some of the application systems for these products, and they come in two formats effectively, a micro concrete, and a grout. So we’ll look first at a micro concrete. These are ideal for self compacting form and pour. They have very high early strengths. They’re good for mixing in a tumble mixer because of that aggregate content. These are the products that would typically get used on a lighting upgrade, but also quite good for other applications, for bridge strengthening, structural repairs and other things that require fast set. You can see the consistency here of the product. I thought I’d just include a short little video, just to demonstrate the difference between a micro concrete and a flowable grout. So there’s your micro concrete.
(09:41):
Moving on to a grout, these are far more fluid products. So they’re suitable for flowable and pumping applications. Extremely low shrinkage. Again, high early strengths with low chloride diffusion and lower exotherm and pot life than what you’d probably see out of an OPC system, believe it or not. Even though they do gain strength very fast, they don’t actually produce as much heat as an OPC system would. And just to give you an idea of the consistency here, you can see this grout is extremely fluid. Quite difficult to believe that that product will be 40 MPA in four hours being so fluid, and also have zero bleed and then reach up to a 100 MPA at 28 days. But that’s what these products can actually achieve. So you can see how fluid they are. Very good for pumping and placing, and then for all sorts of applications, for soil permeation and under slab grouting, and the like.
(10:33):
The types of mixers that can be used, we have paddle and pan mixers. These are typically used for the grouts that we saw in the last slide. So the mixing involves a stirring action that generates, let’s say, minor shearing forces. These are batch mixers, so you’re adding a certain amount of water and a certain amount of product, so you’re guaranteed to get the right water cement ratio on these. And that’s a pan mixer. We also have tumble mixers. These are like the old bricky’s mixer that you might’ve seen on a site with a bricklayer, but they come in much larger versions. You can do I think up to at least one cubic meter, maybe even beyond that. They’re very efficient in their mixing action. They’re quite mobile, really good for ports and airport projects, where product has to be mixed up to a cubic meter in a single pour. They’re quite an agile system for mixing.
(11:31):
And then also concrete agitator trucks. These often are considered when it comes to mixing. Greg presented the other day on mixing and he highlighted how efficient these mixers can be. We find that they’re probably the most efficient mixer, even for grouts without aggregate. Very high shear, very good quality control because you can control your water cement ratios, and really good for large volume batching. Also very agile as well. The only thing to be wary of with these mixers is, it is a very large volume and you want to be mixing pretty close to your source of where you’re applying it. You don’t want to end up with grout going off in your mixer. Once you get to that point, then you may start looking at things like the volumetrics which we’ve discussed in other presentations.
(12:20):
Some of the site considerations. So the flowability of a fast set product. Often when people have a fast set product, they’re quite concerned. They react nervously on site because they’re worried that the product is going to go off in the mixer. So they really rush the mixing process. It’s really important to point out that the plasticizers that are in the powder form in these blends actually take two to three minutes to dissolve. So if you don’t give the product the full mixing time of two to three minutes, what you’ll end up is a lot of the ingredients not dissolving properly. And then you might not get the fluidity you need and other properties might not be achieved as well. So it’s good to point out on site to the people mixing it, that there is time for mixing allowed, that you will have your 30 or 40 minutes of mixing time. Ensure that you have very high shear applied and you mix it for that two to three minutes, and you will end up with the best final product.
(13:15):
Also, set time is something to be mindful of. We’ve seen previously with our volumetric mixes that we can control set time by adding retarders at the source of mixing. That’s not so easily the case with the pre-bagged product. The retarders are actually blended into the powder in the factory, which means we have less control over how much retarder is added, which means we’re locked in for a set time, even though we will modify that seasonally, just so that we get the right set times, depending on the season that we’re pouring it. But it really is important to know that for every 10 degree of temperature difference, you’re either going to halve or double your set times.
(13:53):
So that’s why we have so much information regarding the product at batch time, so we know what set times we’re going to get at 20 to 25 degrees. And then if you’re on a site where that’s going to vary, particularly by more than 10 degrees, we can actually give guidance on the expected set times. There’s also the opportunity to make adjustments if that doesn’t suit as well. So environmental conditions will play a pretty big part in this.
(14:23):
Just some notes on site testing. Obviously being fast set, you have very limited time to cast and transport samples for testing. So if you’re looking for two hour results, this can be challenging. You do need to use very high quality equipment and test methods for testing these products, particularly when you’re looking at the 28 day results, and you’re trying to achieve anything above 80 MPa. The tendency is to rush the sampling, not do it properly, and that may impact the results you get when it comes to testing. And that actually goes with any testing you do on a grout that’s over 80 MPa. You really do have to be quite cautious with your casting of that. You should always use steel molds. Polystyrene molds don’t have the correct symmetry. Often the faces can be out of alignment and that can give lower results than what the grout is truly able to achieve in situ.
(15:19):
And then also a lot of this fast set work, fast turnaround, staff shutdowns are completed at night. So there’s a challenge of having to get labs to get the testing done. We also need to consider temperature. A little photo there of a couple of cylinder molds sitting in the snow, I thought would bring home the point. But the cylinder molds, particularly of a night, and if you’re in a cold environment, they can hold a lot of the cold temperature. The grout itself won’t be able to exotherm and create a chain reaction and the build in heat within those molds can stall compared to what’s actually happening in the field. And the lag in strength gain over those first few hours can be quite substantial, which means you’re not actually getting a true reading of what’s happening in situ.
(16:04):
And that’s where maturity testing might be an option on a project. We’ll talk about a project where that was applied in Melbourne in the last couple of years. And we also have already provided a full comprehensive presentation, somebody may have seen on maturity testing. But just to summarize, it was developed in the 1950s. It’s a relationship between time and temperature. So it’s the mass of time and temperature that get applied to achieve a certain strength. And if you have lower temperatures, it would just take more time to achieve that same strength.
(16:37):
So there’s a correlation between the two and we can actually do baseline testing and then provide real time results for opening to traffic. So rather than having to crush cubes at two hours to see what your strength is, and then again, at three hours, you can actually look and see the strength developing over time, and you may be ready for opening it at two hours and 20 minutes, for example. And that can save time because you can open before the next tests are done. So the maturity testing is really useful. Anyone who’s interested in it, I’d recommend going back and having a look at that maturity testing presentation. It’s actually quite comprehensive and explains all the technical details relating to that technology.
(17:15):
So just finishing up, looking at some of the applications using fast set grout. This was one of our first very large applications of the fast set grout, when the A380s were coming out. Some of you will be familiar with Sydney and the General Holmes Drive tunnels, as you can see in the photo there on the right-hand side. They were concerned that those tunnels and the roof structure, they wouldn’t be strong enough to carry the load for an A380. So as you can see in the middle photo, two precast planks were put into a excavated pit each night and then grouted into place using fast set grout. And that grout had to achieve 10 MPa in one hour so that a plane could land on it.
(17:55):
So as planes were coming in from London, first plane arriving at 5:00 AM on a Saturday morning, these precast panels had been installed. The grout had been put in place, and we were sitting there watching to make sure the strengths were gaining so that the plane could land on it in time. And that work occurred over a period of six months every night, and every night, the grout achieved its strength required.
(18:19):
Other projects such as widening works, where we need stitch joints completed, fast set grouts needed of a night, so they can be open to traffic again, even for small pours the pre-bagged grouts are really suitable for this type of application.
(18:36):
Expansion joints. So where expansion joints are being replaced, again, typically of a night, it’s a fast turnaround time. The mechanics of these systems can be grouted into place using a fast set grout, which means that they could be trafficable within a couple of hours.
(18:52):
This was a bit of an interesting one, Airport Link tunnel. Those of you familiar with that tunnel know that there’s a TBM, very long section TBM tunnel with the precast deck there, where the cars actually in the traffic, ride on. Those precast panels are all supported by a fast set grout, HE80. Had to demonstrate a 100 year design life for that product. We set up, as you can see, the mixing equipment there, which helped with the batching and mixing and the control of making sure that all the ingredients were mixed correctly and in the right ratios. The important point there was the reason they needed a fast set is because as the tunnel was progressing, they were installing these precast panels. And to traffic over the top of them and to progress the tunnel boring machine, the grout needed to achieve 42 MPa in four hours. And every time it achieved 42 MPa, then they could progress the tunnel. So it was a real saving in time for production of that tunnel because they had the faster turnaround times.
(19:54):
We had the Melbourne Airport runway lighting upgrade amongst many, many airport lighting upgrades we’ve done over the years. You can see there, the middle photo, saw cutting trenches in the runway and the bags being loaded into the concrete agitator and then poured into place in that photo on the right hand side. Asphalt over the top, and again, plane landing on that within a couple of hours of casting and that work is completed each night.
(20:23):
Roy Hill Iron Ore marine structures. Again, fast turnaround time is required. Pre-packaged grout. You can see there, and you’ve seen this in a couple of photos, a truck set up with the mixing equipment, the bags of powder on site, the liquid, all self-contained so that they can drive onto site, quickly apply the product and quickly leave site. So it becomes like a mobile working deck for completing these fast turnaround time grouting applications, and really useful where there’s traffic expected.
(20:52):
Tullamarine Upgrade project is one of the first ones where we applied maturity testing. It was very early days for maturity testing, but this is where we had to be involved in a project where bridges were being widened and strengthened. That’s fast set grout, HE80, that you can see cast on that right-hand side photo up against the existing beam, to thicken it out and provide additional strength. And again, traffic couldn’t go over that bridge until the strength had been achieved. So there were temperature probes placed in that grout to tell us and give us feedback on that strength development.
(21:34):
So, just in summary, pre-bagged products can provide a durable solution with a fast turnaround time. Pumping and placement in a range of applications is possible. And just keep in mind that effectiveness of mixing that’s required to achieve the best outcome and most consistent product and just the options available also in terms of onsite testing. I hope we’ve reinforced some of that information that we’ve already covered previously.
(22:02):
So I hope that’s given you a little bit of information about the pre-bagged products. I feel like we’ve focused a lot on concrete products. Hopefully this gives some insight into some of the other types of solutions that might be available for I’d say, smaller projects and more difficult access sites.
(22:20):
It looks like there are no questions. So thank you again for joining us. Really appreciate your time and hope to see you again later this afternoon or tomorrow. Thank you.
Products
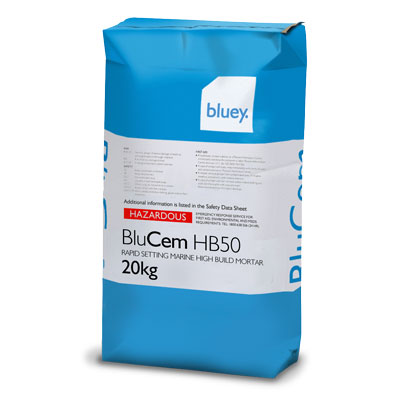
BluGeo – Ground Support Technology
About this Webinar
In this webinar, Greg Sieders examins the applications and specifications of temporary, permanent and removable ground anchors.
Video Transcription
(00:00):
Okay. Thank you for that Daniel and welcome everyone to the webinar series for Bluey Technologies. During this one here, like Daniel said, I will cover across ground anchors, permanent, temporary, and removal anchors, some new technology into the marketplace for the removable anchors. So hope you guys enjoy. And like Daniel said at any time, please jump in with any questions or type a question, Daniel can see that during the day.
(00:34):
So with ground anchors, what’s the purpose of ground anchors and the applications for the ground anchors? So ground anchors are an effective restraining device used in different types of structures. They’re generally stressed anchor, active anchor to prevent the structural movement of the basement of the building or the element itself. And typically transfer the load over the fixed length and these are known as tension anchors and I’ll cover that a bit later on about the transfer mechanism.
(01:06):
So where do we use ground anchors, both in permanent and temporary applications, as well as removables. Retaining walls, in dams, in wharves, bridges, foundations, slope stability. So you can see there a few of the diagrams use this tieback anchors underneath existing buildings, like station boxes being built in the civil industry. Also for permanent walls, so as permanent anchors in the walls and in the dams, they can be used in the dam walls and also for the spillways and also throughout the towers for wind farms and the likes as well. So it’s a very wide range of applications for all the anchors and these are just a few of where they can be utilised.
(01:51):
How are anchors classified? So anchors are classified due to their service life, their purpose, the installation procedure, and also for the method of load transfer. Permanent anchors are classified in the way that they fulfill their function for the design life of the structure and therefore they require comprehensive corrosion protection to justify the design life. So for a civil industry, you’re looking at most of the structures have a design life of a hundred years, where a commercial basement design life would be probably 50 years is the most common for a commercial building. So there’s different levels of corrosion protection that are required for those different areas.
(02:31):
Temporary anchors, they have a working life of up to two years. This is causing a little bit of conjecture in the marketplace at the moment in the civil industry where they’re doing these temporary structures for the basement and the shafts being classified as temporary anchors but have a design life of 10 years, so there’s a bit of issue back and forward between designers and authorities about putting in a temporary anchor, but justifying a 10 year design lifetime for a temporary anchor, where all the standards say anything over two years must be classified as a permanent anchor. So Removable anchors are classified as temporary anchors as well for up to two years working life, but where they need the strands either been removed or have to be able to cut through later on after their service life is finished.
(03:21):
So the type of ground anchors, typically it’s a friction type anchor, and this relies on the friction between the grout and the ground apply the forces. There’s two different types, there’s load concentrative anchors and then load distributive anchors and I’ll cover that in the next slides about how the load is transferring to the grout, to the soil and why they’re used for these applications. And both of them, both load concentrative and distributive anchors can be a tension or compressive type anchor for the load transfer.
(03:54):
So for a load concentrative type anchor, the load transfer, it’s generally done over a fixed bond length which determines… The top image there, which I can show you here, that is a compressive anchor so you’ll have a distal anchorage down the bottom of the hole and the load is transferred from the bottom over the bond length. Where the most common is the bottom one here, which is a tension anchor. So over the fixed length, the load is transferred at the start of the bond length and then dissipate down over the whole length, is there so. Generally utilised within good rock and hard rock conditions where the load distributive anchors there, you can see in the images, you’ve got different anchorage points to transfer the load over the full bond length. And then a load distributive anchor, these are generally for soft soils or weaker ground conditions so you can actually transfer the load over the full bottom length, where if you’re trying to transfer that into a soft soil you wouldn’t get any bond or skin friction to transfer the load.
(04:58):
So the transfer mechanism for these friction anchors, which is applied for the design calculation of the bond length. So this is the theoretical, that you’ve worked out between the grout soil friction and the rock and design bond length for the ground anchor. And this is actually showing you the difference between the actual load transfer and the difference between the theory and the actual. So what actually happens with a friction anchor in your top image there, you have a region concentration on the load at the start of the bond length and then as we said, it dissipates in the load to the end of the anchor. And you can see that the difference between the theoretical and the actual what happens, it actually exceeds the skin friction off the grant, but it’s only a very short distance and there’s a lot of reduction factors that are applied in the design, so you don’t have any issues or any de-bonding at that point.
(05:58):
The international standards or Australian standards that are applied for ground anchors, you’ve got AS5100 which is a bridge design, which covers the geo-technical applications and reduction factors that get applied for the skin friction and the likes. RMS B114 is probably the most common specification for Ground Anchors throughout Australia and gets used in New South Wales. It gets referred to in Queensland as well as in Victoria as well for the most comprehensive ground anchor specification for materials and application. And then throughout the rest of the world BS8081 is the British standard and Euro code are very similar and they cover both the geo-technical and the application and manufacture of the anchors.
(06:46):
Now we’ll go into permanent anchors and what the anchors consist of. So manufacturing of the anchors, and this is for all types of anchors, for permanent, temporary and removable anchors, should all be manufactured under quality systems in a controlled environment. All your components would have quality control done from your sheathing, grease, your strands and everything as well. In-house testing facilities so you can test the anchor blocks, heads and wedges to make sure that they’re all compatible to the system. And they shouldn’t be any site fabrication for temporary or permanent anchors.
(07:21):
You can see there, the photos on the right-hand side, the top image is showing anchors that have been manufactured in a factory coming on frames and then you can see the site conditions the guys have to work into. So if you were trying to fabricate anchors on site and grease and sheave them for a free length, it’s certainly not ideal and is very common for the commercial industry, that’s the anchors that get manufactured on site and installed. So you don’t have good conditions you’re not going to get a good quality anchor. In the civil industry most of them are fabricated off site in factories, like the image down below. So you can have it all done to the standards, they’re all QA’d and a high quality system is achieved.
(08:03):
So what makes up a permanent anchor? So you’ve got the steel strands there. The two most common strands are the ASTM A416 and AS/NZ strand 4672. I’ll cover that off shortly, the difference between the two strands and why you can use both of them for both temporary and permanent within Australia. They have a free length, which includes a greased section and sheathing over that section to give you a free length of strand. Your bond length with spaces so you can get grout connection between all your strands. The standards set out what the minimum gap is between them all. Corrugated sheathing, there is a single or double layer depending on the design life and the application of the anchors and I’ll show you that shortly as well. And then essentially you have your bearing plate and your head and wedges for applying your tension and your lock off loads.
(08:56):
So with the single and double sheathing, you can see there in the images, this is the make up on the left-hand side of your anchors. So you have your free length up the top, which has your sheathing and grease section to create your free length and then down the bottom, you have your bonded length, which has your spaces, that separate your strands to achieve your bond. And the image on the right here shows your single layer sheathing, and then a double layer sheathing there. The double layer sheathing is generally applied when you can’t get back to, when you’re doing a permanent anchor, the standards call for a double layer over the bonded length when you can’t actually get back to re-stress and test the anchor over the 100 year design life of the permanent anchor. Not very common, but it does happen, we’ve recently just applied that to some permanent grounding at Barrangaroo with a double sheathing layer.
(09:50):
So with the steel strands that we talked about before, all the standards within Australia call for the Australian/NZ strand 4672. We’ve recently applied quite a few temporary and permanent anchors utilising the ASTM Strand which is a common strand for the anchors that are manufactured overseas and brought in. There’s no real difference between them in the technical aspects of the two strands. As you can see there, they’re both got good tensile strength, very similar are justified utilised in the ASTM strand for the permanent applications on project key, like I said with the Barangaroo project just done with the double sheathing, we’re actually applying the ASTM strand and the way we’ve basically worked out that, we get the strands in and they get tested to the Australian Standard to meet all the performance criteria, what gets tested locally. And it justifies the fact that you can use ASTM strand for the permanent applications.
(10:53):
The sheathing specifications. So this is a critical part of the permanent anchor to justify your design life, also your performance of the anchor as well. It’s fairly strict criteria for the sheathing. You’ve got to have the right corrugations, the wall thickness, the pitch corrugations and the amplitude. So it’s a fairly complex way to get this manufactured as well. You can see the image on the right-hand side there showing the corrugations of the sheathing. It’s done this way for a couple of reasons. One is for the load transfer between the grout and the ground so you get good bond, you can transfer it over. If it was a straight sheathing you would have the sheathing pulling out and you have no load transfer to your ground. The other reason is for the application of your grout so you can basically have it spiraling up the grout as it’s getting applied and not having any air bubbles that get caught during your grouting capsulation of your anchor.
(11:53):
And then there’s a whole heap of specifications around the performance and the top of HDPE, theres quite a different materials out there HDPE and there’s a very stringent criteria they have to meet from your tensile strength, your flexural modulus, your melt flow index and your density to be classified for the permanent structures.
(12:17):
And then your anchor head protection. Most of the permanent anchors have a cap you can see there on your left-hand side, which will be filled with grease. This allows to come back to the strands later on and re-stress them over the period of life, if there’s any creep over the design life. So they can remove the cap reapply some stress onto the head and wedges to reinstate the stresses on the anchors. And this is where we’re talking about previously, where you had the double corrosion or double sheathing layer in structures where you can’t have access back to them. Then they apply the double corrosion protection over the bonded length.
(13:03):
So the permanent anchor installation. So the installation procedure for doing a permanent anchor or temporary anchor is drill and flush the hole. It’s quite critical that you do flush the hole with water. You can see the image on the right-hand side there, the amount of pressure they use to clean the holes out because you’re relying all that friction you don’t want any of the dirt of debris left in the hole down there. You want a good clean surface to be able to, when you do your grouting, to make sure you get that load transfer. These anchors can be fairly large, it can be up to 40, 50 strands anchors and putting a lot of load, so a lot of transfer to the ground, you’ve got to make sure you’ve got the best performance in your conditions. And then the anchor gets inserted into the hole. Before anything else happens on a permanent anchor, you have to do a water test to make sure you’ve got all your sheathing, there’s to be no damage through there.
(13:51):
So you fill the anchor up with water and there’s a two metre head different between the internal and the external of the sheathing, to make sure you get no water loss over 30 minutes. Once that’s been done, then you grout the anchor up and this is a very technical application for grouting the anchor because you’ve got the corrosion protection which is closed off, you’ve got to grout the inside and the outside at the same time, so you don’t get any pressures on the sheathing and have it collapsed and cause any issue. So there is quite an art form to doing the anchoring and the grouting. Once the grouts been set, come up to strength, which is generally, minimally you want to wait about three days before you’re putting any stressing loads, so you get a good mature connection between your grout and your ground. You do your stressing and lock off and then if you’ve got an exposed head, you do your anchor head protection with your caps after that.
(14:47):
So different installation techniques. Its good with these anchors, ground anchors are quite long. There’s different ways of installing the anchors as you’re going along. So the image on your left there shows the anchor is being done by crane, so they’ll have it hung up and then lowered into the hole, which is okay for doing your vertical anchors. Another way of doing it is by having the anchors prefabricated, which is the middle image, onto a spoil and then can be put in by a man or two. So this is a lot quicker, a lot less manual handling and a lot less spacing required for this installation. And then there’s the old way of having a lot of guys carry the anchor and put it into the ground, so not ideal and not for a safety purposes as these anchors are quite heavy and large, and you want to reduce as much damage and fatigue on the guys as possible.
(15:38):
So other considerations for permanent anchors when you’re looking at these as a hold down anchors or upwards anchors into basements is the other connections that go along with that. So most of these places being a permanent application you’ll have waterproofing or tank structures. So we’ve actually come up with a way to do it a per a hundred year design life waterproofing system on with connection with the waterproofing systems to these anchors. And that’s the drawing in the middle there that shows the connections. So what we do, we do a waterproofing connection, which we covered across in our waterproofing section previously webinars. That gets tested, QA tested and air tested to make sure we got a permanent seal onto the sheathing. And then we connect the waterproofing membrane up around it. So that way we’ve got a fully tanked basement with no water paths.
(16:27):
The image on the left is what not to do when you’re looking at those anchors, you got a HDPE membrane there with a permanent anchor that’s been put in place in sheathing and a steel bar and all they’ve done is painted some black bitumen membrane, over the membrane up on to the sheathing and onto the anchor. So that basement where that anchor was in, is 30 metres deep, so it’s going to have a lot of water pressure there. So once they start de-watering that you’re going to have a lot of issues of water coming up through those anchors. And then you’ve got corrosion issues as well that affect that. So it’s not only the anchor you got to look at and you’ve got to look at their whole construct-ability or these anchors into your basements and connections.
(17:09):
So now we’ll go across to removable ground anchors. So this is an up and coming sort of market within Australia. It’s very common around the world because theres a lot less space, its been around there for quite a long time. And why do we need removable ground anchors? Because we are encroaching on other people’s properties. So you’re doing commercial properties, they’re going underneath someone else’s house next door or rail authorities going underneath the rail, they don’t want to have anything left in the ground. There’s a lot of costs associated with leaving strands underneath properties. Rail authorities charge you, other owners charge you to leave strands in there, because if they want to do some excavations later, then they’ve got to deal with the issues of having to cut through strands. And this is what can happen and why its getting specified more and more to have removable ground anchors into the basements so we’re not leaving this sort of issue for future developments. We can see getting tangled up with strands can be very time consuming and expensive when you’ve got your equipment getting damaged like this.
(18:19):
So the types of anchors for the removable market. There are manually removed anchors, which are the images on the top right-hand side there. So these are removed by manual force, a lot quicker, easier and safer to do. And then you’ve got equipment removable anchors which is your loop or U-Turn. So this is a very old technology, and that’s your image there, your red casing down there. So basically, you strand loops around the bottom end of it and you need jacking forces on there to be able to remove that strand. And then your last option, which is a GRP, a cutable option. So this is not removed out of the ground, the GRP being able to be cut through you can de-stress it or leave it in the ground. So this is a same multi-strand anchor, which you can do the same as the steel, but you can leave it in the ground and I’ll cover that a little bit more shortly.
(19:12):
So U-Turn/Loop anchors. So these are compression type anchor with the U shape bend. Very old technology like we talked about and becoming less and less. You can see there, the image on your right-hand side there, the reason why they don’t get used as much anymore, because you need very heavy equipment to be able to remove the strand by force out of the ground. You lose strand properties in the bend so that you need a lot more of these do the same application and you got limited working life because of that bended application there and very susceptible to damage and then you can have grease contaminating the ground, which noone wants to have.
(19:51):
So the latest technology, which is the SamWoo removable RCD anchor. So it’s world-leading removable anchor technology. You can have multiple strands up to 24 strands with these removable systems. And like we talked about before, they’re removable by human force, you don’t need large jacks on there to do any removing of strands. And they’ve got extensive worldwide experience with over 2,000 projects worldwide.
(20:20):
I’ll cover off the principle and how these systems work. So what you have with the SamWoo systems for removable anchors, you have anchor bodies like these which are holding a single strand or double strands up to six strand anchors. And those anchor bodies are then spread out over the bonded length to transfer your load and create your bond zone. And then what happens down the bottom in these anchors, you have a barrel and wedge system, which allows you to put your tension on there for you active zones. Once you’ve finished, it’s finished its design life, you go through, de-stress the anchors, rotate the strand that will release this anchor here down the bottom and then you can pull the strands out by human force. It’s quite a simple application. There’ve been quite a few projects there’ve been utilising that recently within Melbourne and Sydney for doing the removable anchors, so theres been quite successful applications.
(21:18):
The GRP. So this is the competing markets. Instead of removing the strands, you can leave them in there using GRP. So again, this is world-leading technology for the GRP strand anchors, they’re multi-strand where traditionally you would utilise a solid GRP bar but doing that you’re limited by length, you can only do 12 metres then you have to do couplers. And when utilising couplers on GRP is not the best for doing ground anchors when they’re being fully active they don’t transfer the same load as the bar so in having the latest technology of doing strand anchors with GRP has opened up a new marketplace. They’re lightweight, they’re easy to install and there’s no removal at the end of the day.
(22:01):
So this is just an overview of the GRP. So effectively one bundle is an equivalent to a steel strand. It’s got a 220 kilo newton capacity, a breaking load, and it’s made up of seven individual GRP strands, which is seven millimetres. Very lightweight, you can see the image down the bottom here how they’re assembled, the same as a multi-strand anchor and this is just showing you the make up of those GRP bundles. This is a connection piece, which you see here, which then connects to a standard steel strand for doing your stressing, makes life easier on site for stressing with the steel strand and locking them off. Then they just de-stress them, leave them in the ground and then they can cut through later on with no issues.
(22:46):
So grouting of ground anchors. This is probably one of the most critical applications for all anchors for temporary, for permanent, for removables because it’s all based on the grout connection to your strands, your sheathing and then to your ground, which applies all your load. It’s generally overlooked and probably doesn’t put as much emphasis on this when you’re looking at that, everyone’s looking at the cost of the anchors, the application, but if you don’t get your grouting right, then there’s no point of doing your anchors. Like we said it provides all your load transfer, your bond and also your durability. You can see there, the photo of it, is a cross-section of a permanent anchor, I think that was a 35 strand anchor that was again, double corrosion protected, two layers of sheathing and you can see all the strands there. There’s no bleed, there’s no loss of contact, there’s no air bubbles at all within that grout.
(23:40):
The specifications, it’s quite a stringent specification for grouting and the performance of the grout. There actually will be tomorrow’s webinar with Dan will be covering across, will be going through this fluid grout and all these specifications around the world for RMS specifications and the European specifications, which all cover the post-tensioning and permanent anchors. But this is just a quick little overview of what you need for a permanent anchor and your performance. So your bleeding, you’ve got a less than 0.5% bleed. Volume chain, so it’s got to be very stable. Early expansion, fluidity, this is probably one of the hardest things to achieve is having a flow cone of less than 20 seconds and having it stable, maintain that flow ability for 45 minutes, which you can do that by adding a lot of water, but then you have too much bleed. So that’s one of the hardest things to achieve in the grout. And there’s only a couple of grouts on the market that allow for these application that meet all the specification for RMS and the standards out there. And then your strength for 32 or 40 MPA.
(24:54):
And that’s all, thank you for joining us today. If there’s any questions you can either type it into the chat box down the bottom, or you can unmute and ask a question.
(25:06):
So thank you again, I’ll end this meeting now for everyone and enjoy the rest of your day.
Products
About this Webinar
When Engineers and Authorities consider using an innovative product, they often look to International Standards for minimum testing and manufacturing requirements.
In this webinar, Greg Sieders simplifies the technical standards for GRP manufacture and testing, including ACI 440.3R and CAN/CSA-S806-12. He also discusses applications for soil nailing and rock bolting.
Downloads & Links
Video Transcription
This transcript was exported on Feb 08, 2021 – view latest version here.
The Bluey Webinar Series – GRP Soil Nailing & R… (Completed 01/25/21)
Transcript by Rev.com
Page of
(00:05):
Yeah, thanks everyone for joining us today. Like Daniel said, I’ll be covering a presentation today, just on the basics of GRP for soil nailing in the civil engineering industry. Oops; having a bit of technical difficulties. So what we’ll cover today is what ground support we’re talking about. So the types of the ground support we’re talking about us: soil nails, which are passive anchors; ground anchors, which can be multi-strand active anchors; and then rock bolts, which can be both passive and active anchors. So this is a way we can look at utilising the GRP as an alternative solution. And we’ll cover, of course, the testing and requirements for the GRP in these markets.
(00:52):
Now the current standard for corrosion protection for these applications for anchors. The most common is a DCP or double corrosion protection, and that you can see there on the right-hand side. That’s showing you the double corrosion protection cross-section of a rock bolt. So what you have there on the outside is the grout That’s a single layer of protection, and then you have your sheathing which is a second-level corrosion protection layer, and then grout on the inside. And this is a steel bar component, which can be also multiple stranding and the likes.
(01:27):
The other options for corrosion protection is galvanizing, which is not yet a hundred year design life. You need double corrosion protection do that. And then other options in the marketplace are doing an epoxy coating, which can give you an extended durability over galvanizing.
(01:41):
These are the international standards that, soil nailing and ground anchoring that we must referred to across the marketplaces. BS8006 is the British standard for soil nailing. 8081 is for your grout anchors or multistrand anchors. And then we have VicRoads Section 683 for soil nail walls. The US Federal Highways for geotechnical engineering is good for practical application specification. The EuroCode would be a narrow miss. There’re two good specifications there, which is R64 for soil nailing and B114, which is a fairly extensive grout anchor specification. Okay,
(02:22):
So the BluGeo GRP basics. What is GRP? GRP is referred to as glass fiber reinforced plastic or polymer. It can be noted as GRP, FRP, GFRP. So they’re all one and the same, made out of glass fibres. The last one, CFRP, is a carbon fiber generally use for structural strengthening, not for your soil nailing or anchoring market. A lot more cost. A lot more expensive in that application. For this purpose, the presentation will be referring to GRP, which is a continuously threaded bar.
(03:00):
How is GRP made? The most common practice for manufacturing GRP is a pultrusion process. And what happens there, you have a fiber bank at the back of the machine here which has all the fibers. Gets pulled through a machine key into a resin bath. And then it comes out at the other end, which will come out in different shapes. Can be made into straight bars, threaded bars. A whole range of performance can be made out of GRP. There are different resins and different fibers that are used depending on the application.
(03:30):
But the most common that gets used for the standards are glass fibers, which are 1,000 MPA. If you get lucky, we talked about before carbon fibers are generally used for structural strengthening in the reinforcement market. And then, the critical part is the resins that get used. There are three different types of resins that get used to manufacture GRP. Vinylester is utilised for permanent applications, and we’ll cover that further in their presentation about why that’s used and the testing that goes with that to justify the design. Polyester, which is probably the most common for the mining market, because they’re a temporary application, so they can be used and then cut through later on. Also in the tunneling market where you and your temporary support. And then epoxy is more utilised for your self drilling GRP anchors.
(04:21):
So these are different types of bars that get pultruded, and. The most common up to about probably 5, 10 years ago was the straight bars on your right-hand side, the. So you’d pultrude a straight bar, and then you’d sand seed it to give you your bond to your concrete. So very common in your reinforcement market. The most recent developments are the ones in the middle, and these are the bars that Bluey produces into the marketplace, which is a fully shredded GRP bar. So you can see there, the fibers are actually round around the bars to create the thread profile, where, traditionally, they would have to use a straight bar and then could cut a thread into it, which wasn’t very strong and can give you a lot of load on your left hand side.
(05:01):
And then, on the left hand side, there, you can just see different applications. You can make mesh out of the bars. You can do grates. You can do a whole heap of things in GRP. So this is just a cross section of the threaded bars, so you can actually see the longitudinal section. Only the fibers running right through the fibres of the bars. That’s giving a lot more strength, and you’re not breaking any of their threads when you’re manufacturing the bars. So it allows you to put a lot more load onto the bars.
(05:27):
So we will cover across some applications and benefits. Why do we use GRP for the applications of soil nailing and ground anchors? One is durability, 100-year design life. It’s got very high tensile and shear strength. Traditionally, people would think that GRP is weak in shear, and, probably 10, 15 years ago, it did have a weak shear strength. But with the latest design to the manufacturing processes, the shear capacity has increased. And I’ll cover that across later on. A big advantage is that it’s non-conductive, so there’s no stray current for corrosion issues for the rail corridors and into power substations. Another big advantage is lightweight. So it’s a quarter of the strength-weight of steel, but double the strength. So there’s less equipment used to handle it on site, less crane movements, less chance of any injuries or risks to the applicators.
(06:21):
So where can we use GRP to replace steel? That we talked about before, we’re looking at face and slope stability with soil nailing, ground support, rock bolting within tunneling environments, reinforcement for marine and tunneling and for bridges, and also for permanent temporary applications. It was used in those as a temporary application for the mining market, but, with the international standards, the testing requirements that have come out, there’s certainly now a permanent application that the products can be used for and are used for regularly.
(06:54):
Like we talked about, the GRP is very safe to install. It’s very lightweight. One person can handle a GRP bar quite easily. You can see on the photo there, you’ve got one person in a cherry rig putting in a 12-meter bar by hand. Where, if that was a steel bar of the same length, that would weight about 50 kilos, so you’d need a crane to move that bar up in place.
(07:18):
Like we talked about, the properties of GRP. You’ve got tensile strength greater than steel. You’re looking at a 1,000 MPA bar compared to a 500 MPA steel bar. Very high shear strength. And you’ve got a good bond stress for the grout, greater than steel. And we’ll cover that across later on in the presentation.
(07:38):
So these are just some comparisons comparing a GRP bar to your steel, from a 25 and 32 millimeter bar, which are our GRP bars that we have into the marketplace. So you can see there, we’ve got a 1,000 MPA bar, where a traditional steel bar is any 500 MPA. And then, if you look down the shear capacities, there’s two shear testings there. On a 90 degree shear, which is a knifing shear for a rock bolt application, you can see now that the GRP bar has the same capacity as a steel bar at 170 kilonewtons. In a soil nailing application, where you’re looking at a 50 degree shear, into the fibers, you actually increase the shear capacity of the GRP bar. And we’ll cover that in the testing aspects a little bit later on.
(08:22):
So, durability, was what we talked about. A 100-year design life on the GRP. You’re not relying on all the aspects of double corrosion protection to give your design life. You’re not relying on galvanizing and DCP application, where something can go wrong in the application or manufacture of the DCP or installation, to quite simply putting the bolt in the hole grout to give you your design life. Another big advantage is there’s no minimum cover requirements for GRP. So you can actually reduce your hole size. as long as you can get the same skin friction out of the smaller size hole, you can save a lot of time and money in those applications.
(09:01):
Again, GRP is non-conductive. So eliminates any stray current corrosion for your rail corridors, a lot safer to handle in those environments for the contractors.
(09:17):
So what we’ll cover here now is all the product testing that gets carried out, what standards are applied for the testing of the manufacture of the GRP and also for the testing of the GRP once the bar’s been produced. The two main standards that are referred to for GRP manufacture and testing are the American ACI 440 series and the Canadian CSA S807 and 806 for testing. So these cover out, from the manufacturing point of view, what type of resins you need to use, what fibers need to be used, as well, and also the minimum criteria for batch testing on the manufacturer side. And then, in the testing, it lays out … I’ll show you for the next slide … the minimum type of testing that you have to do on the bars to work out what performance you have out of your GRP. No GRP bars are the same. So you can’t rely on one person’s testing on the GRP bar and apply that as a rule of thumb for all GRP bars.
(10:11):
So, when the designers and engineers are looking at the design of a soil nail wall and utilising a GRP bar, then they have to refer to the testing supplied by the manufacturer for each individual bar to work out the creep rupture, the deformation, the durability performance, and the tensile and bond strengths. They all have different properties, and that’s why the testing standards are set in place to make sure that there is an even playing field, and you’re getting a high quality product.
(10:39):
I’ll just cover you through some of the critical testings. The creep rupture is one of the main testing that needs to be carried out for GRP bar. It measures the maximum long-term load that can be applied to a GRP bar. So what we’re talking about there is at, one point in its life, under load, the GRP can rupture. So you’ve got to work out to the standards where it won’t rupture. So, in the standard itself, you’ve got to have a minimum five test loads tested.
(11:04):
Then they’ll pop that out to work out where your rupture point is and where it won’t rupture. And you’ve got to hold that until it ruptures or for a minimum of 10,000 hours. So 10,000 hours is equivalent to about 13 months of testing. So it’s a lot of testing that needs to happen. And we’ve done this about four times on our bars. Every couple of years, we get them sent over to the University of Sherbrooke in Canada to get them to retest it, to make sure that we’re getting the same quality out of the fibers, out of the resins, and out of the manufacturing process.
(11:36):
The creep deformation, similar sort of testing, but it gets done to 20% and 40% of the capacity of the bar. The 40% is the maximum working load we apply to the GRP bar, and then 20% is probably the most common, lower capacity on the bar. So what we’re doing here is working at what the long-term deformation of the GRP bars is under load. So you can see there, in the graph, most of the or the deformation happens in the first 28 days, and, generally, it’s observed 5%, 10% of a creep observed after that time. Once it gets to load, it’s all then distributed out and stays stagnant on the deformation.
(12:15):
So, alkali resistance. This is another critical testing for the GRP, which is attaching measurability and retained strength in an alkaline environment. So part of the standard means you have to test in an alkaline bath at 13.5 pH at 60 degrees, and you’ve got to have it soak for three months. The standards say you’ve got to have greater than 80% retention for all the UTS and modules to be classified as a class A. Our bars on the marketplace, our GRP 60s, we get about 98% retention of the UTS and 100% retention of GFP of the modules. Some bars that we’ve tested from different suppliers, just that we’ve seen test results on, can come back around 40 or 50% capacity or even lower. So this is why you’ve got to rely on individual tests for each product that’s on the market place and take one person’s testing and apply that to every single bar.
(13:09):
Tensile strength. So this is standard testing that gets done at time of manufacture. It also gets done as local testing when we import the bars. So it’s testing the tensile strengths of the modulus and the tensile strain. So what we talked about, just like a steel product, we get batch testing done on every single batch that is produced to make sure that we’re getting the same capacity, with the minimum standards. And then, when the product arrives in the country, we get local testing, as well, to back up the testing for the local authorities.
(13:41):
The shear testing. There’s a lot of shear testing that we perform on our bars to justify the performance of the bar, because that’s equivalent to steel or greater than steel. And I’ll carry you through those products, those testings, now.
(13:52):
So the first one, which is the transverse shear, traditional testing in accordance to the ACI and CSA standards. It’s a direct double shear till failure. And you can see there, a 20 mil bar has 130 kilonewtons. 25, like we talked about, has 170 kilonewtons in its testing.
(14:11):
Too, obviously, you’re testing that So this is more for your soil nailing application. When you get your bars activating, you’re putting a bit of tension onto your fibers, which increases the sheer capacity, and, hence, you can see that the greater shear capacity in your 25 and 32 are under these 50 degree shear testing. We’ll cover a lot more of this in the coming weeks when we get into more depth about the shear testing and other test standards.
(14:55):
So the bond strength, this is testing the pullout resistance of the GRP bond to a concrete element, and it determines the bond stress between the GRP bar and the grout itself. All the testing that’s been carried out shows that the GRP bar has an equal to or greater than a steel bar in this application.
(15:13):
So this just is the structural assessment, which comes off the back of all the testing to work out our reductions factors we apply to the GRP for design, and we’ll go into a lot more detail in the coming weeks when we do a full design assessment of GRP for soil nailing. So now there’s two main standards: BS8006 and the CSI standards. So the main reduction factors are creep rupture and your durability, so these to the tests that we’ve done previously. Solving the creep rupture, we apply .6 reduction factor. So what that means, anything below 60% of load, the GRP won’t rupture.
(15:54):
And then, our durability factor, we put .65. That’s a conservative number based on the standards but, when you add both of those together, we’re using a maximum of 40% capacity of the GRP bar. So, at that point, we’ll never have any creep rupture, because we’re only at 40% capacity, and there’s still a lot more redundancy in the design of the bar, so …
(16:18):
For a GRP element, we’re looking at the design of being a ductile failure, GRP being of brittle failure. The way we work around that is that the failure mechanism will be between the grouts or interface, so the bar itself won’t be into failure, and we’ll get at ductile failure by the grout is still in place. The tendon’s generally only working at about 10% capacity in a soil nail application, so your bar will pull out of the ground well before we have any failure of your GRP bar.
(16:48):
So this is where we’re just demonstrating that. So most GRP, most , you’re looking at pulling around 150 kilonewtons. The blue line here that you cant see very well, and the green line, it’s a steel bar, so you can see there, when it gets too close to about 400 MPA, you start to put your steel bar into yield, and you get your deformation. What happens to the GRP bar? Of course, you’ve got a lower modulus than a steel bar. You’ll start to get elongation in your bar, so you get your signs of failure. You could get cracking applications, but, generally, your soil nail will pull out of your ground well before we get to that application or, getting up here, your failure of the GRP bar.
(17:24):
And that’s where we talked about the modulus for the GRP, being a more flexible bar. You’ll see a lot more. If you do have it going up to a higher load, you’ll see more deformation in your GRP bar, and you’ll see cracking in your something, and the likes. But, mostly, defamation generally occurs between your grout-soil interface. We’ve done extensive in-situ testing between a GRP and steel bar side by side to justify this and show this authorities, this is where the application is happening.
(17:56):
And that’s what we’ll cover show you here. So this is a side by side tests we had carried out. On the left-hand side, it’s showing the steel defamation. So having a higher modulus, you’re only getting about deformation in your. In a GRP, you would expect to get three or four times that deformation in your But, when you returned back to your datum point of zero, you can see both of them, they’re only having about .7 mill of deformation, which is all your grout-soil interface.
(18:29):
So what we’ll come across now is your GRP approvals. We’ve done a lot of work in Australia, working with the local authorities and train networks around Australia to get the product approved with different applications. The first one that helped out a lot was the British standard back in 2011, allowing for the GRP bars to be used as permanent applications in soil nailing. So, off the back of that, we’ve got a lot of testing and presentations to the road authorities Australia to get that updated. So VicRoads is one of the early ones that came on board, and it changed the specification back in 2012 to allow for GRP soil nailing for your permanent applications. More recently, Metro Trains and Victoria Type approved our GRP bar. You can see the certificate on the right, back in 2017. TMR up in Queensland had approvals in our first projects back in 2014. Same as DPTI, which is South Australia. NZTA, first project over there and approvals, back in 2013, which was the Waterview project, and SCIRT was for the rebuild of Christchurch. So we’ve done a lot of work down there in the earthquake zones to help rebuild some the road and the likes.
(19:43):
And then, also the Eurocode 7, which is the European code for geotechnical applications and approved the GRP as permanent applications. And I think that is everything at the moment. So, a little bit of a short and sweet brief overview of GRP into the soil nailing market. I guess we can open up for questions. You can either type a question into the chat if you have any, or, if you feel like you can email me a question later on, my email address, which is down the bottom there, you can take a note of that and give me an email. I can send you out any information that you’re looking for or have a GRP applications in the future.
(20:23):
Thank you, Greg. That was a very informative and well presented little webinar.
Products
BluRez – Resins & Epoxy Systems
About this Webinar
In this webinar, Daniel Bosco discusses injection waterproofing systems as well as recent advancements in the field. The webinar also focuses on identifying types of cracks in structures and how the correct identification impacts the selection of injection materials.
Downloads & Links
Video Transcription
(00:04):
All right. Thank you for joining us. 11 o’clock Singapore time and one o’clock Sydney time. My name’s Daniel Bosco, for those of you who haven’t joined us previously. So today we’re covering injection waterproofing. It is a topic that we have covered previously, but we were asked just to run it again, just because it is, I guess, a topic of interest. So before we came to the end of this series we thought we’d run through these one more time. And it gives you an opportunity to ask some questions as we go as well, if you like. So hop on in.
(00:37):
So getting started, what is concrete injection? So it’s a method of repairing concrete and rock defects. We can use resins and cement fluids and inject them into structures, and we can fill those gaps and then seal against air or water. The types of products that we might inject include polyurethane resins, epoxies, acrylate gels, microfine cements, bentonite, and silicones, just to name a few.
(01:04):
So we use these injection techniques in leaking slabs, walls of underground structures, piles and permanent shoring, tunnels and basements, which we’ll look at briefly, bridges and carpark decks, and ground engineering. Pretty much any type of structure really that the resin can get into. So over the years, there have been a lot of advancements in the type of materials that we use. I’ve been involved in this industry for getting close to 25 to 30 years now. And a few things have definitely changed, and changed the way we operate.
(01:36):
And one of the main things is the lower viscosity of resins available. So now it’s not unusual to have a resin with a viscosity of less than a hundred centipoise, whereas previously you were dealing with resins that were up around 500 to 1,000 centipoise. Makes them a lot easier to inject now. We have faster reaction times for water stopping so we can quickly seal against that water that’s flowing into the structure. We can use single components. Going back a few decades, it felt like we’re always dealing with two and three, and maybe even four component products to inject. It’s just become a lot simpler now that we can use a single pack product and inject, and the chemicals have become a lot safer to use as well.
(02:17):
So before we talk about injection and water sealing and the types of rectification methods, it’s always good to have a look at the defects and why they’ve occurred. And that gives us a better understanding then of the type of method we should be using to do the rectification. So just looking at cracking. All concrete is designed to crack. I mean, that’s the way you design it. It cracks in the steel, takes the tensile loads. So we usually limit the crack width to 0.1 millimeter for water retaining structures. And typically there’s a 0.3 millimeter limit for general structures. And there are standards all around the world which will cover those limits for different circumstances and environments.
(02:58):
The concrete will usually remain alkaline and protect the steel up to those crack widths. Crack widths below 0.1 typically aren’t visible. And cracks can be defined as either dead or alive. So in other words, they’re either moving and mobile and moving with loading on the structure, or they’re dead as in they occurred at an earlier phase of the structure’s life and they’re no longer moving.
(03:23):
So then, structural cracking. As you can see in the photo there, it occurs where tension is applied. Tension is occurring in the bottom part of that theme so the cracking is propagating from the bottom. Typically it’s even-spaced and evenly patterned. Rarely does it go through the structure unless it was a tensile member, but when you’re talking about bending, this is the type of cracking that you see. And it’s variable winds, so it’s wider at the surface than it is at the neutral axis or the center of the beam. So you can see why identifying this as structural cracking when you’re looking from below would be important in terms of selecting your repair method compared to a crack, which might go right through the structure.
(03:58):
Drying shrinkage cracks, on the other hand, they usually occur only within the first few weeks of casting. Moisture is lost during the curing process, and evaporation of the moisture out of it, the concrete shrinks. We’ve spoken about volumetric stability of concrete in other webinars, and the cracks there seem to be random in direction and spacing. They’re usually through the entire cross-section evenly the whole way through, and will occur due to structural restraints. So as part of identifying the type of cracking, the types of things we are going to look for is that pattern. So the randomness of the pattern, when it occurred will give us an indication, and then from that we can determine, just by looking at the surface, how that crack width propagates through the structure.
(04:43):
We also have plastic shrinkage cracking, which is typically just a surface phenomenon. Just very shallow cracks, those ones. They occur because the evaporation rate exceeds the bleed in the concrete, and usually because of poor placement techniques or overworking. So it’s important to identify this type of cracking because injection won’t apply to these. They’re just too shallow for injection methods.
(05:08):
Plastic settlement cracking. These occur over the top of the reinforcement. They appear within the first 24 hours of casting. And it’s usually caused by segregation. That’s when the aggregate fall to the bottom of the section and it’s separated from the cement paste over the top. That can occur because you’re dropping the concrete from a height, or because of over-vibration of the concrete.
(05:30):
Thermal shrinkage cracking occurs due to the concrete cooling. So when concrete cures, it forms heat. It’s an exothermic reaction. And then over the next few days, once it’s set, it’ll cool down. And as it cools, it shrinks again. So for every 10 degrees of cooling, we’ll see about one millimeter per meter of concrete in shrinkage. It’s quite substantial. When you think about concrete in a thick section might reach up to 80 or 90 degrees, it’s quite a lot of shrinkage that’ll occur during the cooling process. They usually propagate through the section of the restraint. So you can see there in this photo that the wall has been cast on the slab, and then the slab has restrained that wall from shrinkage, so we’ve got cracks propagating off the base of that wall. You can see they’re evenly spaced and you would see that they would go right through the structure, even though they would narrow as you go up the wall.
(06:21):
Crazing. Again, it’s a placement issue. Occurs due to overworking the concrete or working the concrete too late in its life. High wind across the surface. Other curing defects can cause this type of crazing. Again, it’s very shallow in nature. Looks terrible. Really doesn’t have much impact on the integrity, and injection techniques aren’t really going to be useful to you here.
(06:44):
As you can see, this is the reason why we need to identify the types of cracks before we can work out what type of repairment that is needed. I’ve just summarised those things here in a table. This table with the presentation will be available for downloading later. You can request a copy of it. But this is not a bad little summary to have in your pocket when you’re going out to look at cracks, to look at the questions you might need to ask, and the things you would look for to determine the type of cracking that’s occurring.
(07:13):
So why do we repair concrete? It’s a question that doesn’t often get asked. It’s just assumed if you see a crack or you see a leak, we should repair it. But you really do need to know why you’re repairing that concrete before you select your final method, and that’s not always clear. So there’s basically three reasons why you would repair concrete. The first is for aesthetics. So it looks unsightly, the contractor reputation is on the line, there’s a poor perception by the users that maybe the quality of the structure isn’t good. And there’s also safety and slipping issues and other things that need to be rectified. So this is more about the aesthetics of the building rather than anything else. And usually a really good reason to repair concrete, but may require different methods to if you were looking at corrosion protection, which is the second reason why you would repair concrete.
(08:01):
So this is about durability of the reinforcement. We’re sealing against water and oxygen replenishment. We want to protect the surfaces and the fittings that are inside the building or the structure. So we don’t want water tripping on to fire safety equipment and other things which might cause corrosion. We’re also possibly trying to restore alkalinity in the concrete so it can do its job in protecting the reinforcing steel. And we want to prevent contaminants such as chlorides and sulfates from entering the structure. So this is all about corrosion protection, and this is the real engineering reason why we often want to go and repair concrete.
(08:36):
The other one, which is a little bit controversially, structural remediation. So this is where we will want to go inject cracks or defects because we think that the structure might be weakened because of those defects. It’s just important to recognise that when you are injecting to an area that is cracking, that cracked area is in tension or has been in tension at some stage. Injection is not going to increase the tensile performance of concrete. It may increase the compressive performance. And it may increase some other features, such as the ability for moisture and other things to penetrate. But structural injection’s going to offer no increased tensile strength, because even if you have really high bond on that resin that you’re injecting into that tensile crack, the crack can occur adjacent to that again if it wants to and tension is still applied. And when you look at it, concrete typically is designed with zero tensile strength in mind any way. So typically rebonding of the concrete is not effective. Just an important thing to keep in mind.
(09:39):
So just in summary, why we repair concrete, again, just in a table: aesthetics, it looks unsightly; user perception, safety, corrosion protection, ensuring the durability of the structure; and then instructor remediation, trying to fill cracks that we fear may go into compression or may need some reason to be strengthened at some stage.
(10:00):
So crack repair materials that we use vary, and the selection of those will depend upon the amount of movement in the cracks. So we know that structural cracks are going to be moving a lot. We know that drying shrinkage cracks aren’t going to be moving. So therefore we may select different resins depending on the type of crack we’re trying to repair. The crack width will have an impact. The narrower the crack, the lower viscosity resin we’re going to want to select. And then of course, the big question that not often gets asked is the repair objective. Why are we repairing this structure? Is it for aesthetics, durability, or for structural reasons?
(10:37):
Crack injection requires penetrability of a resin. So we need to select the right resin for the width of crack that we have and the type of injection that we’re doing. And there might be different reasons, different penetrability that we’d see from different resins, so different things. So just as one example off that, these microfine cements are often injected for corrosion protection. So where you have honeycombing of concrete and you need to restore that cement paste, you might inject with a microfine cement, and that’ll maintain the alkalinity of the concrete. Where you have a very narrow crack, you may be injecting a low viscosity polyurethane, for example.
(11:19):
So hydrophilic resins, this is a term that you’ll hear mentioned quite often. These will react with water to form a hydrophilic compound. And what we mean is that, that cured compound will then react throughout its lifetime with water to expand and create pressure in the crack. So it relies on sealing the crack by expansion and sealing the water from getting through via compression. So it creates pressure in the joint to further enhance the seal. So hydrophilic resins are alive and active, and they’ll pressurize that seal.
(11:51):
A hydrophobic resin, on the other hand, it’ll react once either with water or with its components, and it’ll form a completely stable compound which will maintain its physical shape even when in contact with water, and it’ll repel water. So hydrophobic resins resist water. They don’t absorb moisture like the hydrophilic ones. And hydrophobic resins, such as epoxy and polyurethane will bond well to concrete. Polyurethanes will bond better to damp concrete. Epoxies will bond really well to dry concrete, and some dampness.
(12:24):
So just summarising again the things we would look for. So we would look, on the left-hand side there, to these questions of how wet is the crack that we’re trying to seal? How much movement does it have? What is the width? And what are the pumps and expertise available? And then from that, we’ll then select a resin based on the criteria that we’ve just listed out there.
(12:48):
Just talking a little bit more about crack width. So very narrow cracks. As I said, 0.1 of a millimeter, you’re not going to see. They’ll start becoming visible at about 0.2, but generally these can’t be injected. They’re just too narrow. And in most cases, the 0.2 millimeter wide crack is going to be self-healing anyway. As we mentioned, 0.1 is watertight. Below 0.2, you’re going to be pretty close to watertight as well, and very difficult to inject a resin. At 0.2 to 0.7, you need a very low viscosity resin, probably less than 200 centipoise, to be able to inject into that narrower gap. 0.7 to one millimeter, you can start looking at the higher viscosity resins. And one millimeter and greater, you will deliberately go and look for more viscous resins so that they actually sit in the crack better and don’t flow all the way through.
(13:37):
Just a little point about the penetration of a resin. It’s often heard, and I’ve said it myself, that to get more penetration of a resin, you need a lower viscosity. Viscosity isn’t the only thing that gives you penetration. I thought I’d just quote the Navier-Stokes formula here, just to make a point on what is successful injection. And you can see there that there’s a formula for flow being Q. And the viscosity is on the bottom side of that equation there. So in other words, if I halve my viscosity, I’m going to double my flow volume. So there’s a linear relationship there between viscosity and flow volume.
(14:16):
When it comes to pressure though, it’s pressure squared. So if I double my pressure, I’m going to have four times the injection capability. So that’s going to give me much more improvement than lowering the viscosity. On top of that crack width which, okay, we don’t normally have much control over that, but for a wider crack, if it’s twice as wide, you’re going to get eight times the amount of penetration. So it’s just important just to have a feel for those ratios so that you know, if you’re not having success in injecting, getting to a low viscosity might help you to a certain extent, but then you’re going to have to start looking at increasing your pressure to give you more penetration. Of course, limiting that pressure so that you’re not damaging the structure in all cases.
(14:59):
Crack repair methods and equipment, just briefly touching on some of this. So water stopping is usually done by a PU resin with high foaming. They’re usually suitable for ground stabilisation. Very fast reaction with water. Don’t be confused by the statement, “Very fast reaction.” There are lots of resins out there that will react very fast. What you actually need is a product that forms stability and structure very fast. So not only should they start foaming quickly, but they should actually form a structure that will carry some load of resisting water very fast as well, not just foaming. So that’s a really important feature.
(15:35):
Crack sealing and injection resin properties. They should be flexible. Low foaming is good because we don’t want lots of little air pockets and voids that can join together to allow leakage later. And we want the crack injection to be a longterm seal. So we’re looking at more of a long-term sealing solution, particularly in a dynamic environment with these crack injection resins. So there is a bit of a difference between water stopping and crack injection, and you should get advice on which is the best type of resin to use for those two situations. One resin won’t fix all your problems. That’s probably the first thing to keep in mind.
(16:11):
So injection methods that we use. We can use gravity techniques in very wide cracks. We can just feed the resin from the top. We can do surface mounted injection, as you can see in the example A there, where we’ve got surface packer as epoxy to the concrete, and we’re going to inject through those. And then you have high pressure injection with packers inserted as well.
(16:32):
The types of injection packers. Obviously the surface mounted, which we saw in the last slide. We have Knock In packers, which is that bottom gray one. And they can just be tapped in, create enough of the seal for low pressure injection. We also have mechanical screw in packers with either a clutch or a nipple head, which are those top two. And they’re for more high pressure injection, where we’re trying to get into narrow cracks and when we’re increasing that pressure of resin for penetration.
(16:57):
The types of injection equipment vary. The first photo there, low pressure injection. We can use hand cartridges. We can also use the gravity feed bottle just to squeegee that liquid in. It steps up then to small injection pumps, which are high pressure with low volume for very refined cracks. And then we move over across to the large injection pumps, which still have high pressure, can have slightly higher volume. Even though it says low volume, it’s higher than the other types of hand pumps. And the volume starts moving up with the bigger the waterproofing problem we have, effectively, and the pumps get bigger in that regard.
(17:34):
Just some of the little procedures. Gravity filling: pretty self-explanatory. We V out the crack first. And as you can see in the photo there, we clean it out with air and water. And then we just flood the crack with the resin and keep filling it until that resin penetrates through. And there are some really good resins out there with extremely low viscosity. They’ll penetrate really well into cracks of around a millimeter or so.
(17:59):
Again, the surface mounted packers. We can use these for vertical or horizontal surface cracks. We V out the crack, we clean it with air and water, we surface mount those packers using an epoxy, and then we seal the length of that crack using an epoxy paste. And we use low viscosity injection resin to put into those packers and fill that entire crack.
(18:24):
We then have pressure injection as well, which requires drilling at 45 degrees. We clean the holes. We typically are drilling about a hundred millimeters away from that crack at 200 mil centers. We’re drilling from both sides of the crack, because we don’t know if that crack is going vertical, as it’s shown in the photo there, or if it’s at a 45 degree angle. A sheer crack could be actually transmitting at 45 degrees and by drilling from one side, you may not actually hit that crack.
(18:50):
So it’s always important to drill a few holes first, install some packers, and check that you’re getting resin into that crack before you go ahead and drill the entire length of crack. So you just want to make sure that system is working. For wider cracks we might epoxy-paste the surface. Typically we like to, at a first point, leave that crack open so that you can actually see the resin coming out and you know that the resin is traveling there. So that’ll just depend on the circumstances as to whether we put that epoxy paste on the surface or not.
(19:22):
So just a final note on water stopping. So we use water stopping that’s higher volume injection. We’re injecting behind the structure. We can use that on TBM segments, gaskets, and ports that are in the segments as well. We can do this for pile walls, rock faces and cuttings, and any underground structure where we’ve got a large volume of water coming in. So we’ll drill holes typically right behind that concrete, we’ll inject resonant, fill the void, react with all the water, trying to get close to the source of the water, and cut that off with a fast-setting resin.
(20:01):
So as I mentioned, that requires higher volume to resist the pressure of the water inflows. The fasts-setting resins we’re injecting behind the structure at the source, and we need bigger spacing of packers away from the inflows. And I’ll just show you a little video here, just to give you an example of the type of pressure that you could be resisting. And as you can see, just away from where he’s installing that packer, there’s a large amount of water coming in from the joint between the two segments.
(20:34):
And notice he’s not drilling where that water is coming in. Often you see the first reaction is, “There’s the water. We should go and inject right there.” But it’s often best to move away from where that water’s coming in, closer to where the source of the water is in the rock, and inject there and fill that entire void behind. And then you’ll see that seal up. Once you install that packer… In that particular case there, it was a job done recently, we started pumping and within about 20 minutes that leak had sealed up. As you can see, injecting a fast-reacting polyurethane will give you a very quick response in terms of sealing, if you know where to inject and you do the job well.
(21:16):
So just in summary. First of all, as I mentioned, you should establish the reasons for injection before you start. Is it aesthetic, corrosion protection, or structural? The reason why you’re injecting. You have to understand the type of crack and the cause of that crack before you dive in too deep. Without knowing that, you might be drilling in the wrong place, you might select the wrong resins, you might just not be doing the right type of repair for that structure. And you should also select the right materials and method for the work. And we’ve given you some tools there to be able to ask the right questions in terms of selecting that resin.
(21:49):
So that’s it on cracking injection. Thank you for sitting through that. If you have any questions, I’m willing to answer. So I’ve just had a question come through.
(22:02):
[crosstalk 00:22:02]
(22:04):
If we complete injection at the connection of D-wall and basement slab, do we need to inject along the D-wall or at the joints in the D-wall? Really, really good question actually. We’ve completed a lot of work in this area. And the reason that you get leakage in that area is because D-walls are cast in advance, maybe six months in advance of the base slab being cast. So then they excavate down and then they cast this base slab. And that base slab can sometimes be quite a large span. So being a large span, it’s going to shrink a lot back to the center, and you could end up with quite wide gaps where the base slab meets the D-wall. And, typically, from what we’ve seen, the type of waterproofing detailing that occurs there is usually pretty weak, so it allows for a lot of water to come in. So, therefore, this is a really common area for the water leakage if the waterproofing isn’t done right.
(22:57):
So there’s a few ways of approaching this. You can drill and intersect right at where the slab meets the D-wall. So the slab might be, say, half a meter thick, and you might try and intersect halfway down. The way we like to approach it is to prompt. First of all, we like to drill so that we’re actually having the hole on the other side of the slab coming out underneath the slab. So if the wall is here, you want to aim so that you’re drilling at 45 degrees, and you want to be coming out at the bottom of the slab at a hundred millimeters in from that wall. And you want to be injecting into the soil where those two meet just below.
(23:41):
And what’ll happen is, as the water is flowing into that joint, it will bring the polyurethane with it. The polyurethane will react and seal right at that intersection point and through. Then what that does is that gives you another opportunity to come back and inject with a hydrophilic resin actually into your joint. So then you can actually intersect at 45 degrees and inject with a hydrophilic resin. So you can actually… I think someone may have made that point for me, so it’s a two-part system. So yeah, I think actually, well spotted in advance there of where I was going with that.
(24:18):
So we start with the hydrophobic resin behind the crack, behind the joint, and then we’re going with a hydrophilic right into the joint. And that’s a two-part system, exactly as pointed out there by one of our participants. So thank you for that. I hope that makes sense, but I’m happy to answer that more directly if you want to shoot me an email, and I can draw some little sketches for you to have a look at on how we approach that.
(24:44):
All right. Yeah, I guess that’s it. Thank you very much for joining us today. Very much appreciate it. Tomorrow, I might even click the whiteboard on and we can drop some of these solutions if some of the questions like this want to be asked. So please come back and ask questions on this topic or any other topic that we’ve covered so far over the last five weeks. Really appreciate it. And hopefully we do. We see you at nine o’clock tomorrow morning Singapore time, or 11 o’clock for the second session. Thank you for joining us today.
Products
About this Webinar
Video Transcription
(00:00):
All right. So, it sounds like quite a few have joined us. We’re up to 70 participants at the moment, which is nice to see it. I’d say we’ve got a special guest joining us, Max Simmons. Max will be joining Greg and presenting on epoxy resins in civil infrastructure. So, Max I’ve known since 2003, I think. A pretty long time. He’s been around Bluey pretty much the whole time we’ve been around. We’ve been supplying his product. He’s, pretty much, I would say, the father of the epoxies in civil infrastructure and building work in Australia. He’s been working with them since the 1970s, which seems like a pretty long time ago. He started a company called Epirez, you might know of, in the eighties. And has been working ever since with those products. So, we’ve partnered with EpiMax since 2003 on some of the largest infrastructure projects in Australia.
(00:58):
And we look forward to Max presenting today and telling us a little bit more about epoxy technology and how it works and how it can be applied to large projects. So, I’ll hand over now to Greg and Max who are going to provide the presentation today. Thank you, Max. Thank you, Greg.
(01:17):
Thank you, Danny. And I’d like to welcome Max Simmons as well. What Daniel said, we’ve been working with Max at Bluey technologies for… Since 2003. I’ve personally known Max Simmons for well over 20 years and been dealing with Max and EpiMax and Epirez products through my family business with my father. I’m applying your products for coatings and the likes of. It’s been a long time and always been a lot of fun working with Max, developing new products in this field of epoxies. So, what we’ll do is we’ll cover across the epoxy resin technology and how it’s using the civil infrastructure industry. So, handing over to Max to give us a bit of an overview of the history of epoxies and how the chemistry of epoxy works in the next coming slides. So, Max, if you could give us a quick one run through that’d be great.
(02:09):
Thanks Greg. And good morning everyone. And thank you for your kind words, Daniel and Greg. The relationship that EpiMax has with Bluey is very important and very important to us. It’s a big part of why we do what we do. We love working with you and really it’s a seamless relationship. And I have to thank you Daniel for seeing the opportunities originally because we have always been a customer of yours in the true sense. And I appreciate them. So, in terms of epoxy resins, they are origin… And that’s a generic term. There are various different types of epoxy resins. But they’re originally developed in the 1930s by two sets of people. There was Pierre Castan in Switzerland, who was looking for some new ways of fixing teeth. And there was another gentleman, Sylvan Greenlee, who worked with Joans-Dabney, a company in the USA.
(03:01):
And they both commercialise them and they… Well, they both patented them. They didn’t get to commercialize them at that point in time, but working with their independent operations. Pierre Castan ended up working for Ciba. And the two organisations, Ciba and Joans-Dabney both patented the idea.
(03:18):
So, you had two patents going. One out of the US and one out of Switzerland but commercial development really didn’t start until after World War II. World War II got involved and they put everything on the back burner. And today epoxies are used in a variety of applications and industries. It’s just so diverse. And we’ll go through some of the background of epoxies and why there are so many different uses.
(03:43):
What do we mean by epoxy? Well, what we really mean is… We mean it’s got an epoxy ring and there’s a polymer portion, which is if you think of it as a chain. And there’s another epoxy ring at the other end.
(03:55):
So… And there’s a number of repeat units in that polymer portion. And the more the repeat units, then the higher, the viscosity of the base resin. The shorter of the chain, then the lower viscosity. But they’re the most commonly used family of thermosetting copolymers. There are two components. So, you react to the epoxy with a curing agent, A plus B, mix it up, goes to C. Which is then a higher molecular weight and a solid and goes hard.
(04:23):
The important thing about that reaction is that there’s no release of volatiles during curing. It’s an addition… It’s called in chemistry and addition reaction. So, the two components, both the epoxy and the curing agent become an integral part of a new molecular structure with inherent stability. The actual epoxy ring is… The definition of that is a three membered ring. And there… It’s got an oxygen atom… Remember from school, university chemistry? Connected the two carbon atoms and that’s really a derivative of ethylene oxide. So, ethylene oxide is a key precursor of the whole process of making a variety of epoxy presence. Some of which are liquid, some of which are solids.
(05:08):
So, there are broadly two areas of application. Non-reinforced that is non-fiber reinforced epoxies. And that can be in adhesives, coatings and grouts. And then reinforced the epoxies for aerospace, wind turbines, circuit boards. So, that’s where they’re reinforced with things like carbon fiber, fiber glass… A whole heap of things to gain extra strength. So, these wind turbine blades, in that slide, they’re all made out of carbon fiber epoxy. Then there are other developments more recently. Novolac resins. Specialty forms of Novolac resins by Novolac. They’re epoxies but instead of just having two epoxy groups per molecule, they have three or more. Four, five… So, the cross-linking density gets high and the thermal and mechanical strength gets high. And then today we’ve got water-based technology and there’s still the original solvent based technology using solid grade resin. They’re dissolved in powerful solvents.
(06:08):
So, Max, just quickly, how does an epoxy resin differ from a polyurethane resin or polyurea resin? Are they all in the same family or a different family?
(06:16):
No, to… Good question. Totally different chemistry. Polyurethane resin, polyurea… They do not have epoxy groups. They do not react with amiens, per say. Using polyols, using isocyanates… So, using a totally different range of chemistry. And they have their… Polyurethanes can have their special attributes. So, in the aliphatic polyurethanes, they’re great for external use, coatings, final coatings and architectural use. And polyureas can be fast setting, but there’s… But they’re totally different. So, there’s no connection. And you don’t use any of the epoxy components in, in polyurethanes or vice versa.
(06:56):
Okay.
(06:59):
So today, where I… And I say… Use the term here in epoxy resin most… We’re really talking about formulated products because we’re not just taking the basic epoxy resin and using them in these applications. We are formulating them. And I’ll talk a little bit about that further along. But we’re taking the base resin and we’re modifying it and doing things with it, reacting with other things to get specific performance.
(07:24):
The aerospace area is a big chunk of it. And maybe not right now with coronavirus and the airlines sort of in the doldrums. But both the Boeing 787 and the Airbus A350 are basically using carbon fiber epoxy for the fuselage and the wing systems. And then as I said about wind turbines, automotive usage, electronics, marines… A lot of marine, both in ship construction and also in marine jetties, offshore structures, sports and leisure… And the area that’s really most important for us, I think in Australia, certainly with Bluey, has been construction. Both in new construction and renewal and maintenance. That’s a big area of opportunity for us historically.
(08:08):
Yeah. And just on that within the construction industry, we utilise the epoxies. Another element is our fiberglass bars that we use. Epoxy resin or vinyl resins for our fiberglass bars. This is all out in market as well. So, to it’s another industry. Another type of epoxy. Also using the water and wastewater for the GRP pipes.
(08:29):
Right, right. Yep. So, we talked about the typical characteristics. And we said, it’s two components, A plus B goes hard, gives C. In the process there can be heat generated. And that heat, that’s generated really indicates that it’s going to a more inert chemical state. And that’s what gives it the chemical resistance as a traditional epoxy. They possess excellent adhesion to most substrates. And why do they do that? They do that because they’re polar in nature and they can easily form Van der Waals forces between the epoxy and the substrate. It’s the Van der Waals forces that really account for adhesion. Good mechanical strength.
(09:13):
As I said, good mechanical strength because there’re no solvents in them. Nothing evaporites. They’re fully cross-linked structure. Low shrinkage… There is some shrinkage, but it’s generally in the liquid stage only. So, it’s before it’s cured. And before it starts… If you get shrinkage in the solid stage, you’re obviously going to build stresses into it later. Such as… That can happen with polyester. If you bui;d stress into it. So, it doesn’t have the impact resistance that he epoxies do. Excellent water, chemical and heat resistant and versatile. And that’s a key component. This whole issue of being tailor made. Formulations can be tailor-made. Application engineering and solving problems which we’ve done with Bluey over the years and we really enjoy doing that.
(09:56):
So, what’s in a typical formulation? Without getting too complicated it’s: You take an epoxy resin that could be varying molecular weights, varying viscosity, varying features… It could bifunctional. It could have two epoxy groups or it could have more than two. A curing agent, something that reacts with that and forms that cross-link structure. Some sort of reactive diluent to change the viscosity. You might include some accelerators, some pigments, some fillers and some thixotropes. So that’s sort of, what’s in a typical formula but you end up with a two part product. You’ve got the epoxy side and you’ve got the curing agent side and there might be some of those things in each of those or just in one of them. But they’re kept separate until you go to use them. When you use them A plus B guys, obviously.
(10:42):
So, Max, we’ve talked about this. There’s a lot of suppliers, a lot of epoxies on the marketplace at the moment. What differentiates the epoxies in… Out there from a cheap epoxy to an expensive epoxy? Why do I differ? I know you got your formulation basics there but why do you… What are you not going to do the cheaper end and what do you get for the high quality resins? And what makes them different?
(11:05):
Well, in terms of any product development or any particular application you really got to say to yourself, “Well, what do we want to achieve? What is… What does the end user want out of this product?” And one of the things is, generally, most end users want is insurance. They want confidence that, in terms of the product itself, it’s going to be fit for purpose and last. Now, how can you cheapen epoxy formulation? You can put things in that list there that are not safe. Just take out the third one down there, reactive diluent. And you could remove that and put in a non-reactive diluent. Something that floats around in the cured structure eventually, but really doesn’t take part in action. On the other hand, it’s very cheap. So, it cuts the cost.
(11:49):
That’s one way you could do it but of course there are the ramifications that… Of using non-reactive diluents in a product today because they will eventually evaporate out of the system. So, there’ll be a weight loss, there’ll be voids in the system, it won’t be water proof and there’ll be… it won’t have the chemical resistance, the mechanical strength it originally had. So, there are cheap ways of doing things but at the same time… But we’re not in that business because we want to focus on our particular section of the market, which does require good insurance.
(12:22):
Okay.
(12:25):
So, typical things that we get involved in are structural grouting under columns, under rotating machinery especially because that’s where he epoxies come in. Where there’s dynamic loads and you’ve got vibration. Water… The water industry is becoming a more important area for the whole world, especially in Australia, making sure we take care of that natural resource and protect it and keep it fit… Again, fit for drinking, potable waterproof. Floor coatings and toppings. So, concrete’s a wonderful material. It’s everywhere and it’s fundamental to our business and fundamental to our past and our future. However, concrete has some limitations chemically, mechanically and sometimes it can look pretty ugly unless you put a nice coating on the top to delineate things in a manufacturing facility. So, that’s an area that’s important to us. Crack injection… Greg, you and I were in a crack injection, right? For the… After the earthquake there.
(13:22):
And you’re involved in getting a lot of our product specified there for repair of concrete structures that have been damaged by the earthquake, right?
(13:31):
Correct. Yeah. So, we’ve been supplying the low viscosity EpiMax 111 epoxy for about five or six years. Repairing cracks in all the buildings over there in Christchurch. it’s been very well accepted over there as a very high quality product and performing very well. And we’ll cover the 111 in a coming slide about the performance of the product as well. So…
(13:55):
And then the last bit of that it’s really… They often go together crack injection, crack repair, structural concrete repair and mass concrete repair. Where we’re talking about repairing concrete, especially in wastewater plants, in earthquake damaged areas… Where we’re talking about mass repair of concrete using professionally applied and professionally formulator products to repair the concrete. Thanks Greg.
(14:22):
Okay. So, I guess what… We’ll just give you a quick little overview here is where cement and epoxy grouts differ in their performance and their applications. So, just a quick little couple of slides to cover both products just so you can understand how they differ. So, with cement grouts, they have a very high compressive strength like the epoxies as well. They typically will have a lower chemical resistance being a generally OPC based cement grout.
(14:49):
There are different types of cement binders. They can increase your chemical resistance but epoxies inherently have a higher chemical resistance. Cement grouts will have a lower tensile strength in the grout and that’s why we utilise epoxies like 111 when you’re doing a crack repair to increase the tensile properties of that strain of that structure. Generally the epoxies do have… Oh, sorry the cement grouts do have a slower rate of strength development compared to the properties. They are more economical in their use per liter. The cement grouts have a lot easier mixing and application requirements. So, with the cement grout, gently just adding water to your product to mix it up to give you a final. And you have a range of water additions that you can add to give you different flow characteristics and also different strength requirements. So, it can dry packing up to highly fluid grouts.
(15:43):
A cement grout will have more critical curing requirements. So, you will need curing agents to stop… To help with your shrinkage. Also surface cracking and the likes. You have a long durability in general environments. So, the epoxy or the cement grouts will give you an alkaline environment to passivate your steel for your concrete repair applications. And generally a good… Generally durable environments. And probably a wider range of applications using cement grass then epoxies of properties are very specific for their application requirements.
(16:15):
Your epoxy grouts… So, like we talked about they all have a lot faster strength development. They’ll have… They can get up to a hundred MPA in 24 hours, with some epoxies. Very simple curing requirements. So, I can mix A and B together. And like Max talked about they’re fully cross-linked. So, once they’ve mixed correctly, part A and part B, you’ll get C as an end result.
(16:38):
They have excellent adhesion. Generally greater than the subject that they’re adhering to. That will have a greater tensile strength than concrete. Effectively a non-shrinking product. Where difference in the grouts at different levels of shrinkage compensation in them. Epoxies are inherently non-shrink. Very high chemical resistance and they’re also better and stress distribution under dynamic loads. More critical mixture requirements. So, you have to mix part A and part B. You can’t lock with water. With cement grout you have a range of water additions you can put into your product to give you different characteristics. With epoxies they’re very critical they need to be mixed, part A and part B. And if you put not enough part B in there your product won’t cure. And those are the consequences that come which will effect the chemical makeup of that product.
(17:29):
They are a higher cost products. So, more specific applications and you will need more experience applicators for doing the epoxy… Because of the mixing requirements and the application requirements for epoxies. So, I’ll hand back over to Max. He can give you a little bit of an overview of EpiMax, the company. And the history behind EpiMax. And a few of their products he’ll cover across, which are mainly involved in the civil applications.
(17:59):
Thanks Greg. So, as Daniel explained & Greg explained, I’ve been in this industry a long time, both here and the US and I’ve always been involved in looking for opportunities to advance the development of the epoxy generally. And really that ties in with the term application engineering. Understanding what’s involved and how to get the most out of a particular product in the field because our products are made in the factory but they need to end up in the field and they need to be able to meet the application requirements and ultimately the end user requirements that make most sense. So, that’s the background of the company.
(18:38):
I also wanted to use the latest technologies in resin advancements. There’s been significant advancements in the last 15 years, 10 years… There’s always something going on that’s new and some of those are prohibited from a cost point of view in mainstream applications. But there’s all.. There’s new applications… New products such as the new Novolac that we can use in coatings and also ultimately in grounds. So, you’ve really got to understand not only the products but how they’re used and where they can end up and how they can solve problems for end users. That’s really our goal as a company,
(19:17):
Product range. Epoxy coatings, some of those are solvent free, some of those are water-based, some of those are solvent based. The water industry we talked about protecting the concrete from both potable water, which really needs to be protected if you think about it. Because you can have mold growing on concrete in a reservoir. And that mold is effectively in contact with the potable water and people are drinking that water. So, we need a lining on the inside of that reservoir to defend it. We’ll talk about that. One of the first areas we got into it that was with Bluey. And then wastewater. Where we’ve got possibly hydrogen sulfide and other chemicals… Aggressive chemicals that can damage the concrete. Precision grouts, yes. Talk about that. And extreme environment epoxy coatings. And they include the Novolacs I’ve talked about. And then green certified more and more people are interested in what’s going from the garbage can to the sky as products cure.
(20:14):
They want to make sure that they’re not releasing VOCs. Both when they come out of the containers, before they’re mixed, during mixing and during application. So, in Australia and New Zealand, there’s a certification process for having products certified to have low or zero VOC which we can achieve in our coatings. Thanks, Greg.
(20:36):
One of the products you talked about briefly there was 111, very low viscosity product. Low viscosity is not the only thing we need we also low surface tension. We want something that’ll flow well into a structural crack, a crack in a concrete structure, but cure… Not to be so… Not to just simply include solvents and hydrocarbons to reduce the viscosity because they will eventually evaporate. They’ll evaporate out of that right out and then you’ll have the problem we talked about earlier. Where you’ve got voids in the repair material and it’s really not doing its job.
(21:08):
So, you want it to be solvent free, your solventless, good mechanical strength, suited for structural injection and also potential in that same area of grouting of bolts and dowels, and restoration of damaged concrete. And we’ve done some interesting projects in that area with Bluey too. Thanks, Greg.
(21:27):
This was a product that we saw as an opportunity. Segmental Construction Adhesive 575CG. It’s a non-sag product. So, it’s a paste adhesive, if you like. It’s a one-to-one mix ratio. It meets the compression, shear and tensile bond strength of the international standard for segmental bridge construction, viaduct construction. Those precast elements you see on the right, in that photo, they’re all basically held together with cables, but as they are brought together, there’s epoxy in there that acts as a lubricant during construction and also acts as a firm grout to make sure the load is distributed over the whole area and also a waterproofing system. At the same time, Kevlar reinforcement is a useful add to that product. This particular one we had a couple of different versions. We had a summer and winter grade. But again, that was a product that really has high specifications, high mechanical strength requirement but we saw the opportunity for it on that project, which we’ll talk a little bit about later. Okay.
(22:34):
480 is our precision grout range and we’ve got a variety of different range work time pot life length, good flow properties, easy mixing, low exotherm. So, the amount of heat generated during a cure is not excessive. But most importantly, high mechanical properties up to 100 MPA, that sort of thing. So, it’s a good product. And it’s specifically designed again for good flow and we have a long work time option for high temperatures to still be able to flow into small voids. Greg.
(23:15):
Okay. This is where we’ll just cover across a couple of those products where we’ve worked together with EpiMax to develop solutions for the customers and product specific applications. So, the first one that Max talked about earlier was the Urban Superway project, which was a fairly large project in South Australia built probably about eight years ago now. I would say. 2.8km elevator roadway. And the challenge, for both of EpiMax and Bluey, was to develop a special epoxy to bond the segments together during the application. Which had a very high specification to the FIP/9/2 specifications and a very demanding application. One in the conditions that we’re working with and then also down in Adelaide, over a long period of time, you’ve got summer conditions then you’ve got your winter to conditions. So, we were dealing with temperatures up to 45 degrees during the summer and down to five degrees in winter time. So, we had to develop an epoxy that was adjustable to suit their requirements.
(24:19):
Like Max talked about the function of the epoxy for this construction process. It’s joining the surfaces of the precast elements together. Also ensuring the compression, then shear is transferred through these segments when they stretched out the post-tensioning cables. And it also acts as a lubrication while they’re doing the erection. So, basically you can see, on your face there, this is where all the epoxy was applied by hand to each and every single structure that was lifted up there.
(24:48):
So, the solution was the 575CG. It was designed and developed with the client in mind. And we worked very closely with the client to modify the product, to give us different work times. They wanted a very long pot life but then they also want it to set very quickly after they had that pot life application. So, it was modified to reduce the wastage on the project. They calculated they would have 40 to 50% wastage at the start of the project. We were working with the client, reducing the kit sizes, the working times and the pot loss. We’ve got that down to under 20% wastage over the project. So, it worked as a good result for the client.
(25:30):
The next one, I guess, Max, you want to give us a little bit of rundown with the Vale project that we…?
(25:36):
This was in New Caledonia at a nickel mine. Probably several billion years ago. A giant meteorite landed near New Caledonia and the place is full of Nicole. And here we have a situation where there’s a new mine going in and they’re all set to go. They had these FIP tanks there that you can see. It was more than that too. That unfortunately didn’t have… Formed a solid foundation with a solid connection with the base. So, they had gaps underneath there that really meant that if they fill those tanks, they would no longer be suitable because they’re liable to crack because they weren’t supported underneath. So, they wanted a product developed in very a short time that had sufficient work time, low viscosity, high strength, to be able to be poured into the fender of those tanks, through a funnel, you see that, and then extend out and fill out the gaps right up to the edge of the tank down to… In some places down to 0.5 mm. Large tanks, 14m diameter.
(26:36):
And the important thing about this, they wanted a high viscosity. So, you can see the set up there, they’re pouring it into the funnel. A big funnel, whatever. And then needed a good 5hr pot life. So, that was where we really developed for 480UT. And that was all done in conjunction… Was seamless with Bluey. And the client was so eager to get that product they flew it on a freight out of Townsville in Australia, out to Noumea. They wanted that product. And again, I think it was about 55,000L of product. So, high strength with good performance.
(27:14):
Good product. And the clients did recently come back in the last couple of years with some more tanks that they’ve had a similar issue with to provide the same solution. So, it’s good to have a client come back and understand the performance of the product and come back and utilise it again for the same situation.
(27:30):
Correct. Yeah.
(27:33):
And we talked about the water industry and this again was probably one of the first times we got… EpiMax got involved with water reservoir reconditioning. And this was Goodna, in Brisbane. And there was a 50 megaliter tank there, as I recall. And the concrete structure was not really adequate. It was brand new, but there were issues with the concrete itself. And so, they wanted two things. They wanted concrete… They either going to demolish it or they are going to repair in terms of epoxy concrete reservoir and then line up with a new product that would give them 50 year service life. Over 50 year service life. And that was really where we got into this whole issue of refurbishment of concrete reservoirs with our 333AR. Another light coating that gives the highest performance to all those things that go inside of a reservoir. And there’s quite a few of them. So, that was, that was a major event in our… In the company’s history. And it was also significant in terms of our relationship with Bluey… Our initial relationship with Bluey.
(28:46):
All right. So, the solution was using the EpiMax 333AR. So, what sort of different about the AR to traditional epoxies, Max, for this environment?
(28:57):
Yeah. Well, we talked briefly there about Novolac. We talked about the fact that there were some epoxies had two groups, three epoxy your groups per chain. Others had per molecule others have more. Well, the 333AR has three… An average of three epoxy groups for the molecule. And as a result of that, you get a high cross-linking density. So, you get better chemical resistance and better mechanical resistance. Self priming, and that was unique because again, the product is solvent free. So, traditionally to get those two performances with Novolac you need to corporate some hydrocarbon salt. We meant to do that without adding some solvent to it.
(29:41):
So, that now has become something that is pretty much specified in a lot of areas where it fits. For lining up potable water tanks, reservoirs, especially in Queensland. A lot’s going on in Queensland and soon to be in Tasmania.
(29:59):
Okay, thank you for that. So, just quick little summary with epoxies… Epoxy resins provide critical solutions in the civil infrastructure industry. They provide us with excellent mechanical properties across the board in coatings and in grouts. Also very high chemical resistant properties. So as we were describing and showing that they’re extremely versatile. And can be tailor made suit specific requirements for customers and application. So, I would like to thank Max for joining us from EpiMax. We’ve got both my email address there and Max’s. If you have any questions, you can email us directly. You have any questions now you can unmute yourself or there’s also a chat feature there as well. You can type a question into the chat line. So, Max, I’d like to thank you for your time.
(30:49):
Thank you. Thank you gus. Thanks very much. Thank you.
(30:52):
Thank you gentlemen. Thank you, Max. Really appreciate that little trip down memory lane with some of the projects we’ve worked on. Just a little snapshot. It’s yeah, we’ve got a lot to be proud of with what we’ve achieved with those epoxies and that technology and how we’ve been able to solve some problems for the customers along the way. So, really appreciate you joining us and running through that with us Max.
(31:15):
My pleasure. Thanks. Thanks for the opportunity, Daniel. Thanks guys. Thank you. Bye now.
Products
BluSeal – Waterproofing & Corrosion Protection
About this Webinar
This webinar, hosted by Daniel Bosco provides an update on the technology, best practises and strategies for industrial, commercial and residential waterproofing in 2020. Daniel covers topics including types of waterproofing, international standards, drainage, bonded membranes, sheet linings, installation techniques, welding and terminations.
Waterproofing is an often overlooked and very challenging aspect of underground construction. Watch the video above to learn more about best waterproofing practises and how they can be adopted to keep assets dry and protected.
Downloads & Links
Video Transcription
(00:04):
Good day, everyone. Welcome to the Bluey webinar series. Today’s topic is on tunnel and basement waterproofing. We, by default, have everyone on mute, so if you’d like to ask a question, or jump in with some something, you’re welcome to do so. Just have to unmute your voice to be able to do that. There is another option, which is the chat box that you might be able to see there on your settings. If you want to type in a question, you can type it to me, or you can type a comment to everyone. Feel free to use that during the presentation as well. And just to let you all know that this meeting will be recorded, so if that’s not acceptable to you, obviously, you might need to move on. So we will be recording, which means that I think your questions and your chat questions will also come through and then we’ll be posting those on our website. So, that just to let you know.
(00:58):
So thank you very much for joining us. This is the Bluey Isolation Series, we’re calling it. Giving us something to do while we’re stuck in our homes or isolated in our workplace. We’re hoping to bring you an educational series on specialised materials relating to civil engineering applications in our area of expertise. So starting off with today, we’re going to talk about waterproofing. So Australia hasn’t always produced the driest tunnels. I mean, this has been an evolving industry over a couple of decades. Our first big infrastructure tunnels were built in the ’80s and ’90s, and I think the Burnley Tunnel in Melbourne, some of you will be familiar with it, back in around 2000, was a real turning point for the industry. They had quite a few issues with the waterproofing detailing and design. Other issues, in terms of it being tanked and draining structures. And it ended up resulting in a lot of delays to the project, quite a few problems in terms of water infiltration, quite poor press, strong community outcry, and cost the contractors quite a bit of money in the process.
(02:10):
I think that was a real turning point for us, and since then, there’s been a real change in the industry, and the approach to waterproofing. And it’s seen as an engineering trade now, and the expertise is often called for, for challenging projects. And in the 20 years since, Australia has really become a leading example in the field of tunnel waterproofing. We’ve turned it around completely, which is great.
(02:31):
So why do we mean by dry tunnels? First of all, I mean, it’s a really clear visual indicator of poor workmanship, when you have bad leaks in an underground structure. It’s something very obvious. And even to the non-engineering person walking through it and using it, they can really see when there’s water coming through, that there’s something wrong. It can cause damage to the reputation of the asset owner because of that, and there’s also usage and shutdown implications. So obviously, you have to shutdowns to do injection and other types of remedial measures. There’s also the long-term cost of rectification and maintenance. So you have to drain the water out, pumping systems, obviously the environmental effects, the treatment of that water in disposing it. So there is a real long-term cost to water leakage. And there’s also the asset user perception of safety. So, a lot of people in an underground structure, just don’t feel comfortable seeing water coming in. They’re aware they’re below the harbour, they’re aware they’re below a river, well underground, and they see that water coming in, and it can cause some anxiety.
(03:39):
There’s typically two types of tunnels when it comes to waterproofing classification. You have drained tunnels, where you have a limited hydrostatic head, so it might be limited so that it doesn’t increase above, say one meter of water head above. The drainage is provided around the circumference, and it’s typically allowed to drain out of the bottom into a drainage system, where it’s taken away. You can see in the photo there a typical drained system, which was used on the Epping to Chatswood rail line, back in the early 2000s. It was about 400,000 square meters of drained tunnel on that project. So the drainage medium is designed to allow for full inflow, practically for the duration of the life of the structure.
(04:21):
Whereas a tanked tunnel is allowed to develop to full hydrostatic head. Being tanked, it’s sealed all the way around, and we limit the amount of water that can come into the tunnel. So, they’re typically the two different types. Obviously, as you can appreciate, it would result in different design between tanked and drained. Tanked has to withstand a lot more pressure, so the structure has to be built differently. So you will have reinforced concrete, other things to deal with. So, two very different types of tunnel building then.
(04:52):
Australia doesn’t have a standard for tunnel waterproofing and basement waterproofing, so we refer to international standards. And around the world, there are a range of standards that get referred to. There’s the British Tunneling Standard, which is fairly lightweight on details, but gives us some of the information that we can refer to. There’s BS8102, which we’re seeing a lot more of recently. That’s more a building code, rather than a tunnelling code, but it does cover the classification of dryness very well. But typically doesn’t tell you how to get there, which is one of the shortcomings of that code. And it really is made… It’s been written around smaller structures, not large civil infrastructure structures. The other types of standards that you see…
(05:35):
Melbourne Metro at the moment, and a lot of the projects in Australia, are now referring to the ÖBV Tunnel Waterproofing standard, which is an Austrian standard. It does actually have a lot of detail in there, about the types of membrane, thickness of membrane, spacing of waterstops, and the type of information you would need to detail and to design a tunnel. But some interesting stuff in there, which can be a little bit contradictory. The standard we’ve referred to most over the last 20 years, has been the German Railway Standard. We find that provides really good, clear guidance on all of the details you need for waterproofing.
(06:04):
So, that’s a range of standards that can be referred to. There’s many, many other standards up there. The Swiss have these, that are listed on your screen now. There are US standards, French standards, a whole range. And a lot of them interact with each other, and repeat a lot of the basic information, but that’s a rough overview of where we’re at in Australia in terms of using standards. And hopefully we’ll see a standard here in Australia before not too long, something that I think ATS are working on.
(06:32):
So, getting into the basics of waterproofing. The first starts with surface acceptance of your shotcrete or your rock layer. So it’s important not to have sharp protrusions sticking out of your rock, because obviously that can damage the membrane. You don’t want excess undulations or irregularities in the surface, and we use a couple of things for that. So when we’re doing an inspection, we want to make sure that… and in the design as well… that the bends and the curves, and the transitions, don’t have anything less than a 200 mm radius. So you want to keep that radius on the corners as big as possible, for internal and external curvature.
(07:11):
We also refer to what we call the 5:1 rule, and that’s putting a straight edge over the surface, say a meter long, and then from that meter long straight edge, you would measure off that, and you wouldn’t have more than a 200 millimeter deviation, for example. So, that’s our 5:1 rule. We also recommend nothing more than 10 mm aggregate size. So they’re the high-level things we look for, when we’re inspecting shotcrete, and the type of fixed attachments we have. Obviously, there’s a lot more detail that goes into that, but that just gives a broad overview.
(07:41):
These are the types of substrates that you would look at, and deem unacceptable. So we have large drops, transitions, fallout in shotcretes, roughness that might not be acceptable. So these are the sorts of things we’d be looking at, at an inspection. Once you’ve got your surface inspected and signed off, then you’d be looking at applying a geotextile layer. So the geotextile is a fabric, typically either 500 g per square meter, or 700 g per square meter. It provides protection to the membrane from the soft substrate, so it’s just another layer in between. 100% non-woven polypropylene. We use polypropylene, because it’s really resistant in an alkaline environment, which obviously is what you have, when you have it in contact with concrete. And it provides a drainage path, where you have a drained tunnel, for example. So a few features there of a geotextile, and that’s the reason why it gets installed before the membrane.
(08:33):
We then go and fix rondels to the surface. The rondels are those plastic discs that you can see in the smaller photo there. And that’s designed so that you don’t have to put a nail through your membrane, to fix it to the wall. I mean, clearly if you’re designing something that needs to be water tight, the last thing you want is holes through it. So we install these discs, we nail them to the geotextile, and then we heat weld the membrane to the disc, and that’s how it sticks. And they can range in quantities from one per square meter, in an invert, up to five per square meter overhead.
(09:05):
It’s really important that the nails are not in contact with the membrane, for a couple of reasons. One, obviously when you’re pouring your concrete, that nail could punch the membrane, but also, the nails get hot while you’re doing the heat welding, so you don’t want that nail to damage the membrane behind. When you’re installing the rondels, it’s really important to have a good system and sequence in place, so that you don’t have a domino failure. So what could happen is, one part of the membrane comes down, and puts additional weight on the next layer of membrane, and that comes down, and that comes down. And you can see, in situations it’s happened previously, where hundreds of meters of membrane come down and have to be re-installed. So, there are things the guys will do by providing breaks in the membrane, additional securing, and other things, to make sure that, that doesn’t happen on a site.
(09:52):
Two types of membrane, and I think this would probably be topic for another presentation later down the track, just how you select the different types, but just a headline on the two types of PVC and VLDPE. PVCs are a little bit more flexible, easier to install. Not as secure as a VLDPE system, but still a very good membrane system. VLDPE on the other hand, is a lot more robust. It’s a tougher membrane. It’s suitable for highly complex shapes. And the reason is, that it can actually be extrusion welded as well, so you’re not just relying on hand welds, which we’ll talk about that in a moment. So that gives you a lot more security, on a tunnel where water tightness is a lot more critical.
(10:39):
So when you’re installing the membrane, there’s a few important things that need to be considered. The membrane has to be installed with some slack in it. And you can see in that photo there, what we call quilting, which is the membrane just looping a little as it goes along the length of the tunnel, to provide enough slack, so that when the concrete is poured, it can actually push back to the surface without putting tension into it. So, that slack is really important. The guys, when they’re welding and installing it, will go in and push the membrane at different points, just to make sure that they’ve allowed for enough. You don’t want to allow for too much, because you don’t want folding in the membrane when the concrete is pouring. So it’s a really neat balancing act, in making sure that you install your membrane well, and quite a skill to achieving that.
(11:21):
Successful welding, no matter what type of welding it is, whether it’s extrusion, hand welding, or double welding, relies on three key factors for a successful weld. It’s the temperature that’s applied to the membrane, it’s the pressure that you apply, and the time that, that’s applied for. And those three things in combination will result in a successful welding if those settings are right. We do that for automated double seam welds, hand welds, and extrusion welds, which we will give a bit more detail on now.
(11:50):
So a double seam weld… I think the best photo there for describing how it works, is the bottom left-hand photo with the machine. You’ve got the two rollers there, which show how the pressure in the second photo, can be applied to the two layers of membrane at two points, with an air gap in between. So you end up with two 15 mm parallel weld seams. You end up with very reliable and consistent results, because it’s all [inaudible 00:12:18] operated, so you set the temperature on the machine, you set the speed of the machine, and you set the pressure. So you can be assured that all of those three key elements are being applied correctly for the entire length of the weld.
(12:30):
And for that reason, this is the preferred welding technique, because of that reliability, but also because you’ve got the ability to be able to test the air channel afterwards. And when you look at this photo here, that top photo shows that air channel, and the bottom two photos show how we can test that air channel. So we pressurize it, we make sure that we don’t get a pressure drop, in this case less than 20% after 10 minutes, we do a two-bar pressure test in accordance with the standard, and this makes it really reliable. So we test every single weld that we do, and this is required, by most standards anyway. So you test every weld as you go. So it makes it a really reliable way of welding.
(13:10):
The other type of weld is a hand weld. So this is where you have more complex shapes, three-way curvature, other things to deal with as you’re going along. It’s used for repairs. And you’ve seen those three photos down the side there. There’s a hot air gun, pressure being applied, at first by finger, and then it becomes applied with that roller. And the pressure is being applied by hand with the role of the heat, and the speed is all being managed by person. Which obviously, it’s a good weld, but there’s the possibility that something can go wrong with that type of weld.
(13:44):
And that’s the way you hand weld PVC, where you can’t use a double seam welder, whereas with VLDPE, you can then come in over the top, and you can place the third type of weld, which is an extrusion weld. So after you’ve completed that hand weld, you come in with an extrusion gun, which you can see in the photo there, and that top photo shows the extruded molten HDPE over the top of that hand weld, creating an extra layer of security, and a double seam. So then your hand welds also become double seam welds, which give you that extra layer of security, which is why we like to use VLDPE in situations where you have tank structures and high consequences of failing.
(14:30):
So we also do on sites, what we call a peel test, and this is a machine for doing it, an extensometer. This tests the weld parameters. You want the weld to be stronger than the membrane itself. So you can see that piece of membrane going into tension there, will actually test that the weld doesn’t fail. But that’s usually done on a regular basis throughout the day of welding, every time the weld parameters change, a new test might be done. And it can be done with an extensometer, or it can be done by hand as well. The important thing, is that the weld is stronger than the membrane.
(15:01):
There’s also the possibility to do vacuum box tests. They’re not as common in tunneling, because you’re usually not dealing with flat surfaces, but you can apply the box over a flat surface, create a negative pressure, and you can check for leakages. So this can be done on flat surfaces. Just another type of testing that is available, and usually limited for localised testing on very specific items, maybe where a repair is done, for example.
(15:30):
So, moving into detailing of the membrane. First of all, we have rearguard waterstops. So these are used for internal compartmentalisation. I’ll explain what that means in a moment. The stop end protection, where you have formwork, and you’re worried about the formwork coming in contact with the membrane we can put, and we usually do put, waterstops at every construction joint for tank structures. And these are fully welded to the primary membrane. So it’s fully sealed to the membrane, and we create compartments with these waterstops. So the compartments act to stop water traveling from one area to another area between the membrane and the concrete.
(16:09):
So if in 20 years time, someone comes and drills a hole straight through your structure, and that compartment starts leaking, then that water won’t be able to travel. You can see in that bottom diagram there, how the waterstop creates a longer water path and prevents water from getting to the construction joint. You can see in the photo there, very heavy compartmentalisation on a structure, which has been broken down into smaller compartments, because of the number of pores that are being done. So obviously, a lot of security there, and that then classifies the membrane as partially bonded in this case. So, we had a bonded, unbonded, and partially bonded membrane. And this would be partially bonded.
(16:47):
We also use injection hoses. So, injection hoses are used at locations with a high risk of leakage. These allow resin to permeate the joint in an area, without having to drill afterwards. We can use acrylics and polyurethane resins to inject. We like to put them at construction joints in tunneling between pores, really good to have these included in your structure, even as a backup. They’re a low-cost item, really good insurance policy. Good to have in place in case the structure moves, or somebody comes along and makes a change in the future that will require some remediation waterproofing to be done.
(17:26):
Obviously important to have an anchorage system as well, because quite often you have to fix through to the rock to support different elements. And if you fix things through, then you want to make sure that the membrane isn’t compromised in that process. So we have a few different types of anchors that we can use. So we have what we call a BA anchor. And that BA anchor, just there in that top photo, doesn’t hold as much load, so around 20 kN, compared to a GRP anchor, which can hold in excess of 200 kN.
(17:55):
But both systems are sealed all the way through, and you can see in the little drawing there, that the membrane is welded to the flange of that anchor, and then it’s sealed all the way around the fixing, and then that entire BA anchor is resin anchored into the rock, or the shotcrete surface. So it creates a fully sealed system that then you can fix reinforcement to, you can fix formwork to, and other elements. The GRP anchors are typically made for holding up much heavier items by the large formwork systems, or vent fans, or other things that require the high load.
(18:37):
So just moving on to terminations. So everywhere your membrane ends, you’re going to need to terminate it with an effective seal, and there’s a few ways of achieving that. In underground structures where there’s high pressure, we tend to go for the pressure gasket. There’s also an alternative to use an epoxy termination, but we’ll talk about the pressure gaskets first. So the pressure termination is our engineered sealing systems. So the pressure in the gasket is designed to be two times the maximum amount of water pressure that you’re trying to resist. Okay? So that can actually be calculated and worked out. We use a couple of things. We use finite element analysis modeling for the plate, and we have a model that we use for the rubber gasket, which takes into consideration the hardness of the gasket, the thicknesses of the gasket, and the type of pressure that you’re trying to resist.
(19:28):
So in a typical design, as you can see on your screen at the moment, for an 80 m design, you might have a 10 mm thick steel plate, which is 100 mm wide. Your gasket will be 12 mm thick, with a Shore A Hardness of 50 to 65, which is quite a firm rubber when you see that. And we compress that down to around 50%, and we achieve negligible leakage with that. We’ve done a lot of testing on it. We’ve tested it up to 80 m of water head without any leakage, and we know that technically it will work well beyond that as well.
(20:01):
Those pressure gaskets are then used in a range of situations. So I’ll just go back a slide or two. So that first photo that you can see there, is a TBM tunnel, where you have the TBM concrete segments, which have been opened up for a cross passage, and then we’ve terminated the membrane around the opening, to connect in with the gaskets on the TBM segments. So that’s one reason why you would need to terminate membrane, is the TBM cross passage.
(20:28):
Going forward, pile terminations are another way that these pressure gaskets can be used. A really important part of designing basement structures, shafts and the like, where you have uplift. So you have the tension piles. Those tension poles are broken down to invert level, and then we put an epoxy capping across the top, and we do a compression seal all the way around, and that membrane is connected, and you have a fully sealed systems. So a really effective way of sealing pile terminations.
(21:00):
You also have a epoxy terminations, which can be made. Obviously, anyone who knows anything about epoxy, knows that you probably need a fairly dry environment to be able to use this. It doesn’t tolerate any movement of the substrate, so that’s why we typically don’t use them on TBM cross passages, because any movement of the TBM segments, could resolve in cracking, and probably will result in cracking of that epoxy. So we’d rather use a pressure termination in that situation to tolerate the movement. But the epoxy termination can be used in other areas. We like using it on diaphragm walls, for example, where there’s limited movement, as long as the diaphragm walls are dry enough. It’s faster to apply, it’s lower cost, and doesn’t give too bad an outcome, as long as we’ve got it used in the right circumstances.
(21:46):
And another little challenge we come across is terminating DCP anchors. So that these are commonly used for uplift. Hasn’t really been a way of sealing these up until the last couple of years. So by using the VLDPE membrane, we can actually weld that to the HDPE sheathing. And the way we weld that, is through a number of stages, so that we can test it the whole way along. And if you look on that top photo… So first of all, we weld a flange if you like, around the sheathing, which is a flat section. Then we add pressure to test that, to make sure that the weld, top and bottom, is fully sealed. So that’s a fully pressurised system. We know it’s sealed. That top photo, you can walk away knowing that, that’s successful welding.
(22:30):
And then from there, we create the boot, which you can see in the bottom photo, which comes up and connects to that flat section. And then that boot connects to the membrane below, and we can air pressure test that as well. So we know then that we’re walking away with a fully sealed, pressure resistant system, which connects to the DCP anchors.
(22:55):
So, dewatering is another consideration, often gets overlooked during the design stage. So particularly when you’re installing membrane on a tank structure, water may be coming in from the rock, and water will build up pressure beyond the membrane, so you have to have a way of draining that water, while the membrane is installed, and through to the concrete being placed and poured, because you don’t want that bulging behind the concrete. So we have a number of ways of doing it. This is just one way you can see in the photo, which is by using a steel flange, which can then be capped off. Because the biggest consideration after this is all done is, “How do we cap off the system after we’ve used it for dewatering?” So, there’s a lot of different ways of doing it. You can do it with a steel, you can do it with plastic, you can do it with welded systems, but it is something that needs to be considered during the design stage, to allow that water to relieve.
(23:47):
So, just finishing up with some of the construction considerations that can be overlooked during the detailing, and some of the surprises that kind of pop-up at the last moment, that you have to try and deal with. One is formwork fixings. So almost in all cases of membrane installation, there has to be an allowance somewhere on the line to be able to install formwork, and that formwork needs to be fixed through to the structure to support it. And we need to consider how that will be done, either without damaging the membrane, or in a way that the membrane can then be adequately repaired after the fixings are taken out.
(24:23):
Obviously we prefer to use things like BA anchors, and other fixing mechanisms, so that we don’t compromise the membrane during the fixing of the formwork. And also, we have to protect the membrane as well, from the formwork. And in circumstances where you have uplift of the formwork, this becomes particularly important. So you can see the shape of these two tunnels here, where they curved and they come down to the bottom. So the formwork actually becomes buoyant during the casting process, and that buoyancy force could be extremely large, so that force has to be resisted. There’s usually pads at the top of the formwork, which will hold it down, and those pads are supported against the membrane. So that obviously has to be designed well, so that it doesn’t damage the membrane as well.
(25:12):
Storage of materials, and not just the membrane, but also steel reinforcement and other things, so the trades that come in after the water… is installed. So the membrane will need to be protected with a blinding layer, or some sort of mechanism for ensuring that the membrane doesn’t get damaged during the process. Fire safety is a consideration. Tunnels are reasonably confined in terms of their space, access, and egress, so obviously it needs to be a consideration during the construction process. When you could have hundreds of meters of tunnel with membrane installed to the surface, you obviously want a membrane that meets certain flammability requirements, and you also don’t want it to release toxic gases while it’s burning.
(25:59):
Storage of materials becomes really important. You don’t want to be stockpiling materials around the membrane. Simple things like smoking, lighting fires, welding around the membrane, all need to be considered. So you have to have adequate safety protection measures in place, to ensure that that membrane doesn’t catch alight during the process. And then on projects previously, where we know we’ve had to install long lengths of membrane, we’ve actually allowed fire breaks. So we do short lengths of the tunnel, firebreak, short length of tunnel, firebreak. We control the storage of our materials, control the storage of flammable liquids, and obviously smoking and other things are controlled as well. So a few things to consider there.
(26:39):
Traffic over the membrane. Depending on the sequencing of work, you may be required to traffic over the top. Obviously, particularly for the invert membranes, where you have to do a wall or a crown afterwards, or it’s the only access for the tunnel. So blinding obviously works well, rubber matting, other things can be used to protect that membrane. Many different types of access for installation of the membrane. The most simple would be an EWP or basket style arrangement, as you can see in the left photo. The middle photo is probably the more technical, and complex type of installation equipment. So this is an automated gantry system. That automated gantry system actually moves around, and unrolls the membrane as it’s coming over. We have both semiautomated and fully-automated systems. So these things can get as technical as you like.
(27:32):
On one hand, they can be very flexible, these systems, so if you have changes in tunnel width as you’re progressing, so you go up from three lanes to four lanes, then this type of gantry can be flexible in that regard. But it has a limit to its flexibility as well. So that just needs to be considered depending on the size and shape of the tunnel, and then we have fixed gantry, which you can see on the right-hand side of your screen.
(27:59):
Steel fixing during the process. So after the membrane is installed, the concrete is usually reinforced, not always, but usually. That reinforcement needs to have a way of being fixed to the surface through the membrane, without compromising it, obviously. The BA anchors play an important role in that, also things like lattice girders, which we’ve seen in some previous photos, can be used for fixing the steel reinforcing cages overhead. Probably the greater risk here, is how the steel is actually handled on site, once the membrane is installed.
(28:35):
So bundles of steel being dropped and moved around, there’s a real potential for damage. And one thing I should mention, when you’re looking at all these membrane photos, you can see a coloured surface… so in one photo there you see yellow, the other one you see blue… that’s a very thin film of membrane on the black membrane behind. That thin film, if anyone scuffs the membrane, or if it gets damaged in some way, provides a visual indicator that the membrane’s…
(29:04):
Sorry, there’s someone coming through there. So sequencing of the work is also important. So the membrane doesn’t always get installed all in one go. There may be a cavity at the top of it before you can access the wall, it may be part of the roof that needs to be installed, before you do the base or the walls, different sections that can be done at different times. But that sequencing can have a really big impact on how the membrane is detailed, so how you make those connections from one piece. Which may be done 12 months in advance, for example. Then coming back 12 months later, and connecting into that membrane.
(29:45):
So it’s not just about the lines on the drawing, and where this membrane goes, but it’s also the sequencing of work, which will ended up determining how we do our install. So some of the construction considerations… That was the wrong slide. We’ve already been through that. Just in summary now anyway, we’re coming to the end. So it’s important to ensure that you go through all of the design very early in the process. The earlier that you can have engineers involved and thinking about the waterproofing, the more chance you have of success. We have engineering solutions that can be provided to create watertight structures, and the smaller details really do matter, when it comes to managing water infiltration. And it’s obviously always the small details that are the hardest to focus on, but that’s really the most important part.
(30:37):
So, that’s a little bit of a summary on waterproofing basics. I hope that was useful to everyone, just on our half an hour mark there. I’m happy to take questions now via chat, if anyone has any questions, or something that you’d like me to go back to. An alternative, my email addresses is up there for you all to see. So jot that down. If you’d like to shoot me an email after this, then please feel free to do so. So if there’s any questions, feel free to chat up, or if you want to put yourself off mute and ask one verbally, we’ll see if we can handle that as well.
(31:17):
Okay. It looks like we explained everything reasonably well. No questions there. So I’ll just take the opportunity now, just if anyone’s writing a question, just to thank everyone for attending. It really does mean a lot to me. We had nearly 70 people on the line today, which I just think is amazing. Really, I was hoping for maybe 10 or 15 people to drop in, and listen to these, and I’m really appreciative that people made the time today.
(31:45):
I hope it gave you all something a little bit different, and I look forward to seeing you all tomorrow. So Greg Sieders from Bluey, will be talking about GRP bars tomorrow at 11:00 again. And we’ll be doing these little seminars at 11:00 every day, so please join in, share the link around, let your colleagues know. We’re more than happy to have as many people as we possibly can fit in these seminars. So thank you again. I’ll bring that to an end now, and we look forward to seeing you again tomorrow.
Products
About this Webinar
The webinar above, hosted by Bill Green, discusses HDPE Corrosion Protection Liners as well as recent technology advancements in the field. Later, Bill explains the various welding and testing techniques, including extrusion welding, spark testing vacuum box testing.
Downloads & Links
Video Transcription
(00:00):
All right. Welcome everyone. Thank you for joining us again. A particular welcome to those of you that haven’t dropped in on one of these webinars previously. We had a pretty good week last week with good attendance and some good presentations, so great to see a good group of people joining us again for these. We’ve got a bit of a special treat today. So these Bluey seminars are run at 11 o’clock every day, just covering technical topics as most of you know. If you’d like to pop in and ask a question, you’re just going to have to unmute yourself. By default everyone’s on mute and then just go ahead and ask your question, you’re more than welcome to do so. There’s also a chat box there that you can see at the bottom of your screen. Just type a question if you’d like either to myself or Bill directly, otherwise to the entire group.
(00:53):
Also, just to let you know that we’ll be recording the meeting today, just so that everybody knows, and then they will be posted up on our website and also on YouTube later for viewing. I’ve noticed that it’s been a little bit popular, actually, people ducking back and looking at those videos and there you’ll find also downloads of the presentation, possibly also some TDSs and some brochures as well that might be of interest. So today the topic is HDPE Corrosion Protection Liners. We’ve got Bill Green from Bluey, who’s joining us today to present on that. Bill’s been with Bluey for more than 10 years as a civil engineer, previously 20 years experience in precast concrete. He’s our technical and specifications manager, so I’m going to hand over to Bill and let him fire away with his presentation for the day now that it seems that most of us are on board and in the room. So go ahead. Thanks Bill.
(01:50):
Thanks Daniel. Welcome to our presentation today, Blueys. As Daniel said, he’s been holding these webinars about various subjects all relating to civil engineering applications in our industry. Today’s presentation is about HDPE Corrosion Protection Linings, which is a fairly topical subject particularly in the water industry. Just to talk about the Australian experience with these types of products. Water authorities around Australia have been using epoxies and other polymers to spray on and protect sewer SX in particular. Some of the precast companies in Australia have used PVC linings for casting linings but predominantly, most of the structures have been sprayed with polymer coatings. Now these coatings have proven to be only a 10 or 20 year solution and that really depends on how well it’s applied and the product that’s applied. As you would know, reapplication of any corrosion protection lining in a live sewer network becomes very expensive and it disrupts the network.
(03:11):
Now water authorities are starting to recognise HDPE CPL as a one-off solution and it’s going to give you a 50 to 100 years, lifetime or service life depending on whether it’s in the UV or in an underground structure. Now, why do we need concrete corrosion protection? Well, in surge networks turbulence of the aged sewage creates a gas called hydrogen disulfide. This gas in the sewer combines with oxygen and water is consumed by a little organism that lives in the sewer called Thiobacillus Concretivorus. That little organism excretes sulfuric acid and the sulfuric acid attacks the Portland cement matrix of the concrete. Now this happens only above the low water lines because obviously below the water, you don’t have any oxygen for the organisms to live. The loss of the cement matrix, that of course is what they call a concrete corrosion and concrete corrosion can ultimately lead to a structure failure.
(04:23):
Typically in a sewer or concrete pipes sewer we’ve seen where it’s been either badly protected or not protected at all. You get quite severe concrete corrosion above the low level water of the sewer. Now this is typical with where they protect these concrete pipes now is that they only go down to about 350 degrees of the pipe, because the invert of the pipeline is obviously below the low water level and it doesn’t suffer from the attack.
(05:02):
Now you’d ask, why do spray applied linings fail? Well, there’s a multitude of reasons. You can see on the right there, it’s an old pump station that’s about 20 years old, and you can see that the coding has failed quite significantly after 20 years. Now, this is due to bad surface preparation or damp issues in the structure when it was coded. It can be incorrect mixing of the products. Most polymers are a two or three part mix that have to be mixed on site. You can get pinholes in the coding because of the atmospheric conditions at the time of spraying. Live cracks in the structure fail coding, this means that if the structure concrete cracks during it’s lifetime, the codings are often not flexible enough to bridge the crack and so you actually have a reflection crack in the coding.
(05:58):
Groundwater from outside the wall concrete is permeable, so that if you’ve got any hydrostatic pressure from groundwater outside, it will migrate through the concrete and eventually cause hydrostatic pressure behind the coding and of course to de-laminate. Dark or humid working environments impede the bond. Most of those polymers are not very friendly against any moisture and don’t actually function that well, if there is moisture present. There are curing difficulties depending on what the structure and the atmosphere is like and as I said, concrete vapor transmission through the structure causes de lamination.
(06:39):
Now conversely with a HDPE liner, as I’ve said, they can last up to 100 years in a non UV the environment which is most underground sewer structures. These linings are cast into the structural concrete so they’re actually part of the structure. There’s no onsite mixing of materials required, pinhole free and defect free estimate in the factory. There are set thickness of the lining in the factory so no one has to judge the thickness on site and of course, HDPE has 700% elongation at break so it can bridge across cracks between the knobs. Welding of the seams is 100% quality tested, I’ll talk about that further on in the presentation. It can endure ground water inflow because between the anchors into the concrete, the membrane will part from the concrete and allow flow of any hydrostatic pressure down to the base of the structure.
(07:40):
There’s no curing required, in other words, after it’s cast into the concrete and you strip the forms, you weld the seams, basically the structure can go into service. Of course it allows the vapor transmission. Some of the features that allow the HDPE CPL to last its 100 years. Well, they use a Virgin HDPE resin and these resins have extremely high resistance to acids and other chemicals. They’ve got excellent abrasion resistance. Now, HDPE is often used for slurry transfer in mining applications. This is preferred over steel because the HDPE actually lasts longer in terms of abrasion. The anchored membrane can release negative pressures as I said, the flat piece between the anchors will actually not bond to the concrete so this allows any pressure that comes through to release down to the bottom of the structure.
(08:38):
Light colours are stabilised with a UV stabiliser for two years of sunlight thus to cover the construction period. Structures exposed to sunlight are specified in black HDPE and this HDPE resin has a combination of carbon black stabiliser of two and a half percent. This allows up to 50 years service life, similar to HDPE pipe in P100 or P80. There’s been lots of testing done with antioxidant depletion around the world on HDPE and they validate the 100 years life out of the sun.
(09:19):
Just to talk about the manufacture of HDPE CPL and how it’s made. The companies that manufacture these types of products manufactured under a certified quality system in ISO 9001. Basically the HDPE comes in pallets. It’s put into a hopper, heated up to above 200 degrees C, and then it’s pushed through an extruder. Now the extruder feeds twin rollers and these rollers form a flat membrane with the anchors and integrity formed as part of the membrane. Shape thickness can be manufactured from two millimeters up to 10 millimeters and roll widths are usually from two to 3.2 meters. These plants have quite sophisticated laboratories that check a lot of the attributes of the product to ASTM standards. Some of the things that they check during production are thickness, obviously that’ll be within a tolerance. Tensile strength, elongation shrinkage and of course the density defines the product in terms of its identity.
(10:32):
Installation Welding. How the HDPE functions, it’s basically fastened to formwork on the flat side and the concrete is cast and encapsulates around the anchors. Various products have a number of anchors, but if you have 1240 anchors per square meter, that gives you a 700 KPA pullout resistance of the anchors. The membrane has 13% elasticity as I said, that allows the flat section of membrane to stretch and allow transmission of moisture and it’s pressure behind the lining and that alleviates any pullout from overpressure from external groundwater. That membrane has been tested to release from the concrete at around 50 KPI, which is quite a low pressure. Now, all the seams are welded and 100% tested. Most of the site welding is done by an extrusion welder. You can see a picture of a modern extruded welder there. They’ve come a long way in the last 30 odd years in this industry. They’re now fully computer controlled to control the temperature accurately and the flow of molten extradite.
(11:51):
And you can see here, the welding wire is fed in through the side of the machine. It’s usually four or five millimeter wire. It heats up to over 200 degrees C and then goes through an extruder, comes out through a Teflon shoe. Now these Teflon shoes are machine to barrier shapes depending on whether you want to do an internal, external, corner weld or standard flat weld. These machines also have a preheating mechanism. You can see there that it actually blows hot air ahead of the Teflon shoe that heats the sheet and actually prepares the sheet ahead of the weld so, that it’s at the same temperature.
(12:33):
Very important with HDPE is that you actually remove the oxidisation layer. This layer forms on the sheet pretty much in an hour after you take it off so you need to remove that layer and apply the weld within half an hour. Applicators also chamfering of edges of sheets and they also remove knobs where they overlap the sheet to do the welding.
(12:56):
These are various details around for welds. Two of them shown here basically show where shades are joined on the formwork. The preferred detail is to overlap the sheet, as you can see on the right. On the left, you have a maximum three millimeter right gap to the concrete. This is put in so that you don’t actually lose too much heat out of the weld into the concrete because the concrete acts as a heat sink. There are various details for corners. You can see here external and internal corners and again, you have the maximum three millimeter gap to allow heat transfer from the weld. If you’ve got more than three millimeters, you need to use a cover strip with two extrusion welds.
(13:50):
There are various forms of welders. This is showing you a extrusion welder on an automated orbital system for welding in concrete pipes. These are main entry sewer pipes and this machine was designed for repetitive welding of the CPL at the pipe joints. It has as an automatic pressure system so it actually applies constant pressure as you go around the circumference of the pipe. Butt welding is another way of joining the sheet. Here you can see a butt welder set up making tubes to make concrete pipes in a precast factory. Basically it has as an element in between the two ends of the shape that heats up both ends to above 200 degrees C. The ends of the sheets are forced together and that gives you an excellent weld, in terms of budding together.
(14:42):
Testing of Welds. As I said, 100% of welds are tested after the membrane’s cast into the structure. This can be done by two ways, either a vacuum box. Vacuum box is a perspex box where you can apply a vacuum from a vacuum pump. You paint the extrusion weld with a soapy water mix. You apply the vacuum to the box over the weld, and you can see any imperfections where it’ll bubble up through the weld and that can be repaired later on. The other alternative is to use an AC or DC spark tester. These testers apply a high voltage to the weld that ox through to a metal strip or wire under the weld or to the moist concrete under the lining.
(15:34):
Some of the details that are viable. You can see here penetration into the structure with a pipe. It’s fairly common in sewer structures with a non-HDPE pipe. You use a fleece back HDPE strip, and that’s epoxy to the non HDPE pipe around it and then that leaves you to HDPE surfaces you can extrusion weld to. Alternatively, if you have PVC or ductile or iron or stainless steel or steel, you can use that system full run on high HDPE, such as PVC, DICL or steel. With P100 or P80 pipes, you can weld straight from the membrane to those pipes
(16:19):
With corners, there’s a couple of details where you’ve got a nice budding up with a membrane in the corner. You can use an internal corner extrusion weld. Alternatively, you can use a fabricated smooth cover strip that’s bend into the corner with two extrusion welds. Where you’ve got tops of walls, you can use the smooth fleece back HDPE, again, epoxy to the top of the wall. You bend over the HDPE and do two extrusion welds like side of the wall. Now fittings can be secured into the aligned structure any way that you require, as long as it’s not over an extrusion weld. The fittings are basically, you drill into the concrete with a hammer drill or a coring drill and you attach the fittings with a chemical anchor or expanding bolt. The main thing there is to specify that either neoprene washers or silicon around the bolt to make sure it’s against to its attachment
(17:29):
Pipe Joints. This is a typical pipe joint for a concrete pipe that’s aligned with the HDPE CPL. Generally you can have an overlap coming from the spigot to the socket or alternatively, you’re going to have a cover strip that is welded with two extrusion welds. The main thing about this type of system is that you have quality all the way from manufacturers through to installation. I talked about the quality systems in the manufacture. Now, when you come to design and planning, there are international codes around that specify the various installation details and how you plan to a line of structure. All manufacturers of HDBE CPLs have installation manuals that their applicators work to. And there’s a need for shape layout planes for each structure side so you actually carefully plan where your welds are and where you’re going to cut the sheet and which details you got to use for penetrations, et cetera.
(18:32):
One of the important things is not to plan to tank a structure. Although you will have up to 700 KPA pull out on the membrane, the long-term time pull out is restricted due to a creep of HDPE, so most of these products will have a maximum of 200 KPA long-term capacity on the anchors. So the key is to make sure that you don’t get anywhere near that type of negative pressure on the membrane and the way to do that is to designing pressure release mechanisms combined with the drainage behind the membrane.
(19:15):
The other most important part is to make sure that your applicators are well-drained and are competent. Approved applicators companies should only be used, in other words, people that are approved by the CPL supplier. The people that work for these companies should have formal training in welding of HDPE CPL and of course the most important part is that the CPL supplier provides all the relevant technical support to the product.
(19:48):
The product can be post installed or used to remediate structures. So the way that this is done is through grouting. Now, unlike a polymer such as epoxies and polyuria, cement grouts are very tolerant dam structures so you can actually grab these to a damp surface and still get excellent bond. It can be applied to flaws and benches in the new structures in this manner and then of course, remediation of all structures is possible by grouting the lining. Any structure shapes could be remediated. Of course, you have to have a formwork that’s designed to hold a liner or resist the hydrostatic loads. Depending on the access to the structure, you need to have a very simple assembly that can be put into the manhole cast the lining and removed.
(20:42):
Surface preparers key. As in any bonded membrane, the surface preparation should be a minimum roughness of CSP5 and it’s important to have it very clean and clear of any loose particles of dust. So dust is the enemy of bond. A lot of specifies nominate that you actually test the bond on the structure before grouting a liner in. So you build a test pad out of the grout onto the side of the structure if it’s clean. You need to have a bond of that grout sitting session of any possible hydrostatic pressure from the outside. And often, this bond is not a function of the grout itself but it usually the maximum 10 solid strike you can get from the substrate.
(21:33):
Grout specifications. You need to have a grout that’s very high fluidity, obviously, because it needs to go in behind the membrane down to 12 millimeter gap and up to a 100 millimeter gap. It needs to be a low water cement ratio that obviously gives you a high compression strength and high chemical bond. You can get bond up to 2.0MPA, which is 2000 KPI.
(21:59):
Couple of photos of a rehabilitated pump station using HDPE CPL. So you have a view from up from the bottom and down from the top. So had quite a neat finish and also you’re looking at a one-off rehabilitation that structures lifetime now is with respect to corrosion is increased to a 100 years.
(22:24):
Just to give you an idea of how this product is used. These products are used around the world. I’ll give you some examples of typical installations. These are sewer manholes. You can see one on the left is a trunk sewer. One on the right is a residential sewer manhole. Sewer pump stations. These photos of a pump station, I think up to about six meters diameter. Concrete sewer pipes have been done around the world now with HDPE on numerous projects, particularly the lateral sewers on the deep tunnel projects in Singapore, Middle East and Africa.
(23:05):
Waste Water Treatment Plants. You can see some quite complex shapes can be done with the lining, providing you do the layout plans and planning. This is a Buyer Erector tank where obviously it’s a semi-spherical surface which can be lined with the lining. Numerous tunnels around the world HAVE BEEN lined with AKS and other products. You see on the left there, they’re wrapping the lining around traveling mold. That mold goes through a already completed segmental tunnel, and they concrete the lining into the tunnel as a second pass aligning. Several projects now are done with a single pass. In other words, they line the segments themselves in the precast factory with HDPE CPL. You see in the center there it’s about a 3.2 meter diameter tunnel with the trial rings for the tunnel. And then on the right-hand side, you can see where they welded all of the joints of the segment in the tunnel.
(24:11):
A lot of these deep tunnels sewers also have access shafts have to be lined. This particular one is in the Middle East, I think it was up to 60 or 70 meters deep. Very important to specify how that’s going to be drained, because obviously in 70 meters, you have quite a lot of groundwater pressure. So some of the detailing there is very important to make sure that the water pressure is released down to the bottom of the sewer.
(24:37):
Sewer Structures. You can see that some quite complicated structures have been lined with HDPE. These are add its on a deep tunnel sewer in the Middle East.
(24:51):
The other application is in the mining sector in the chemical industry. These are photos of a project in the Congo in Africa, where they actually lined sulfuric acid bonds for a copper mine. The feature here is that the CPL actually has a knob surface on the top side as well, so it’s grouted onto the bond with grout and then on the top side, you have a non-slip surface that allows pedestrian traffic.
(25:22):
Just to summarise a few of the key points I’ve talked about. It’s a one-time solution, 100 years service life. Very high chemical and abrasion resistance. It’s easily cast in the new structures and it’s suitable for rehabilitation of old structures. The product’s quality controlled right from manufacturers through to installation and it’s allow us to whole of life cost. Thank you very much.
(25:50):
All right. Thank you, Bill. Appreciate that. Good little presentation there. I’m just wondering if we’ve got any questions that anyone on the webinar might have for Bill. You can either type it into the chat box or otherwise feel free to unmute yourself and ask the question. I’m sure Bill will be more than happy to answer it. If you don’t want to ask it here, you can always shoot us an email. Just send it through to bluey@bluey.com.edu and we can answer any questions for you. Like I said, a video of the presentation will be up on our website later today and they’ll also be some downloads available there.
(26:28):
It doesn’t look like we have any questions at this stage. Just to remind you all that 11:00 every day. We do have a question coming in from Jerry. So Bill, Jerry wants to know how long is the typical rehab installation process, say for a normal manhole of six meters deep?
(26:52):
That’s a good question, Jerry. It depends obviously on the complexity of the structure and also access. If you’re doing a structure that needs traffic control, of course, it’s a much more involved process. But if they’re doing one in a property where you have good access usually, it can be up to a week’s process. Obviously you’ve got to do your grout bond test, you’ve got to set up your formwork, pour the grout. You’ve got to wait 24 hours before you strip the formwork and then you’ve got to go back and weld and test all the Wells, but it really would depend on the size of the structure, but six meter manhole, I think that would do it easily within a week.
(27:41):
I’ve got another question here from Shane. Can a liner be used for internal wall protection of concrete anaerobic digestive tanks with an agitation system?
(28:00):
Yes. I think it probably has been used for that, providing that none of the paddles or blades that are agitating don’t contact the surface. As I said in the presentation that the product has very high abrasion resistance, but you may look at specifying a slightly thicker membrane. A lot of the sewage structures that are lined in Australia and around the world are around about two and a half mil. So in a structure where you’ve got movement of grit and so forth, you may look at going for maybe a five mil liner.
(28:39):
Five mil as in five millimeters, just for the guys who are on from the U S. So thank you once again, everyone for joining us. Really appreciate your time and I hope this has provided a nice little break for you outside of the isolation and other challenging work conditions that we’re all faced with at the moment. And I hope you can join us again tomorrow and some other days this week.
(29:07):
So thank you. I’ll end the meeting now.
Products
About this Webinar
In the webinar above, Daniel Bosco delves deeper into the topic of underground waterproofing of cross passages. Throughout the presentation, Daniel covers topics including complex installation techniques, spray liners, water stops and some recent past projects.
Downloads & Links
Video Transcription
(00:00):
All right. Welcome everyone. Thank you for joining us again on this last day of the working week. So as I mentioned, TBM cross passage, well cross-passage waterproofing in general, it really, really should be, is a topic that’s pretty close to my heart. As most of you who know me know, I’m pretty passionate about tunnel waterproofing. Has been an area that I’ve been involved in for quite a few years now, decades actually.
(00:32):
Cross passage waterproofing is one of the most challenging areas of tunnel waterproofing. Has very complex shapes, you have heavy reinforcement, you have terminations to the TBM segments to be dealt with, a lot of detailing compressed into a very small area that needs to be addressed. Now, over the past 10 years, there’s been a really strong engineering approach to improve outcomes. I do remember, going back to the early stages of my career, it was almost accepted that TBM cross passages couldn’t be waterproofed successfully. It was just too challenging, too difficult to get around the gaskets and seal to those segments.
(01:10):
So hopefully, by the end of this presentation today, you’ll see how we approach it now and how we’ve taken an approach that puts some science into what we do and improves the outcomes. So why do we need dry cross passages? You need it for durability of the structure, obviously, for the entire tunnel. And it needs to be safe for access and egress, particularly in cross passages, because they’re used for the safety for the public to move from one tunnel to the other in a time of emergency, and they often contain critical operation equipment as well, which can corrode. So you don’t want water, groundwater, getting in and affecting that equipment. And also the treatment and disposal of groundwater is costly so it adds to the total life cycle cost of the structure as well. And contractor’s reputation becomes important when you have leaking cross passages, you have an unhappy client, I guess.
(02:03):
So you have two types as always, with any type of tunnel you have drained, you have drained cross passages as well, where they limit the hydrostatic head. You have a drainage medium, as you can see in that photo, with a dimple drain where the water can actually pass behind the concrete, once it’s poured and flow down into drains and be taken away, so that one type with lower pressure. And then also you have tanked cross passages. And this is where they’re fully sealed all the way around, sealed to the tunnel itself and full hydrostatic head is able to be created above. And you can have 40, 50, 80, a hundred meters of water hit above that you have to seal against and this is where we use a liner to seal them.
(02:46):
So membrane selection. To some of you who’ve sat in on the waterproofing basics last week, we’ll have covered some of this already. But I thought I’d just touch on the topics just briefly, again, for those who haven’t seen it because it really is relevant the type of membrane you select and then the type of installation methods as well.
(03:04):
So first, I thought I’d just quickly mention spray-applied membranes. They do get used in cross passages because they’re perceived to be fast to apply and they can conform to the curvature really easily. And as I said, cross passages are fairly complex structures.
(03:18):
But they can only be applied to dry surfaces. So you can see there in that photo, that’s more typical of what you would see in a cross passage. I mean, let’s face it. You wouldn’t build a tunnel using segmental… A segmentally lined tunnel, unless you had reasonably poor ground. So if you’ve got poor ground, when you build your cross passage, you’re probably going to be dealing with tougher ground conditions than you would have normally. So the idea of trying to apply a spray-applied membrane to that is always going to be a challenge.
(03:48):
So it’s quite difficult to apply because of the dampness, also the quality of the rock. You also can’t complete pressure termination. So where that membrane meets the segments, you can get a little bit of bond there, but you’re only relying on bond. And then how do you connect that membrane through to the gaskets in the TBM segments? We’ll talk about that in a moment as well. So that’s difficult to do. And just controlling thickness and pin holes and other things in this type of environment is too difficult. So needless to say, I’m not a fan of using spray-applied membranes in cross passages. I haven’t seen many, if any, successful applications using those methods.
(04:26):
So what we’ll focus on is sheet membranes as the preferred method of waterproofing cross passages. So it’s a flexible membrane. PVC’s one type. There are two types we typically deal with. PVC being a softer membrane, it’s a little bit more flexible. It’ll conform to surfaces. Usually requires lower-skilled installation. Relies on hand welding, mostly, for the complex welds. And it’s usually only suitable for drained applications rather than tanked applications.
(04:58):
VLDPE membrane, on the other hand, it’s a lot more robust, VLDPE membrane. It can also be extrusion welded, and I’ll talk about the different welding methods. It has the highest resistance to damage in a tunnel, which is important when you’re dealing in such a confined space. It also has chemical resistance. It does require a higher level of skill from an application point of view, but it really is the membrane you need to use where you have a specification that calls for no damp patches, and you’re trying to resist high water pressures. So this is a better membrane you’d used in a tanked cross passage.
(05:34):
So the different considerations, when it comes down to selecting a membrane, you need to ask is it tanked or drained? Does the specification have certain requirements that need to be met? Like, are there no damp patches required? Is there a complexity of shapes? Because cross passages are always in various shapes and require different types of welding. What is the termination system required and what pressure of water are you trying to resist? And is there ground contamination? So these will determine what type of membrane you end up using.
(06:02):
So membrane welding, just to cover it off again, as I said, we’ve spoken about this last week. Double seam welding. This is the primary welding technique. You use this as often as you can. In cross passages, it’s a little bit more difficult to use this method of welding, just because there’s so much three-way curvature. This type of welding works well in straight runs, but doesn’t work well in curves and short runs. It’s very reliable, provides consistent results. It’s got machine and computer operated. And as you can see there, you’ve got the two rollers which created a double weld. And then you have an air channel in between, which means it can all be quality tested afterwards, as you can see in the photos here. So you’ve got the little air channel in that top photo, and you can see that the channel is being pressure tested any other two photos.
(06:49):
So this is why the double seam weld is so reliable, but we can’t always do that everywhere. So where you can’t do a double seam weld, you have to do a hand weld. And you can see in that photo on the right-hand side. All of those little black blinds represent hand welds. That’s been done with VLDPE where an extrusion weld has been done over the top. So the black shows you that there’s a hand weld in those locations. And as you can see in a cross passage, there’s a really high density of hand welding required, which means that it becomes quite critical because it’s so commonly applied in a cross passage. It relies on the applicator putting heat in hand, rolling, as you can see in those photos. So on its own, it’s not so reliable, but that’s all you can use in PVC type membranes.
(07:37):
When it comes to VLDPE membranes, you have the option of doing that extrusion weld over the top. And you can see in that top photo, the black HDPE which has been mulched and put over the top of the hand weld. That provides a double weld, a second layer of protection on that weld to make sure that it’s sealed. It’s only available in VLDPE type membranes, which is why we used VLDPE membranes in critical applications, because you’ve got that double welding system. Not to say that we don’t use PVC. I would say it’s a 50/50 choice between the two, PVC and VLDPE. You just have to be mindful of the difference when selecting the membrane for the application.
(08:13):
So that’s a little bit on membranes. Getting into actual cross passages themselves, now. We can start talking about how we terminate the membrane to the TBM segments, because this is a really critical part of cross passage waterproofing.
(08:28):
And the waterproofing membrane can be fixed in two locations. And you can see there in the diagram, it can either be fixed to the cut face, which is where you saw cut your segments to create the opening, or can be created on the rear face. And I’ll talk about both those options in a little bit more detail, but both options require continuity with the TBM gaskets. So there has to be a seal between the fixing of the membrane and the gaskets in the TBM segments.
(08:56):
So when you’re talking about rear face fixing, you can see there in the diagram, that’s being fixed to the back face of the segments. It requires less surface preparation because the back of those segments are already smooth, they haven’t been cut like the cut face. And generally sealing to the gasket, which you can just see there in purple, is a little bit less problematic: it’s closer, it’s easy to tie into, you can create a good connection between the two.
(09:20):
The disadvantage with rear face fixing is that you need a bigger excavation face. So you’re seeing some of the photos that I’m going to show. To be able to expose that rear face, you have to excavate out further. You have to allow a space for a drill to get in there to be able to drill those fixings. And it’s actually quite a lot of extra excavation that’s required to be able to create that space. So you’ve got the advantage of it being potentially a better seal, but you’ve got a disadvantage of needing more excavation space.
(09:51):
When you look at the cut face fixing you don’t need as much excavation. You get to excavate straight up to the line of the cut, you don’t need to excavate behind. Sure, you require a lot of extra surface preparation because that face is going to be rough. It will have defects in it. It may have the edge of the segment exposed, which means it’s got dowel bar holes and other things that have to be fixed. There’s also the internal corners, where the vertical and the horizontal faces meet, that become a bit of a challenge to create compression in that area, also, to make sure that area is clean and ready to accept a compression seal.
(10:28):
What’s causing more problems, over the last couple of decades, is that when you look at the TBM segments, the gasket is actually moving further and further to the back of the segment; to the point, now, where I think the gasket has moved as far back as it possibly can to the back of the segment. And it’s been realized that is the ideal position for a TBM gasket. When you go and put your compression seal ready for the membrane on, there’s a gap between the two. So that’ll be in the mid-point of the segment, and then you’ll attach the membrane.
(11:00):
Just lifting that membrane back up, what you can see is that it creates a discontinuity between the TBM gasket and the compression seal that you’re creating. This is one of the most challenging areas, in terms of being able to achieve the waterproofing, because as you can see, the water can go in that point, go around and come out the other side. So it’s really important to create that seal between the two and that can be done in a number of different ways. It can be pre-injected into that joint with a hydrophilic resin. You can put in an additional gasket in. You can put a flexible sealant between the two. It all comes down to the amount of water pressure being resisted, to determine the type of seal. Also, the movement that’s expected. So whether you need something to accommodate large or high movement. But this has to be engineer designed in the same way that the compression seal has to be designed, which I’ll go into in some more detail as well.
(11:57):
So just talking more about the terminations and the pressure gaskets you create. You can see there in the photo a typical compression gasket that’s bolted in and fixed to the segments. It’s an engineered system, as I mentioned. The pressure that you’re aiming for in the gasket has to be two times the maximum amount of water pressure you’re trying to resist. So you have to know how much water pressure you’re trying to resist before you can complete this termination. The surface must be flat and well-prepared.
(12:27):
We use a couple of models to determine how the system is designed. We design the plate and the plate thickness, the plate width, the gasket hardness, the gasket thickness, and how much we compress that gasket to tell us how much pressure we’re going to be resisting. So that’s all part of the design for a typical 80 metre design. And this has been tested on a number of cases, as well as being theoretical. We’ve set up mock ups and tested this projects.
(12:57):
But for a typical 80 metre design, you may end up with a 10 millimetre thick compression plate, that’s quite a thick plate, a hundred millimetres wide. With a 12 millimetre thick gasket with a hardness of about 50 to 65 Shore A. And we’ll typically compress that down to about 50% of its thickness. That’s how you measure it and you ensure that you’ve got the seal. You’ve got to be able to maintain that compression between the fixings, as well, to achieve that negligible leakage. So it’s all part of the process of design and then install, and then checking to make sure that you don’t get any leakage. So, that’s compression gaskets.
(13:29):
We also utilize epoxy terminations in certain applications that typically are only suitable for dry surfaces, which makes them a little bit problematic for cross passages. I don’t like them for TBM cross passages, simply because they don’t have the flexibility needed. We all know that TBM segments will move as the pressure increases and the epoxy won’t tolerate that movement. So I would say that epoxy isn’t suitable for TBM segments. We want cross passages where you’re going to have movement and where you have water pressure. It is faster to apply, so it can be used in certain situations: maybe where you have a drained cross passage, particularly, in a mine tunnel rather than a TBM tunnel. This is how an epoxy termination looks. It’s a piece of membrane, which is felt-back, it’s bonded to epoxy and then the membrane is welded and becomes continuous with that.
(14:31):
Some of the other waterproofing details to be considered: anchorage. So when you need to make fixings through the membrane, you obviously don’t like punching holes in your membrane, so there are systems. BA anchor is used where you can drill, install that into the rock. It has a sleeve around it which completely encapsulates the fixing. Suitable for up to about 20 kilonewtons and you can fix your reinforcement to it. You can see in the photo there, all of those little circles in the photo of BA anchors, which are holding that steel reinforcement in place. Steel reinforcement can be quite dense in a cross passage because the loads are quite high around that opening.
(15:08):
Reargard water stop is another thing to be considered. Provides internal compartmentalization. Also provides stop end protection. So when you’re putting a formwork in place, it’ll protect the membrane from the timber or metal formwork fully welded to the primary membrane.
(15:22):
And what that does is it stops water from travelling behind the concrete, between the concrete and the membrane. So if you do end up with a leakage in one spot, because someone comes along in 20 years time and drills a hole through your concrete and straight through your membrane, then that leakage will be compartmentalized to that one area. You can see in the photo there, that what we do is we’ll pick areas of high risk like the cross passage, and that’s being completely isolated and compartmentalized by that black line of water stop that you can see, which is taken all the way around the cross passage. Eventually that bit along the invert would also be connected and create a complete loop all the way around the cross passage. And that stops water from travelling from one compartment to the other.
(16:05):
We also use injection hose, and this is important in cross passages. We know that we get movement in the segments and that can result in, even if your termination is completely perfect, there could be leaks that occur in the TBM segment gaskets themselves. So you want that ability to be able to inject that zone after you’ve installed it and after the pressures has come up. And the injection hose allows resins to be injected into that area without having to drill later down the track. And they’re a good insurance policy flatter so you tend to see these used a lot around terminations and cross passages.
(16:44):
We also need to protect the membrane once it’s installed, because with steel reinforcement and other activities coming in… And that can be done either by laying a membrane over the surface, as you see on the two outside photos there. The middle photo, you can see a concrete, blinding layer has been used. Less likely to use a blinding layer in cross-passage for a few reasons: one, it’s difficult to get in there. Two, it actually takes up thickness. So you’d have to excavate further, and that’s not always desirable in a cross passage. And typically the turnaround times are too fast. So the membrane will be stored, the reinforcement stored, and it all be concreted up within a matter of weeks. So there’s not a lot of exposure time.
(17:26):
We also have to consider de-watering while the membrane’s being installed. Particularly obviously, in tanked design, when once the membrane is fully sealed up, you will need the availability to be able to draw that water from behind the membrane, the groundwater that’s building up, so the pressure doesn’t build up behind it. So you need to think about how that’s going to be connected to your membrane, and then how it will be capped off later. And there are certain designs for being able to do that. It is often overlooked during the design stage. It’s something that comes up once you’re actually on site. You realize you’ve got a lot of groundwater to deal with, so a system needs to be implemented. But it’s good to have that prepared in advance.
(18:04):
Some of the construction considerations: things like formwork. Fixings are important, quite heavy formwork around cross passages, quite often has to be fixed through the membrane. How do you do that? We use things like BA anchors. We also have options for GRP dowels to be put through the membrane and sealed off. So there are ways of doing it, but it is something that needs consideration.
(18:26):
Storage of materials afterwards. So is there a place to store my materials that are coming in to be used once the membrane’s installed. You can see photo on the left, good outcome. Photo on the right, pretty bad outcome. You can see the storage of materials there on that membrane really is possibly going to cause some damage to that membrane.
(18:47):
Fire safety. When you have lots of plastic installed in a very small confined space, certain systems have to be implemented to maintain fire state. You don’t want rolls of membrane piled in locations. You, obviously, want to be careful with your hot work and other things that you’re doing around the membrane. And you want to have enough safety mechanisms in place, if there is a fire, to be able to put that out.
(19:12):
Traffic over the membrane: the membrane is protected because there will be certain activities that have to happen afterwards that require access and movement of materials. So you can traffic cross the top. Lots of different ways of doing that and protecting your membrane as you go, whether it’s a concrete blinding layer, rather than adding a timber structure or something that needs to be built over the top.
(19:33):
Steel fixing, as I mentioned, very high-density reinforcement around cross passages. So that needs to be designed through the use of lattice girders. You can see there in the right-hand photo, some sort of mechanism for holding it in place or the BA anchors or something along those lines. It does become a pretty big consideration, cross passages, how you fix your steel reinforcement.
(19:56):
And then finally, sequencing of the works, as well, is important. Ideally, you can get in there and install your membrane all in one go. If that can be worked in as part of the design. On the other hand, sometimes you have to go in and make two or three attempts to get the membrane done. You might be doing your invert first, your entry, exit points, and then your crown last. Makes it a bit more complex. So sequencing of the works needs to be taken into consideration.
(20:25):
So that’s the broad overview of how we complete waterproofing cross passages. What I have, now, is a sequence of photos taken from airport link on two different types of cross-passage that we completed up there. One was completed using steel set openings. This was the method that was also implemented on the water view project, in New Zealand. Then I’ll take you through the alternative option, which is the more common option of just having to cut segments. So, I mean, this is just a bunch of photos, which will give you an idea of what was done. So these are the steel segments so that you can see, they were in the tunnel when it was constructed, which makes it really easy then just open up the cross passage and start your excavation.
(21:10):
What it also does is helps us with the installation of the compression scale. As you can see there, when we’re using the steel segments, we’ve used a stud welder and we’re welding the fixings directly to the segment. So we would fix our compression seal directly to that. Makes it a lot easier, much smoother surface to deal with, much easier to connect to that segment gasket as well. Just looking through the photos, you can see the compression gasket going into place and all of the fixings. The access over the top, obviously doing the crown first, coming back to do the invert last. Access into the cross passage becomes important. You can see the injection hoses around that compression seal. The protection layer going in, and the steel reinforcement being laid.
(22:07):
Concreting works about to start. Concreting the internal, and then there’s your finished product with the skillsets. And obviously the concrete encasement of those on the steel sets as well. Moving over to the cut segment openings, you can see there, the concrete segments have been sort of cut across the top. And then the segment whole segments have been removed to create the vertical part of the opening. You can see there that there’s a lot to deal with, particularly in that right-hand photo, in terms of being able to prepare that surface ready for a compression seal. There are openings in the concrete segment that need to be sealed across shotcrete, across the surface, and also that top internal corner to be dealt with. And there’s the better photo of that top internal corner I was just talking about earlier, needing to repair that.
(22:58):
This is a cut face, fixed membrane. So you can see there that the excavation actually comes right up to the segment. It doesn’t have to go behind those segments to create extra spaces and you can see that in these photos as well.
(23:11):
Coming back to that other photo that I mentioned, it would’ve been difficult to apply a spray membrane in this circumstance. But you can see, pushing a bed with a sheet membrane blade de-watering as best we can, but still able to install that membrane effectively.
(23:25):
We can see a lot of the welding detail that goes into this. A lot of three-way curvature we dealt with. So in this case, it was a PVC membrane that was used. You can see there, being installed. And on that right-hand photo, the lobster backing and the middle photo as well, just to be able to deal with that three-way curvature.
(23:51):
And the compression seal being finished off. I’m ready for the concreting reinforcement to be installed, or the injection hose.
(24:01):
These are presentations will be available to download. So you’d be able to see these photos. There’ll be more closely. Of course, to the end there, this is what you want to cross passage to look like nice and dry. This cross-passage was probably 40 or 50 meters below the water table, but no sign of leakage. And if you’ve done your work properly, this is what you hope to end up with.
(24:22):
So just in summary, cross-passage waterproofing is a really complex area of tunnel under the ground waterproofing. There’s a lot of detailing to be completed in a very small space. So you have a very high concentration of complex activities. The engineered terminations are probably the most challenging part of that, but you can design those so that you will achieve a seal and you can build them so that they can resist high-pressure water, and you can achieve those dry course messages. So thank you for joining us today. I welcome any questions you might have either by taking yourself off mute or otherwise dropping a question into the chat there. I also have just popped my email address on. So if any of you would like to send me an email afterwards, more than welcome to do so. Happy to ask questions. Really enjoyed the last couple of weeks. We heard that you have to, and thank you again.
Products
About this Webinar
Downloads & Links
Video Transcription
(00:00):
For those of you that I haven’t met, my name is Daniel Bosco, as you know we’re running these webinars every day, 11:00 AM, Sydney time. And then again at 1:00 PM Sydney time. Different topics each day and today we’re going to be talking about basement waterproofing, and this is all part of our webinar isolation series, helping to keep us connected during installation and maybe cover off some topics and give us the opportunity to pick up something new along the way. So Australian Experience for basement waterproofing has been a little bit mixed to date, and there’s a few reasons for that, mostly because there isn’t actually a current Australian standard for underground waterproofing. Believe it or not, even though we’re flooded with standards now, and this happens to be a fairly challenging area for building construction as well. So quite surprising that we haven’t been able to put something to paper on that to date, we’ve had significant failures report in the media, particularly recently in Australia.
(01:11):
A lot of that does revolve around waterproofing defects, which is such a big part of defects in building. It really boils down to what I think is a lack of training and guidance for architects and engineers in terms of designing new buildings and being able to have the right input in terms of detailing. So, we’re going to run through a few of the details today and hopefully build on some of that knowledge and experience and discuss some of the issues that are faced out on sites when it comes to building waterproofing.
(01:41):
So why do we need dry basements? It’s a really big part of health and safety for residents and users of the building. Obviously mold and moisture have a negative effect on, on health. There’s also durability and serviceability issues. It can create slippery floors and entrances can also corrode not only the concrete structure because water’s coming in, but services around those, lift Wells and shafts and the like getting water into those areas can really degrade a building fast.
(02:16):
And there’s a really high cost of rectification and maintenance it’s associated with waterproofing. Often quoted is the statistic that waterproofing is less than around one or 2% of the total construction costs are very, very small component of the construction cost, but ends up resulting in 80 to 90% of the defect rectification costs. So something to consider, maybe it doesn’t cost that much more to do a really good job of waterproofing and save yourself a lot of money in terms of rectification and also that reputation of the builder as well in the longterm.
(02:51):
So there are two types of basements. You can categorise them either as a drained basement and that’s where you have a drainage system. You can see in that photo there on the floor, a cell type drainage where the water is actually allowed to flow in, go down to drains and then it’s pumped away or drained out to storm water.
(03:11):
Then there’s also the tanked basements and this is where it’s like a pool. You completely tank it. You’ve got membrane all the way around, up around fully sealed off and hydrostatic head is allowed to build around the basement structure itself. Obviously that requires a much higher level of water tightness. It’s important to know which one you’re dealing with before you start, as I said, there’s no Australian standard, but there are some international standards that can be referred to, about underground waterproofing, and a range of them that we refer to here in Australia. One that’s come up more often, recently, is the BS8 102, which has really good guidance on dryness levels that you’re trying to achieve. And so really good description on how dry we want our basement to be, why we want it to be dry for the type of use. The problem with BS8 102 is it doesn’t give us a lot of indication on how to achieve that.
(04:04):
It’s actually a little bit of a lightweight in terms of particularly tanked basements and deep basements, where you’re going to have water pressure building. It’s more designed for small residential buildings where they may be drained. And it actually says within the document. So, for tank placements and where water pressure is building, we refer to some of the European codes, which are a little bit more robust in that area.
(04:25):
Trouble is that I think BS8 102 does get lent on quite a bit here in Australia and also in Asia as well, for guidance in areas where it might not be completely appropriate. On the other hand, then you have the European standards, which are more designed around deep tunnels and large structures, which are a little bit more civil engineering orientated rather than building orientated. They’re great because they provide really good guidance in terms of how to waterproof and the detailing, but they don’t always provide as much guidance on dryness and have as much consideration for the building and building environment. It’s a little bit of two extremes and something in the middle of being needed when you look at the international standards.
(05:11):
So just a little comment. I like to call it the “elephant in the room”. I think it’s something we, as those of you who know bluey, we do a lot of work in civil engineering and tunnels and underground structures. And we also do work in the building industry as well. I think the difference between the two, if I had to pick one large difference, is the way it’s approached by the client. Instable. Everybody recognises that a failure is bad for everyone. It’s a little bit more of a team effort in making sure that you have a successful outcome.
(05:44):
Whereas in the building industry, it’s a little bit more of a transfer of responsibility. So there’s more emphasis on the warranty that’s provided, there’s less clearly defined expectations and goals. The builder is going to throw their hands up in the air and put it all back on the waterproofing applicator, if it goes wrong. That doesn’t always provide a really good outcome. What we’re saying is that it’s much better if people work together on a good outcome. We don’t rely completely on the warranty because a warranty is not a guarantee that it’s going to go well. You can’t transfer that responsibility. So, a little bit more collaboration in working out the details and coming up with common solutions, I think, provides a better outcome.
(06:28):
Just a little bit on engineering input. The waterproofing specification writing, there’s a whole series of activities that have to take place to create a dry structure, starting with that specification, writing, referring to international standards, doing the detailed design and picking up as many of those details as possible before you start construction. So that you’re not trying to design things on the run, having input into the structural design as well, because there may be changes that are actually needed to the design of the structure to accommodate the waterproofing. That sounds like it’s a little bit extreme, but it can actually provide much, much better outcomes in the long run integration of the construction methods and sequence choosing the piling parts, for example, terminations and other things before you start.
(07:13):
And then of course, once all of that is selected overview, you’re monitoring the works all the way through. So really does start early in the project. As an example, we need walk, which involved a building and a tunnel project, which was completed a few years back. We were involved with the engineers five years before that project started with all of the design detailing, because it was such a complex structure. Eventually, when the project started and it all went very quick, but five years of work went into the planning for that project.
(07:44):
So in terms of product selection is there’s a lot of options and probably more options when it comes to building basements than what there are in civil engineering applications, because the type of construction is so varied. And you’re talking about, above ground works that have to be integrated with below ground work, some draining and some tanked, varying levels of depth, and the types of things that we consider when we’re selecting a type of waterproofing system is the continuity of the membrane that’s required. How are we going to terminate? How are we going to do with penetrations? We had a thing about the conformity to the substrate and the environment. So how flexible does it need to be? Is there a lot of three dimensional curvature and things that need to be dealt with? How complex is the structure? Detailing of the construction joints is important.
(08:30):
Depending on the type of construction that’s being used there, how much movement is in those construction joints, will determine the types of systems that are used there. Post-installation protection. You can see there in the photo, steel reinforcement being laid down over the top of the membrane. How can we protect that membrane during the activities that occur between putting the membrane down and the concrete being cast? And then of course, repair and maintenance at the end. What I’m going to do, is I’m going to run through the three or four main types of waterproofing solution, and just have a think about each of those six items and how those different solutions apply. So, first of all, looking at sprayed applied membrane, it’s a fully continuous membrane, doesn’t have joints and uses bonds for termination. So when it comes to getting to the end of a spray applied membrane, it terminates itself effectively because it’s highly, highly bonded.
(09:25):
It conforms to highly complex geometry. That’s actually one of the advantages of a spray applied membrane. As you can see in the photo there, lots of dimensional changes, coats quite well in that environment. It’s fully bonded when applied to the structure. So, that’s another advantage. In other words, the water can’t move laterally between the membrane and the concrete structure. So if you have a hole in one spot, it’s not going to travel longitudinally. We also have some disadvantages; it’s very limited in its movement capacity. I’ll talk about the engineering behind that later in this presentation, but effectively, because it’s so heavily bonded as the cracks open up underneath that membrane, it’s quite challenging for that membrane to elongate and to stretch, not impossible, but a bit more challenging. The membrane can be protected from other trades, so we can put blinding layers down. We can put other things down to protect it, and repairs are possible depending on the access that we have available to us to get in there and repair it.
(10:27):
Bonded membrane systems is an interesting one. They’re covered quite heavily in BS8 102 and I think, certainly they have their place in the building industry. If you’re looking for the Holy grail of waterproof membranes then a bonded membrane makes sense, because on paper, if you have a bonded membrane, then if you get a hole or a defect in one area, then the water won’t travel laterally to other areas. The problem with that is even though it is the ultimate outcome for a waterproofing membrane there’s too many compromises that have to be made at the moment with the current systems that are available to create that completely dry structure and to use these products effectively. So in other words, they sound really good on paper, but practically in use, they don’t work. The reasons for that is that the sheets aren’t welded together.
(11:21):
So, you have sheets that are just over a meter wide and the strips of membrane themselves are just overlapped. So there’s every opportunity for concrete to get between those, joints to come apart during concrete pours, walls, steel reinforcement, people walking over the top. There’s no termination system. So you can see from that photo there, the membrane comes up the wall. It can’t be bonded back to the piles. That occurs whenever you have tension piles within it, double corrosion protection anchors, any other type of discontinuity. The only way you can actually terminate that membrane is by using a liquid membrane, which isn’t a really effective way of terminating membrane. They’re also only suitable for very basic geometry. So again, you can see in the photo there, that is not working real well where you have three way curvature. Just because you can’t cut and weld each segment to kind of launch to back the membrane around first.
(12:17):
I’ll show you some other photos with other examples. There’s a photo there of a bonded membrane being terminated. The piles you can see, it’s just a liquid membrane that’s being applied. Anyone could probably walk up to that and just peel it off the surface pretty comfortably. It’s not going to take a high load of back pressure and there are better ways of terminating membrane. So the advantage is, that it’s bonded when it’s applied to the structure. The construction joint design is also a little bit questionable because it’s a bit independent of the extra lining. The water stocks don’t get welded to the membrane. So they’re acting independently, which makes them a lot less reliable and there’s no protection available following the installation. So you can see here in this photo, that membrane has been laid. The steel fixers have walked across the surface, and there’s quite a bit of contamination that’s got onto that membrane.
(13:11):
That’s made the bonding system a lot less effective. Without that bonding system in place, you also now have joints that aren’t welded and a completely exposed system, which was relying on that bond, which now won’t be able to perform as hoped. It’s also very difficult to repair these systems afterwards. And you can see here, this highlights a number of issues. This is where the membrane comes into the diaphragm wall. You’ve got independent water stock, which is a moot, which is an issue within itself. And you’ve also got this little black pitchman bond, which is a terminating the membrane to the diaphragm wall and considering the amount of movement that’s going to occur at that location, that’s a completely inadequate detail for the type of structure that’s being built. So as you can see, bonded membranes look good on paper, but they really don’t pull together an entire system when it comes to construction and the real world of being out on site.
(14:09):
Sheet membrane systems are a lot more tried and tested like spray membranes have their place. They’re fully welded sheets, and they have engineered terminations, which we’ll talk about the suitable complex geometry. So, they can be applied in three-way curvature, if the substrate is wet, if the substrate is coarse, it’s going to be a lot more accommodating. They compartmentalise with water stock. So under BS8 102 they’re actually classified as partially bonded. So, they do have that feature of being able to compartmentalise leaks. And you can see there in the photo, those black strips of water stop, which is compartmentalising. So if you get a hole in one area, it’s going to contain that leakage to that small area, which can then be addressed and treated. They have very high movement capacity around construction joints, very good ability to bridge cracks, and they’re able to be fully protected following installation, which is important.
(15:00):
They don’t need to be left exposed like a bonded membrane because we’re not relying on that surface bonding to the structural concrete. We can actually lay over the top of the membrane, either a blinding layer or a protection membrane to protect it. That can be completely independent of the structure. And there’s also a backup repair system. Clearly that is the preferred choice, but the basements particularly where you have a tanked structure. So, we’re going to go into a little bit more detail on these systems in a moment. I just wanted to mention before we move on to that concrete attitudes. Concrete attitudes are used in some projects as a form of waterproofing, they rely quite heavily on crack control within the concrete. The structure has to be designed to limit the crack width to less than around 0.2 millimeters for them to be effective.
(15:50):
That’s quite an extensive exercise to increase your steel reinforcement to a level high enough to stop those crack widths increasing above 0.2, because most suppliers of the concrete attitudes, won’t warrant a crack beyond that width. They don’t offer any protection to construction joints and movement joints. So, not really a completely adequate system on its own for water tightness. Good for durability of the structure and probably protection of reinforcement, where you have small crack width. We spoke about concrete cracking in our presentations earlier this week. You can go back to our website and have a look at that. We all know that concrete is designed to crack. If it does crack, concrete attitudes can be useful in terms of the durability outcomes, but probably not so much in terms of the waterproofing outcomes from providing the total system.
(16:42):
So just diving a little bit deeper into sheet membranes. As I mentioned, every joint is heat welded, and you can see there in that bottom photo, the choice is to do a double seam weld and the two photos there going be the welding machine shows how that welding is done. It’s a double seam, provides an air channel in between in that air channel can be tested. So it’s a fully tested seam pressure tested, and the seam itself is stronger than the original membrane. It’s a fully sealed tanked system. There are systems available for penetrations to allow for drainage and post-injection, so they can actually penetrate through the membrane and have a seal across it.
(17:20):
I’ll talk a little bit more about how those terminations work and the design behind those. There are systems available for conduit penetrations. This is obviously a challenge in buildings where you have PVC and HDPE conduits coming through. There are different ways of sealing those depending on the makeup of the cluster of those conduits as they come through. Also, the materials that those conduits are made of. Treating PVC conduits versus treating HDPE conduits will be different and may actually determine which type of membrane you select depending on how important that issue is.
(17:56):
There’s anchorage systems that go through these membranes and create a complete seal around. These are important where you might need to fix a formwork through to the rock strata behind it, through to the piles where you may have to hang services and other things later down the track. You can actually penetrate through the membrane and still have a fully sealed system with either the BA anchors. So as you can see in the top photo or the GRP anchors, which carry a higher load shown in the bottom photo.
(18:24):
A little bit more about termination. So, these are really important where you’re terminating against diaphragm walls, for example, where you have openings in the structure where the membrane is coming to an end, and it actually needs to be terminated and that’s achieved by using a pressure gasket. You can see there in the photo, that’s a steel band over the top and that’s bolted into the concrete structure. There’s a rubber flange behind a rubber gasket behind, which gets compressed and creates pressure. The idea is to create two times the amount of pressure in that gasket of the water pressure you’re trying to resist, and that’s actually an engineering solution and a calculation. We go through and we actually use finite element analysis to work out the thickness of the plate, the spacing behind between the bolts and how tight those fixings need to be, to be able to create that pressure.
(19:20):
We can also work out the type of gasket needs to be used. So the thickness and the Shore A hardness to be able to achieve that water pressure sealing. So, a typical 80 meter design, which is obviously going to be pretty extreme for a building site, but, it can obviously be toned down for lower depths, but you’d be looking at a 10 millimeter thick plate, a hundred millimeters wide, the gas bit of the DCP portray hardness probably be compressed to about 50% of its thickness. That would seal against up to 10 bar of water pressure. These systems are designed to create water tight structures in very extreme water pressure situations. And how do we use those?
(20:04):
So, we obviously use them, as I said, in diaphragm walls and openings instructors, but also in file terminations. So piles you saw in the photos earlier with a bonded membrane, and this was typical for most types of membranes, not just bonded membranes previously, going back a decade or two, you bring the membrane up to the pile and you paint something around and try and get it to bond or maybe you try and put a band around it. It was really challenging because the top of the pile was usually damaged from the breaking down to its level. Water would be coming up through the pile. And then how do we terminate that membrane? Well, now we actually use pressure gaskets, and we design those to resist the water pressure on the structure. And this is how we do it.
(20:48):
We use those terminations, the diaphragm walls, pits and openings as discussed. So you can see a few different applications there of how that’s done. And then we also have bonded or AC termination. We can use an epoxy to bond the membrane down to the structure. These can be used where you don’t have very high pressure saying the diaphragm wall termination, where the diaphragm wall is reasonably dry. You can use an epoxy. Obviously they don’t work as well on a dense surface, so then you’d be moving back to a pressure termination. In that case, we had a lot of water around and also they don’t cope with movement really well. It has to be a fairly stable environment that you’re applying this type of termination. So, wherever you’re expecting, maybe movement in piles, you probably wouldn’t go through this type of termination. It doesn’t have a lot of flexibility, not like the pressure termination, but for diaphragm walls, in most cases, when the diaphragm walls are dry, this can be an adequate termination detail.
(21:52):
We also have terminations around anchors, again, probably a more recent innovation in being able to seal around double corrosion protection anchors. These are becoming more common in basements now to resist uplift where you have steel anchors down into the strata and they come up and they have a plastic sheathing around them. As you can see in the two photos that sheathing has to be connected to the membrane system. A Really large project undertaken over on Barangaroo’s station as part of Sydney Metro at the moment. This solution is now being applied across a lot of the basement structures that we’re working with, where they have tension piles.
(22:30):
It’s a fully sealed system, it’s tested and has a lot of movement capacity for when the structure moves later in its life. It is only possible to do this with VLDPE only because the VLDPE is a type of membrane. You have a couple of different types of plastics that you can use for sheet membrane. VLDPE, being a very low density polyethylene, is compatible with HDPE, which is the high density polyethylene, which is what sheathing is made of. So, it allows those two products to be welded together.
(23:02):
Substrate suitability is something that needs to be considered when selecting the membrane type. As I mentioned, we have PVC type membranes, which are a little bit more flexible. VLDPE is a little bit more rigid. So, if you have a complex structure, you may be leaning towards PVC and you can see there, three-way curvature is pretty common, but having welded joints and flexibility really helps you to provide that continuity of membrane in high risk areas. Particularly when you’ve got a good applicator who knows what he’s doing and knows how to weld. You can even see that something is a steel pile coming out there just off to the side of those guys and the membranes being able to be welded around that actually maybe a de-watering point there and the membranes being welded around it temporarily, very easy to conform to a structure.
(23:53):
Suitability for the application also needs to consider the underground environment. This is where you start differentiating between roof membranes and basement membrane. When you’re down in the basement, it can be wet. There’s moisture coming in, water. This is obviously an extreme photo here, but, it’s not uncommon to see this type of thing in a basement where you have water ponding and really difficult to go and select things like spray applied membranes or fully bonded membranes when you’re dealing with this type of situation. The membrane system that you select really needs to be appropriate for the application.
(24:29):
Compartmentalisation is another thing just to touch on and that falls into internal and external compartmentalisation. Internal compartmentalisation is the water stop that you can see there in the photo. That’s in loops, and it prevents the internal lateral transfer of water between the structure and the membrane. It needs to be fully welded to the membrane and the water stop itself needs to be welded, not glued together, which sometimes you see. The ribs actually provide a mechanical bond to the concrete and the water is forced to travel around the ribs, increases the path length, and also provides a lot of resistance from that water traveling laterally. You can see there in the photo, quite small compartments, a hole in one area. It means that the water won’t travel to other compartments.
(25:19):
External compartmentalisation on the other hand, is to prevent the transfer of water between the membrane outside the structure. That could be important where you have a creek or a water feature or something around the basement that you don’t want draining into other areas where you have a tanked part of a structure moving to a drained part of the structure, and you need to compartmentalise between those two areas. What you’re trying to do is stop water traveling outside of the membrane system. Usually you achieve that by either proxy bonding the membrane down to the substrate or providing another type of connection, depending on the complexity and how much water that you tried to stop transfer. There is that available as well.
(26:06):
Protection systems, as I mentioned, really important once the membrane is installed to protect it from damage afterwards. I should point out that when you see the membrane in these photos, the blue and the light gray blue colour of the membrane, that’s actually a very thin film of membrane over the top of a black membrane. That’s designed to be a signal layer and the signal layer acts as an indicator when the membrane is damaged. If somebody scrapes that membrane or runs into it with a steel bar or a car or whatever it is, it’ll scrape off that very thin layer of colour and expose the black pine and it’s really obvious that there’s some damage there that needs to be addressed. We hope that that never happens because we provide really good protection to the membrane and you can see in the three photos there, concrete blinding layer, 40 or 50 millimeters thick across the surface, so that once that membrane is lay tested and signed off, there’s no further damage that can occur to it.
(27:03):
And the other trades can come in and work across the top. This is a real advantage of a sheet membrane versus a bonded membrane. With a bonded membrane, you can’t do this because the chemicals in the surface of the membrane have to be connected to the structure. Another reason why, as I’ve mentioned, a sheet membrane is preferable for these large basement applications.
(27:25):
As we come to the end, some details to be considered during the application and design. Coming back to the water stop, the water stop actually needs to be robust enough for the application and you often see small water stops. They might be 150 millimeters wide, we’ve got large structures and deep pours. Water stops come in variable thicknesses, commonly used up to 500 and 600 millimeters wide. Get as much of that water stop into the structure as possible. If you can have three bars on one side and three bars on the other side, biting into that structure over a length of 200 millimeters on each side, that’s going to give you a much better outcome than having 80 millimeters on each side. It needs to be robust enough for the application. They also need to be installed in continuous loops.
(28:08):
It seems obvious, but it’s surprising how often you see something like in the photo there on the right hand side with the blue water stop, where the water stop just runs to a wall and stops. What happens there, is that the water will get into the end of that water stop and it will just travel along and the water stop ends up providing a conduit for water flow. It actually makes the situation worse unless you actually have your water stop in loops and being tied off and sealed to compartmentalise then it really doesn’t add much value to the entire waterproofing system. Then as I mentioned earlier, just looking at that other photo there, you can see their water stop, which has been glued together rather than heat bolded. You can see that it’s starting to come apart and that’s not a really robust system.
(28:53):
They had just used a sealant effectively to join that water stop together. We’re talking about some pretty high profile projects that these photos have been taken of. So they’re not small projects. Again, piles and anchors, we need to pay more attention to the details. We want to use engineered details where they’ve actually had calculations and testing done on the pressure resistance. I’m kind of being a little bit tongue in cheek here saying goo doesn’t seal, but then you look at the photo and that’s exactly what’s happened to you. Someone’s just put some gunk around the bottom of the pile and they’re hoping that that’s going to seal. Nobody can say put an engineering cap on and say, yes, that will seal against 30 metres of water head. They’re just hoping that it does.
(29:36):
We also just finally need to allow for repairs and maintenance, no matter how good your waterproofing system is, you should always have injection hoses and other things loop into the system. So that later down the track, if there is some damage that occurs in 20 years time, there is an option available to come in and inject some resin and actually seal the system off. Particularly when you’re in a tank structure, which has a lot of water head there’s high risk and consequences of failure. These are really cheap, easy, insurance policy to be installed because at the end of the day, nothing’s perfect and you can’t always predict what’s going to happen in the future of a structure. Hydrophilic joint seals is something you see used a lot in the building industry, less civil engineering. They rely on expansion in contact with water to create compression in the joint.
(30:26):
The amount of compression that’s created, that’s called uncontrolled. You hope is enough to resist the pressure. As we learned from compression seals. You need two times the amount of pressure in that joint of the water pressure you’re trying to resist. You don’t know that you’re going to get that because you don’t know how much that joint is going to open up. You don’t know how much that hydrophilic seal is going to expand and how much pressure it’s going to create over the life of the structure. So, we would say that that’s not a suitable outcome for joints with high movement, and they’re fairly unreliable in large structures where you’re going to have those large movements. Not the product of choice when it comes to ceiling joints. And finally, just a word on crack bridging. Spray membranes, as I mentioned, do have their place and can be quite a useful tool.
(31:16):
One thing to consider is that the properties are really important when it comes to a spray membrane. It’s often the properties that are most important that are overlooked a little, I often hear people say, Oh, this membrane is really good because it has high bond. High bond actually works against you in a spray membrane. I also hear people referring to percentage elongation. Percentage elongation doesn’t help you at all when it comes to a spray membrane. What you need is the membrane to be thick enough, so that develops enough tensile strength to be able to bridge that crack.
(31:47):
You can see in the diagram above, what you’re looking for is the membrane to D bond over a length. So that at the increased, that stretch length that you see there in the diagram, as wide as possible. The wider that stretch length, where it’s de-bonded, then the more chance you’ve got of that membrane being able to bridge that crack because it’s got enough strength in the tensile forces that are developed to hold together and the modulus of elasticity, not the percentage of elongation, the modulus of elasticity, will help you because what that’ll do is that’ll limit the amount of force that’s created for the amount of stretch that you’re getting.
(32:22):
They’re the important things: modulus, low bond, high tensile strength, high tensile strength comes from a tensile capacity multiplied by the thickness. You can see there in the bottom photo, that’s how you create crack bridging. And you can see there in that photo, very fine line where the membrane has de-bonded, but it has very high tensile strength and has been able to hold together over the bridging of that crack. So just the final note on crack bridging and spray membranes.
(32:53):
In summary, as we finish up, waterproofing should be treated as an engineering solution because that’s exactly what it is. There are some international standards that can provide assistance with the design, but they’re not completely used when we don’t have an Australian waterproofing standard yet for underground basements and successful sealing. It sounds so obvious but just relies on all those small details being addressed and correct. Thank you for your time on that. That’s the end of the presentation. If you’ve got any questions, feel free to either unmute and ask away or type something in there for us. We’ll be happy to consider that. Thank you again for joining us. Hope to see you again, either this afternoon or tomorrow. Appreciate your time.
Products
About this Webinar
In the webinar above, Daniel Bosco and special guest Celia Kim from QuicSeal in Singapore discuss why concrete cracks, the methods of creating joints in concrete and concrete sealing.
Video Transcription
(00:03):
So as I mentioned, we’re covering off concrete joints and ceiling systems. We’ve got Celia Lim joining us from Singapore. I’m going to get started with the first half of the presentation. Then I’ll hand over to Celia.
(00:14):
So why do we need joints in concrete? Why can’t we just create massive, long, big slabs? There’s a lot of reasons. One, by putting a joint in the concrete, you’re actually relieving tensile forces within the structure. Prevents stresses, which could result in cracking in the concrete and it changes the reaction forces in structural members. So in other words, you can transfer between members, just shear, or shear and ending. And also finally it allows for construction sequencing. So you can’t just pour an entire building in go obviously, you’ve got to build it in little bits. So these are all the reasons why we need joints in concrete.
(00:53):
The purpose of joint sealing systems. They offer concrete durability, stopping contaminants getting in. They allow free movement of the concrete during service life. And we’ll be talking a lot more about that aspect. They also offer chemical resistance and they offer protection to sub-base of pavements. So stop those from being washed out with water and other things entering and deteriorating the sub-base.
(01:18):
So let’s go back to concrete volumetric stability, which we’ve spoken a fair bit about over the last few weeks, but I’ll just summarise with a few reasons why concrete moves. And it’s important to recognise this, because in the early stages we have things like drying shrinkage, where moisture is lost during curing and evaporation. Most of the drying shrinkage occurs within the first 56 days, particularly the first 28 days, you get a lot of that shrinkage occurring. As time goes by though, that becomes less of a factor, the drying shrinkage. Higher water content causes more shrinkage. So we know all of this from our previous webinars.
(01:52):
We also have plastic shrinkage, and this is due to a lack of water for hydration. Occurs in the first hours prior to initial set ,and occurs where the evaporation bleeds. So this is something that will happen very early in the concrete’s life. It doesn’t really impact what happens later during the service life.
(02:10):
And we also have thermal shrinkage. This occurs as the concrete cools, it appears and occurs within the first few days of casting, just as that concrete, which is heated up due to exothermic reaction of the cement particles, the entire structure then cools down and we end up with shrinkage. And larger sections create more heat and undergo more shrinkage. But again, this is something that happens very early in the structure’s life. It’s not something that occurs during the service life.
(02:38):
Once we move into the service life, that’s when we start seeing things like thermal expansion and contraction occurring. So these will occur through the entire life of the structure. It’s due to the daily and seasonal temperature variations. We approximately have, and this is just an approximate value, but around one millimeter per liter, for every 10 degree of temperature change. Exposure to sun and storage of hot liquids is going to increase these fluctuations. So the concrete is continually expanding and contracting during its service life. And obviously this is going to have a big impact on the way the structure reacts.
(03:11):
And then cracking due to volume changes. This can occur where volumetric changes are actually restrained. So if we restrain that movement, where the movement joints fail to operate as per the design, You can end up with cracking, where the movements exceed the creep capacity of the concrete. So concrete can absolutely absorb a small amount of movement at different stages of its life, depending on how that movement occurs. And also cracking can occur where volume changes are higher than the design allowance. So all of these come into consideration when we’re designing the joint system for a structure.
(03:48):
So the types of joints that we see in concrete, just summarising a few of them, construction joints, these aren’t designed for movement, they’re included for construction staging only. They can transfer all types of load. So this is basically the end of one pour and the start of another poor. And when I say construction staging that’s as much concrete that usually can be poured practically either in a day or at a time, depending on the circumstances on site. So this is just state one moving to stage two. And this is the connection between the two parts of those concrete elements.
(04:21):
Movement joints on the other hand, they’re still at a joint in the concrete, but they actually allow movement to occur. Usually that’s in a single plane, and it relieves tensile forces. Typically in the movement joint will be designed to transfer shear, but not always. The diagram you can see there, that’s a shear transfer joint. So the end dowel is actually sleeved and it’s allowed to move in and out. And as you can see, it’s moving into that one plane it’s relieving tensile forces from the structure.
(04:51):
But we can also introduce saw cuts, and we can have induced cracking into the structures. This is a methodology used to initiate cracking in a controlled location. It prevents undesirable shrinkage, cracking, occurring randomly. So that we’re actually controlling where it occurs. Because the timing of cutting needs to be early enough after casting. And we can also insert induces, which Celia is going to talk about. We can place those top or bottom, and those inducers will pin the structure and ensure the cracking occurs when we want it to occur. So that’s the purpose of a cracking inducer.
(05:27):
Sealing of the joints in concrete can be done in a number of ways. Celia is going to talk about this in a lot more detail, using gun grade and pourable sealants. These usually have a slightly lower movement capacity. Very good surface preparation is required for these, and we’ll discuss why that’s the case. We need priming. The concrete must be fully cured before application. There’s two reasons for that. One, it’ll improve your bond because the moisture content in the concrete will be more suitable, but also after the curing, a lot of shrinkage has occurred, so then there’s less strain placed on those joints as well. Suitable for both construction and movement joints, but typically not a high amount of movement as a percentage.
(06:10):
We can also use strip adhesives, these come under various names, but these have various high movement capacity. They do require traffic protection if they’re going to be exposed on the surface. A very good surface preparation is required for these again, because it’s a bonded system. We weld all the joints of those strips together, and we seal the terminations and they’re suitable for fairly high movement joints. And they can be used in a number of different ways.
(06:36):
We also have to have a pressing seal. This is just a pushing rubber seal, very easy to install. Chemical resistant, it’s durable, and usually used just to keep contaminates out of the joints so that we can allow that that free movement of the slabs.
(06:50):
Hydrophilic seals. These rely on expansion within a joint. So they’ll develop compression by expanding. Not typically suitable for joints with high movement, because they may not expand enough. They’re a bit unreliable in large structures and somewhat uncontrolled type of ceiling, but still have their place in ceiling joints.
(07:10):
We have Waterstop. Various protocols available. We can use rearguard Waterstop, or center guard Waterstop. Typically all welded together in a loop. And they’ll stop the from traveling through the joint from behind and coming into the structure. So important to point out, that some of these systems are designed for water and contaminants entering through one side. Other systems are designed to stop water coming through the negative side.
(07:37):
We also have bridge expansion joints. These are for ultra high movement, very high load carrying capacity. You’ve seen these at the end of bridges with the various types of designs of structures that allow the movement in and out. Very large range and still able to carry the load.
(07:57):
So they’re the types of joints that we use in different applications. We’re going to focus today now a little bit on airport pavement joints and Celia from Quicseal has done a lot of work with airports like Changi Airport, so I’ve asked her to come along today and just run us through what they do for the airport pavements. So I’ll hand over to Celia, I’m controlling her screen, so hopefully the timing of that goes well. Over to you, Celia.
(08:21):
Hi. Yeah, thanks Daniel. Yeah. I’m Celia from Quicseal. today I’ll be diving into the sealing materials for airport pavement joints. Airport becomes busier and more congested as the number of flights and passengers increases throughout the globe. It is then critical the pavements are designed, constructed and maintained to withstand the imposed load, perform in adverse weather conditions, and other deteriorating influences. It is also essential to provide a clean and level concrete placement at the taxi ways and parking aprons. With this, it prevents disruption of aircraft operation and improves operational safety.
(09:13):
The best practices to ensure long-term durability of pavements, as we know, it is not practical to construct a continuous lapse without joints. Therefore it is always important to seal the longitudinal and transverse joints in concrete pavements for durability. The usage of control crack inducer to control crack forming on the concrete after cast, and for ministry joins in packing aprons and taxiways, is an important step to ensure the pavements are correctly constructed. The implementation of comprehensive maintenance program, which includes periodic check around a site to pick up any defects which may have formed, so that it is repaired early to prevent further deterioration on the slab. And this is essential to deliver good right quality for the safe operation of aircraft and minimise potential of foreign object that breaks.
(10:18):
There are a few types of sealing materials for airfield usage and it’s important that we select the correct type to minimise the defect occurrence on site. They are broadly categorised under form in place and compression seal type. Under the form in place sealant, it is divided into hot and cold applied sealant. The hot pour sealant was the first type of form in place sealant, which requires heat to melt the bitumen block into liquid state before placement. And as technology advances, low modular sealant like silicone polyurethane and polysulphide are made available with improved qualities, and these do not require hot pours.
(11:04):
Compression seal on the other hand, is factory manufactured. As you can see from the earlier shared by Daniel, it is placed by inserting the seal into the joint. And it’s typically a neophrine based, and it allows aircraft traffic right after placement as no curing is required.
(11:32):
Why do we need to seal joints in concrete pavements? Concrete contributes to several pavement distresses and is therefore important to effectively seal the longitudinal and transverse joints in concrete pavements. Sealant is required to minimise infiltration of surface water and isolates joints from fuels and the de-icing chemicals, and protects the pavement against spalling, grit softening, and that dowel bar corrosion.
(12:07):
By sealing the joints it also prevents incompressibles from entering the joints, and foreign objects that risk issues that has a capability to damage an aircraft. It also reduces pavement joint blow ups, which refers to an upward buckling of pavement on both sides of a joint, as you can see from the diagram on the right. An unbelief of the pavement, and this is normally caused by the presence of incompressibles in a joint. Obstructive things like expansion in hot weather.
(12:47):
High requirements are placed on joint seals at airfields, and sealants are expected to resist it and exhibit blast resistance. There are a few specifications available in the market like the BS 52 12, the British standard, and the EN14188-2 European code. The Chinese airport group has adopted the EN14188 as one of the requirements for sealant, as the BS 52 12 was made obsolete a few years ago. In the specification, the sealant must remain permanently elastic. Ability to stretch out the form to accommodate joint movements. A low modular sealant is preferred, due to it’s ability to stretch and compress elastically. The sealant must also possess the resistance to tearing and the tension, as it is an open space application, it is important that the sealant must resist aging due to climatic conditions, including UV exposure and temperature variation. It must exhibit compatibility with the surface in contact like backing rod and concrete, and possess shot opening to traffic time of no more than three hours, to allow across traffic in times of emergency.
(14:16):
Now we come to airport joint seal methodology. Joint design is a critical consideration. And the width to that ratio is also a consideration to facilitate pro installation and allow sealants to function properly. The joint width is dependent on the climate, sealant dimension, and other local factors. And this is usually determined by the structural engineer. But 2-5 mm recess below the surface is required to prevent tire contact of the aircraft. The initial joint should be wide enough to allow for effective cleaning. It is generally recommended to have minimum joint width of 8 mm. And no limits for maximum. However provision is required if width is wider than 20 mm, to limit the risk of mechanical damage.
(15:19):
Joint preparation, substrate preparation is an important element in the sealant installation to ensure the joint is properly sealed. After cutting it is important to remove all debris or loose particles from the bonding surface by high pressure water jet, and dry using compressed air. A cleanliness check is recommended by gliding along the sites with a finger or a test cloth, and do a visual check. If there’s high level of contaminants pick up. Moisture check on the hosed concrete is necessary to ensure there is no excessive moisture within the concrete. As we know, polyurethane and polysulphides system will require a dry surface for bonding.
(16:09):
After the substrate preparation is done, the closed cell backing rod is inserted into the joint. Closed cell backing rod is one of the important component in a joint in an installation. There is no specific national specification, but a sealant that does not saltwater and moderately compressible within suitable for use. It prevents sealant material from flowing out downwards, and prevents third-side adhesion, and this can be clearly illustrated from the diagram here on the right.
(16:43):
When the sealant adhered three sides, the ability to accommodate the movement when the slack opens and closes is limited, and it may cause, or it may results in tearing or adhesion failure within the joint. It optimises the quantity of sealant use, and it helps to create the right third thickness by using a 25 to 30% bigger than the joint width, so that it stays in place at the desired depth. It helps define the shape factor, which is the width to depth ratio. And this is important to determine the correct sealant that with respect to the joint, and we will show you in the latest slide, how to derive the right sealant thickness and joint depth.
(17:39):
It is essential to use the right tool and skill set when installing the sealant. And this is usually done by the specialist. Understanding the record window of the primer is important to achieve good bonding with the sealant. Normally the sealant is applied when the primer is left to dry for about 30 minutes, tech-free stage, before it received the primer to create the bond. Normally will not bond when the sealant is installed, when the primer is still wet. So these are some of the information the applicator has to be made known, and they have to understand clearly from the manufacturer, before they start application. For multi component sealant, we do not recommend partial mixing, as this could result in incorrect mix ratio of the base and hardener component, and cause impact to either improper curing, or durability of the sealant.
(18:53):
We’ll look at an example of a joint I mentioned. Say a sealant with a 15 mm here, with the formulation to calculate sealant depth, you will arrive at a thickness of 11 mm for the sealant, a recess of 2-5 mm, which is required to prevent tire contact with the aircraft, and then a 3 mm depth, when the backer rod will become oval when compressed in the joint. Some spare space below backer rod 3-5 mm. And this number will vary according to the project needs, and then a backer rod diameter of 20 mm. With respect to a width of 15 mm. You will arrive at the total joint width of 39-44 mm. With this configuration, the sealant will achieve the correct shape factor, which is the hourglass shape, which will contribute to an effective seal.
(19:54):
Failure types and quality control. There are commonly three different types of failures that is observed on site. The adhesion failure, which is represented on the diagram on the right hand side, is a detachment of the sealant from the host concrete, and this is commonly attributed by poor substrate preparation, wrong timing installing the sealant after primer application. This is referring to the primer we put in window, improper sealing material used or excessive moisture within the concrete. Cohesion failure refers to a tear within the sealant, represented in here in this example. This happens when the sealant is not able to withstand the internal stress induced when the sealant is extended. Incorrect joint design, if the width of that ratio is less than 0.5, or the sealant is filled to a deeper depth than required. It can be also a case that the application was done without a backer rod, and sealing material loses it’s ability to perform due to aging. Extrusion of the sealant from the joint occurs when the sealant softens, or when the sealant is being compressed. This could be due to incorrect sealing material reaction with the hydrocarbons at the airfield, or no recess was done during the application.
(21:38):
These are some of the photos that was taken on site. On the left-hand side, you will see a cohesion failure, and this is attributed by a lack of not sufficient thickness of the sealant applied over the backer rod. And then in the middle, you have a case where the adhesion came out loose, possibly due to poor subject preparation, or even there was no primer applied. And the last photo here, again, showing an issue of failure between the sealant and the host concrete.
(22:18):
It is important to check that the sealant is installed properly so that it delivers a water tight seal and minimizes any defects during the service life. You can achieve this by performing a simple hand pull test on site to determine if the adhesion is sufficient along both sides of the joint. It is performed after the sealant has been cured sufficiently. This test is destructive to a portion of the sealant joint, which we’re required to reseal the removed portion of the tests. So basically what you need to do on site is do a knife cut across the width of the joint, make two length-wise cuts of about 50 mm. Along each side, grip the free end 25 mm, from the bonding edge, and do a 90 degrees pull, till the sealant elongated to about 140 mm. You have a ruler in place, a ruler at the site to measure the distance travel. As long as there is no de bonding occur along the sides of the joint, the adhesion of the sealant are good, and the installation is successful.
(23:42):
We have touched earlier on the usage of crack inducer used during rigid pavement casting. It controls the correct location forming on the concrete after cast. It also aid in forming straight joints, and it’s available in four depths to the slab thickness. The size selection is generally between one third, to one quarter of the slab thickness. So basically what you do on site is you insert the crack inducer when the concrete is still wet. And after the concrete has set, remove the top portion, the triangle portion is detachable. Remove the upper portion and you leave a gap to receive the backer rod and the sealant.
(24:33):
Back to you, Daniel for the summary.
(24:37):
Thank you for that Celia, good to see some insights into some airport work there that we usually don’t get to see. So just in summary, the concrete does require controlled allowance for movement to be able to function correctly, we now know that. A good joint design detail, we will add to the structure and pavement service life, and also good quality pavement joints that are well-maintained are going to reduce disruptions and also the occurrence of safety issues. So jointing is a really important part of concrete and structural maintenance. That’s it for today, I’ve just popped up my contact details. And also Celia’s, if you’ve got any specific questions. You can also request a copy of these slides just by clicking on the link that Aiden has just popped up there in the chat box. You can also request other information through that link. No questions there? Thank you very much for joining us again today. We look forward to another week of presentations. Thank you very much to Celia for helping me present today. It’s very much appreciated, and we’ll see you all again soon. Thank you.
Products
Miscellaneous
About this Webinar
In this webinar, we’re joined by guest speaker, Dean Oliver from This Is Construction to discuss how COVID-19 is affecting the construction industry both domestically and internationally.
Video Transcription
(00:03):
All right. Welcome everyone. Welcome back for another webinar, The Isolation Series, as we’re calling it. Just letting people into the room now. As I mentioned, today’s going to be a bit more of a laid back topic. We’re not going to hit you up on a Friday with heavy-duty technical information. We thought we’d rather spend the time maybe looking at the impact of coronavirus on the construction industry. And to do that, we’ve invited a couple of people on, just to come and have a little bit of a chat with us. We’ve got, as we mentioned yesterday, Dean Oliver from This Is Construction. And Dean’s a bit of an expert in everything news across Australia. We’ve got a couple of people from overseas we can have a chat with as well. And just see what the current status is of the construction industry and what impact that’s having on people around the globe, I guess. And maybe get some insights into what we might be expecting over the next few months, or even longer.
(01:06):
I’m just going to hand over to Aiden now, who’s going to run the interviews. Aiden’s from Bluey, and he’ll be asking us all the hard questions today. So over to you, Aiden.
(01:17):
Thanks Daniel. Good morning, everyone. So I guess, just to begin, Dean, do you want to give us a bit of background about yourself and about This Is Construction?
(01:30):
Yeah. So, firstly, thanks for having me on. I’ve started a company called This Is Construction and we are a video news channel for the construction industry. Every week we put out a five minute highlights reel of the top stories in construction, top five stories. And you can access that, you can head to our website thisisconstruction.com.au, and every week we’ll send that out.
(02:06):
So the idea behind it is basically to give you a quick wrap up of the construction news every week, without having a troll through a whole bunch of different sources.
(02:20):
Gotcha. Gotcha. All right. So, I guess jumping straight into the coronavirus news then. It was a big week of changes in the government-level regarding the coronavirus. What changes did you then see in the construction industry and the civil industry with these changes in the past week?
(02:44):
Yeah. So we had Queensland close their borders, which is yet to come into effect, it will come into effect tomorrow night. And that’ll actually impact FIFO workers flying into Queensland. So if you’re flying in from other states, only critical workers will be allowed through. And the Queensland Health has published a list of who those critical workers are. But it’s very limited, so it will prevent a lot of workers traveling into Queensland.
(03:23):
So the other change that we saw was just yesterday, and construction site times have been approved for extension to Sundays and public holidays now. The purpose being, to give contractors some more flexibility with rotating shifts and maintaining social distancing on-site, and reducing the number of workers onsite at any one time.
(03:56):
Otherwise, there hasn’t been too much direct impact. We saw Hutchinson Builders lay off 200 staff, and that’s kind of been the first real sign we’ve seen of this virus directly impacting the industry and jobs in the industry, as such. So, interesting development there.
(04:23):
Thanks Alan. I guess, similar question to you Daniel, you seen any changes and have those changes been affecting Bluey in any way, as of yet?
(04:34):
I think, to be honest, I’m very grateful to be in the industry we’re in, when you look around in other industries and the impact that’s being felt by restaurateurs and hoteliers and others around the place, I think we’ve been extremely fortunate. The number of changes in construction in Australia have been very limited.
(04:54):
And just to add on to what Dean said there about the announcements yesterday, that was Rob Stokes, the Planning Minister who came out and has now said that construction sites will be able to operate seven days and on public holidays. And he finished it off by saying that the construction industry is absolutely critical to the economy, and it’s really important that we continue to support it. And it was a really clear indication that the intention there is to keep the construction industry going. And probably the best bit of news that I’ve seen in four weeks, to be honest, after seeing bad news after bad news on this.
(05:25):
So we’re feeling reasonably positive, probably more positive than I was a week ago, about things. I think as long as everybody acts responsibly from here, and we can control the spread, then construction sites will continue to operate. So hopefully minimal changes up until now, other than we’re working from home and those sorts of things, the adjustments we’ve had to make. But the construction industry still seems to be powering on in Australia.
(05:53):
Yeah. I think it’s been interesting to see how different governments around the world have been, I guess, coping with the virus. And to get a bit of an outsider perspective, we’ve got a couple of other ring-ins for the webinar today.
(06:10):
The first is Alex Terry. He is the Director of Tunneling for MRT, the mass rapid transit system in Kuala Lumpur. Alex, if you’re on the call, do you want to just give us a bit of an update of the state of the construction industry in Malaysia at the moment?
(06:28):
Yep. Everything’s ground to a halt here. We had the first movement control order on the 18th of March, and that’s basically said everyone has to stay at home and work from home. We’ve got about 10 tunnel boring machines in the ground at the moment, and a couple of them were under live railways. So we’ve been working hard with the authorities to try and get them moving. Because, basically, when they imposed the movement control order, they said that if to stop works would be dangerous then they would allow works to continue. So, we’ve been doing our best to get those re-moving. We did get approval and it takes quite a while to get the supply chain moving again and things like … because we’ve got dumping grounds in other states, so we’ve got to get things open, the whole logistics of tunneling has had to restart. But, as of this morning, I think we’ve got about six machines going. So, we’re back in business in that respect.
(07:46):
The movement control order in Malaysia has been extended until the 14th of April. And so, we’ll wait and see if that gets extended further. It’s been quite successful in flattening the curve, as the idea of having these movement control orders is to try and keep the virus from getting out of control. So, so far, it seems to be working quite well, but we don’t know whether it’ll extend past the 14th of April or not.
(08:24):
Excellent update there, Alex.
(08:27):
The other person that we have in on the call today is David Sharp. He is down in New Zealand. David is the Director of Grouting Services. David, can you give us a bit of an update on Ardern’s measures?
(08:42):
Yeah, sure. Good morning gents. Can you hear me Aiden? I’m not sure if this was working [crosstalk 00:08:46]-
(08:45):
Yep.
(08:48):
Okay, great. Yeah, so as you know, New Zealand went into lockdown the 26th of March. And like Kuala Lumpur, we’re basically shutting everything down. There’s no construction and everyone is under order to stay at home. You can do a bit of exercise and go for a walk. And generally, we’ve got a 96% success rate of people abiding by the rules. It might seem a bit draconian. I think the fact that we’ve got a labor government in power is one of the key differences between New Zealand and Australia.
(09:19):
From my personal perspective, I’ve got a construction company with 50 men and as an owner and, I guess, just a human being, our focus is on looking after those families, first and foremost. The government’s come to the party and has given a subsidy, which isn’t a lot of money, it’s between 30% and 40% of what an average person earns. And we’re topping up that, over the next 12 weeks, to 80%. So the governments pay the money into our bank. That’s pretty good. But they’re doing the best thing they can.
(09:55):
We’ve got a massive amount of forward work. New Zealand, like Australia, was absolutely booming. There’s concerns around when we’re going to get live again and what that will look like. I suspect, when the government announces on Monday coming, their strategy, they will extend our lockdown of four weeks to six weeks, we suspect. And any sense of normality is going to be a long time coming. And certainly, I’m a glass half full guy all the time, but it’s challenging, the times ahead for us. And I think the sooner we can get something going between New Zealand and Australia in the future, whether it’s 6 months or 12 months, the better. You’re our cousin. So, that’s where things are here.
(10:41):
Yeah. No. Good to hear. Good to hear. And are you breaking the social distancing being outside there or is that just a nice background behind you mate?
(10:47):
Yeah. No, I just thought I’d share a couple of my passions, [crosstalk 00:10:49] the New Zealand flag, mate.
(10:52):
Good stuff. Good stuff.
(10:55):
Okay, another one back to you Dean. We’ve been seeing some media stories recently that we’ve got construction workers not practicing social distancing, having lunches sitting side by side, walking out shifts at the same sort of times. What precautions are the sites taking themselves to stop the spread? And what initiatives and safety measures are being imposed now?
(11:21):
Yeah, this one’s pretty classic. You’ve got the unions on one side kind of saying it’s all safe on-site and pushing for work to continue. And they’ve actually teamed up with the Master Builders along with a bunch of other industry associations in a rare alliance. They’re usually at odds with each other. And then, last night, you’ve got 9 News just walking around with a camera on all the construction sites and everyone’s just acting like it was just another normal day.
(11:56):
So, yeah, there’s obviously a lot of people breaking the rules on-site and not following the rules. But builders have said they’ve started staggering shifts, created more lunchroom facilities, spread people out. And now, with the extended working days as well, we’ll probably see a bit more of that as well, which will be good. But the unions and their Master Builders are in a united front to just push forward and just make sure that head contractors have got the sanitizer on-site and they’re keeping people separated.
(12:45):
All righty.
(12:47):
Daniel one for you. I guess a bit closer to home, but the Bluey guys that are down on-site and working around the country at the moment, what measures have they sort of taken into place themselves to ensure we’re sticking to the rules and doing the right thing?
(13:06):
Yeah, I think the really important part for us was to get buy-in from everyone that works at Bluey, around the fact that this is really necessary for social distancing. And that it’s important that we follow the rules, in terms of being able to maintain the continuity of work for all of us. It’s important to them and important to us. This wasn’t just something that was being forced upon them, we have a responsibility.
(13:30):
So we were meeting each day with the guys, to ensure that they are aware of that. And we also, just in terms of the site meetings, we asked our client to breakdown the toolbox talks in the mornings, not to have them in large groups. So that was an early step that we took. And obviously we’re practicing all the basic sanitizing procedures, washing hands and everything else that goes with it, trying to split the crews up a little bit. In terms of our office work, we’re trying to get people to work from home as much as we possibly can.
(14:02):
We took pretty immediate steps. As soon as this became apparent that there was going to be an issue well before any bans were put in place, management team got together and put out a policy specifically on this issue, which covered a lot of the items. So I think we probably, at the time, were seen to be overreacting with a lot of things that we put in place. But looking back on that now, I’m pretty happy with the way we’ve handled it from the start.
(14:29):
Yeah, no, it’s been a bit of a change working from home for three weeks now, but getting more used to it.
(14:36):
Dean, another one for you. This week we were introduced to the JobKeeper scheme. Can you give us a bit of a rundown, sort of, I guess, get rid of a bit of the confusion as to what it actually is and who it’s going to help out and who’s eligible?
(14:54):
Yeah. So, we all saw the massive queues at Centerlink. So ScoMo has brought in this JobKeeper allowance now, which is basically a payment to the employer to keep an employee in a job. And that payment is $1,500 a fortnight. And both the employer and the employee must meet a set of criteria. A general overview of that criteria is the employer must have lost revenue. And if the employers turnover is less than $1 billion; to meet the criteria they need to have lost about 30% revenue in order to be eligible for this scheme. And as an employee, to be eligible you have to have been employed at the 1st of March, 2020. And it also includes sole traders, so gig workers will be eligible for this payment as well if they’ve had regular work from one company. And even if these workers typically earn less than $1,500 a fortnight, they will still be entitled to the full payment. So they actually get a pay rise, if that’s the case.
(16:27):
Yeah. Interesting. Interesting.
(16:32):
One back to you, Daniel. I think we sort of touched on it a little bit earlier. But with the sort of position that the government seems to be taking with construction staying open, what do you think the outlook for the rest of 2020 is going to be in regard to civil and construction?
(16:51):
Yeah, look, I’m not too worried, like I said, about the next few weeks. The next few months get a little bit more concerning. It’s probably the next few years which concern me the most. When you look at what’s happening in Europe and the US, the economic outfall from that is going to be quite massive. You can only hope that the Australian economy stays strong enough to be able to support the construction industry. And that’s one of the good things about our industry, is it’s one of the first areas of spending for governments when there is a downturn. So we’re just hopeful that we get through this quickly enough that the damage isn’t so bad, that we’re in a strong enough position to be able to come out the other side.
(17:33):
I mean, we’ve seen bad times. I’ve been in industry for over 25 years now, and anyone who can remember the early 90s, we know that, back then, there were really tough times in terms of construction, low employment levels, not a huge amount of spending on construction. Leading up to the Olympics that improved a lot. And we saw some really good years up until around the GFC, which was another little blip on the radar. But, I think, if you try and compare now and what’s going to happen over the next couple of years to the GFC, we got through the GFC really quickly, the government responded really quickly here and it supported the construction industry.
(18:16):
I just hope that the Australian governments, the Australian governments all around the world for that matter, are in a strong enough position at the end of all this, to be able to take similar action and cease pull out. I mean, the last thing we want to see is a long lasting recession turning into a depression over time. But, I mean, that’s probably taking the most negative view of it all. At the moment, like I said, I’m feeling reasonably positive considering how bad the circumstances are.
(18:47):
Perfect. All right. While we’ve got everyone on the call, does anyone have any questions that they’d like to pose to the group or have answered? If you’d like to just unmute yourself or add into the chat, can go for it now.
(19:11):
Yeah. And while we’re waiting for any questions to come on, again, I just like to thank everyone for joining us in these sessions. Next week, you might see, we’ve got our program … oh, you can’t say that, that’s not going to come up on the screen. But Aiden’s going to be putting out the program. It’s also on our website. We’ve got a few different speakers next week. So we’ve got Bill Green, he’s going to present on HDP and corrosion protection liners. I know there’s a few people on the call who might be interested in watching that one. Ground anchors on Tuesday, fluid grout’s on Wednesday, and they were going to be covering waterproofing of TBM cross passages on Thursday to finish off the week.
(19:51):
Any questions coming through? No, nothing yet. So I think we might leave it at that. And I might thank Alex Terry, very good mate of mine, for joining us. Dave Sharp, a very good mate of mine, for joining us today. Really great to see your faces guys. And of course, Dean Oliver, who’s helping us out with these sessions as well. Thank you very much, Dean.
(20:13):
Sure.
(20:13):
And Dean, just remind everyone where they can come and find you? LinkedIn, This is Construction, is that the best way?
(20:20):
So you can head to our website thisisconstruction.com.au. You can follow me on LinkedIn, Dean Oliver. We’re also on YouTube, Twitter, Facebook. You can watch our videos there.
(20:30):
All right. Thanks again, Dean. And thank you everyone. I hope you all have a really good weekend. I hope that wasn’t too negative. I’d like to think that we aren’t in such a bad situation with construction, and it’s great that we’ve got such a supportive community around. And I look forward to seeing you all again next week. So, thank you.
About this Webinar
In this webinar, we’re joined by special guest Brad Parker, CEO of Mates In Construction NSW. Brad and Daniel Bosco discuss mental health, diversity, suicide prevention and the effects that COVID-19 has had on the construction industry.
Downloads & Links
Video Transcription
(00:04):
Okay. Welcome, everyone. Just letting everyone into the meeting room. Thank you again for joining us today on these webinars that we host every day at 11:00. My name’s Daniel Bosco, for those of you who haven’t joined us previously. As you know, we typically run technical webinars each day, covering topics from civil engineering, but on Fridays, we like to maybe take a little bit more of a lighter approach and a look at the construction industry from a different angle.
(00:35):
So, today, we’ve actually invited in MATES from Construction, and we’ve got Brad Parker with us today. He’s going to talk about mental health and suicide prevention, particularly in light of the COVID-19 lockdowns and the isolation that we’re all going through. So, I’m going to hand over the interview process to Aiden, who’s our marketing and engagement leader at Bluey, and I’d like to welcome Aiden, and also Brad, and thank Brad for joining us today.
(01:08):
Thanks for that, Daniel. Hi, everyone. Hope you’re having a nice Friday. So, I guess we’ll just jump straight into Brad if you would like to just inform everyone a little bit about MATES in Construction, I guess, its vision and purpose, and how did it begin, a bit of an intro.
(01:27):
Yeah, thanks, Aiden. I want thank Bluey Technologies in the first instance. They’ve been a wonderful partner in MATES in Construction. Without the likes of Bluey Technologies and others in the industry, we probably wouldn’t have the program that is now considered one of best practice worldwide, so we really appreciate the work that Bluey Technologies does with us, and we very much welcome their support.
(01:58):
So, MATES in Construction, how did it start? Its embryonic beginnings started in around about 2007, in Brisbane, so it was a Brisbane-based idea in Queensland. There’s a fund in Queensland, it’s at one of these redundancy trust funds that exist in the top-end of the commercial industry, and they have a component within that trust fund of insurance for all kinds of areas of insurance, so it might be outside of work, as well. So, they were looking at death claims between the years of 1999 and 2007, and what they found was they paid-out on a series of death claims, totaling nearly 400, and out of that 400, 88 were suicides, and they thought that’s a little bit disproportionate, maybe we should investigate this a bit further. So, the BERT Fund, Building Employees Redundancy Trust, that stands for, they then engaged Griffith University in Queensland. They then conducted a study that was part of the AISRAP report, which took the industry by storm. That AISRAP report found that the numbers were disproportionate, so a construction worker’s about two-and-a-half times more likely to suicide than the national average. If you’re between the ages of 15 to 24 years, you are 11-and-a-half times more likely to take your life than die from a workplace accident. That was their starting point. Wasn’t very good.
(03:41):
And then they started to look a bit deeper about what are those issues around the industry. One of the main issues that came out was they found that 93% construction workers that had suicided in the past had never sought professional help, so they either didn’t know where to find it, they didn’t want to, or they weren’t encouraged to. I could bang on forever about MATES and about how it started, but really, that was the key, and that was about looking at construction workers, how do we encourage them to seek help. And essentially, we set it up in that way, back all those years ago, and of course, I’m from New South Wales, I’m from Sydney, so we’ve only existed for about six-and-a-half years in Sydney, so we did get our beginnings back in around about 2008 in Queensland. But, yeah, we’ve only been going about six to seven years in Sydney.
(04:44):
Okay, Daniel, over to you. How did you first hear about MATES in Construction and to what capacity did you get Bluey involved, and are we involved as of today?
(04:55):
Yeah, it was quite a few years ago now. I’ve probably lost count, but it was in the pretty early days of MATES in Construction, and I had turned up to a site induction, it was over on one of the very early projects on [Berang Peru 00:05:09] and MATES had sent someone in to do a bit of a talk. It was about a one-hour talk to everyone who was being inducted, and I was just so impressed with what they were doing and saw a real need for it in the industry. I just couldn’t believe that nobody had really done anything about this previously. I mean, we all know that the construction industry is a very male-dominated industry, and people aren’t really willing to talk about the way they’re feeling and the issues they may be having, and the way MATES in Construction approached it and provided an avenue for people to talk to someone, and then just bringing that topic to the forefront so differently to the way anyone else had presented previously, really impressed me at that induction.
(06:01):
I actually went home that night, sent them an email immediately to the president saying I want to be involved, what can we do? I said, “I’m happy to give time. Is it financial support? What is it that you guys need? I mean, we’re a small company, we can’t run your organisation with our finances, but whatever we can do we’re willing to do?”
(06:22):
So, we took up a couple of initiatives. We helped them print out some little documents that they were handing out at inductions originally and provided the facilities for that. We then formed an ongoing annual partnership with them, and yeah, we’ve been involved in a number of initiatives since then. And we’re seeing MATES as probably one of our primary kind of areas that we’d like to contribute to as an organisation as well because we just recognise that mental health is such an important issue in the construction industry, and it’s something that we feel can make a real difference to safety of our employees on-sites.
(07:07):
No, it’s good stuff. Good stuff. Brad, can you tell us a bit about the training programs that MATES runs to educate workers on mental health and communication, I guess, all other areas?
(07:21):
Yeah, thanks, Aiden. So, I guess Daniel’s experience is not so different to many people who they get engaged with our program, as soon as they see it on the ground. When we do the training on the ground if we need to bring in directors of companies, we’ve done that in the past, politicians, so ministers and so forth, we get them to come in and have a look on the ground and see the interaction of the participates we have, the workers, the people in the industry because I think it’s the best way of showing you how it’s done. And that’s with the General Awareness Training, you’re right, Daniel, that goes for 45 minutes to an hour, that’s like an induction program, that talks about those signs, we teach those signs to look for. So, what are those signs of suicidality, what do they look like, what happens when you ask someone if are you okay and they’re not okay, what do you do next, and then we teach also how to keep someone safe while connecting them to help? So, that’s the General Awareness Training. That’s 45 minutes to an hour.
(08:30):
We generally try and get at least 80% of the construction-site during the course of the period of the project. That’s difficult. A construction-site can be a moving feast. People are coming and going, but we overachieve on that. We normally get 90% for those companies are serious about running out the program. Out of the General Awareness Training, we then get people to volunteer to do the next phase of our training called Connector. A connector is a person who is trained in keeping someone safe while connecting them to help. The ratio of connectors that we try and achieve on a job site is one in 20. It fits into a bit of research that talks about one in 20 people may have suicidal thoughts, they may be fleeting, but they do have them. So, one in 20 is our ratio we try and achieve. We overachieve on that as well, generally, on a construction-site, and that’s for four hours. So, four-hour training, it’s not meant for everyone. We get people to put up their hand, say that I’d like to volunteer to do that program. We then hand those names to their employer, and their employer then we organise with the employer to conduct that training.
(09:44):
And then we have a third phase called ASIST, Applied Suicide Intervention Skills Training, which is essentially two days of suicide first aid. That’s not meant for everyone. You only need one person from the site to reach what we call MATES Accreditation. So, we go through that accreditation, we try and get 80%, one in 20 connectors, and then get at least one person, but we overachieve on that generally on the site that do the ASIST, An ASIST-trained person is someone who can put a safe plan together, and then connect them to the mental health professionals.
(10:22):
So, just so you know, we’re not the mental health professionals, we don’t seek to be the mental health professionals, we’re not counselors, we’re not psychologists, but we are that bridge that’s never been built, and that is those people connecting them to get to help, remembering that stat, 93% of construction workers who had suicided in the past never sought professional help. So, that’s what we seek to achieve. I think we do quite well.
(10:48):
If you’ve looked, we are an evidence-based, research-based program, so you can have a look on our website and have a look at all the research we’ve done. We have on each board, in each state an academic that sits as a director. I have in New South Wales the emeritus Professor Michael Quinlan. He’s a bit like Doc from Back to the Future, he’s out there, but what he does is just magnificent, and we’re always looking to see how we can better the program we have.
(11:22):
No, good stuff. As Daniel mentioned earlier, he said that there’s a little, well, quite a big range of diversity in the industry, and talking just about the lack of maybe female representation in the industry, what is it MATES in Construction are doing to support women who might feel sort of out-numbered, or out-machoed, let’s say, in construction?
(11:55):
Look, great question, Aiden. I saw this question coming earlier and I thought what a wonderful question to ask. There’s a few things that we need to understand about women participation in our industry, there’s not enough, number one. I was bought up by a feminist, and she’d be happy to know that … And this is a starting point, in MATES in New South Wales, 80% of my staff are female, so I think we’re punching well above our weight when it comes to gender equity in our industry for MATES in Construction, New South Wales. We just recently employed a 75-year-old, Dr. Peggy Trompf, and Peggy has no qualms about me mentioning her age. She doesn’t look it, and she’s as sharp as they come, and she’s our industry engagement officer who’s looking at our national industry Blueprint for Better Mental Health and suicide prevention, which is partnered with Beyond Blue, and I can talk more about that later.
(12:55):
The women are very much a key to looking at suicide rates in construction. If you looked for a reason, no better reason to engage with women in our industry it is that we believe that higher participation of females in construction can actually save lives. There’s no better reason than saving lives. So, women are very much a key because women, we know, generally across the country in Australia, 75% of males suicide compared to 25% of females. Why is that the case? We know there’s a little bit of international research that tells us that women has this really good communication network. They’re very good at offloading their problems. They’re very good at talking openly about issues of anxiety, depression, and mental health. Us blokes tend to bottle it up. We don’t tend to do that. We’re not encouraged to do it, either. There’s this thing about harden up, have a cup of concrete, what’s wrong with you, princess, all that sort of stuff that goes on. So, women are a very important part. We know that they’re really good at help offering. So, women are an important part of reducing suicides, I think, in our industry.
(14:14):
What happens when women get onto a construction-site? Well, I got to tell you, there’s still a problem there. We don’t one, encourage women enough in our industry to participate, but also, when they get there, I was talking to Dr. Natalie Galea just yesterday, who has done some gender equity research from University of New South Wales, and Natalie was saying to me, they’ve may have taken all the pornographic material in the crib sheds and the lunchrooms, but the men are still talking about it in front of the women during their lunch. That’s got to stop. That’s got to stop. So, to answer your question, we have a number of women that work for MATES in Construction, New South Wales. I put on the high-vis and I go out and I train with my staff when I can, I enjoy it. At the end of the General Awareness Training, generally, a lot of blokes will come up, and they’ll line up to speak to the female staff that I have. They won’t line up to me. I can’t take it personally. They’ll line up and they’ll speak to the female staff afterwards because they somehow want to get involved and get active within our program. And that’s a very important thing.
(15:32):
So, on the ground, if we were able to support women from our industry, we know it’s in the back of our mind, we do do it well, I think, but I want to use this as an opportunity to encourage more women, that we need, us blokes, actually, need to create an environment where they feel comfortable that they’re able to achieve in our industry, and they can actually help reduce suicides.
(15:57):
Daniel, I know you’re a bit of an advocate for this conversation, do you have anything to comment on this, also?
(16:05):
Yeah, I’m just so glad and relieved to hear Brad speak about that. I mean, sometimes you feel like a bit of a lone ranger on this topic, and it’s something that you know I’m extremely passionate about, and I think it’s one of the biggest weaknesses in our industry is the lack of diversity in construction. And there are really good reason why we need it, and Brad’s pointed most of those out. I mean, I’m a guy that comes from a background of I’ve got two daughters, I’ve got a wife who’s a civil engineer, she worked on-sites in the late ’90s, and it is impossible to feel more excluded from sites than the way women are made to feel on-sites. And on a lot of occasions, even now, and even though, as Brad says, that pornographic material has been removed from sites, the type of conversation that goes on. As a dad with two daughters, I wouldn’t want my daughters in that type of environment. It’s not right, and it’s not reflective on the way the rest of society behaves now, and it’s beyond what’s acceptable.
(17:11):
I walk around the streets of a morning and you walk past construction-sites, and sure we might be getting rid of the wolf-whistling and whatever, but there’s still that real macho culture of chest-beating and a real boys’ club that exists within construction that needs to be broken down, and the only way to break that down is by some forced diversity in the industry. And somebody actually needs to stand up and start making this happen sooner rather than later if we’re going to get on top of things like suicide prevention and other issues that form as a result of that male-dominance that we have in the industry. So, it’s great to see MATES in Construction, again, leading the way on these types of issues, and I’d like to see big business supporting it more. I know they are. I’ve got to give some due credit to some of the larger companies. I know they’re trying to make an effort to make sites more welcoming. I know that if you go back only 20 years ago, it wasn’t unusual to have strippers come into site for Christmas parties and stuff, and like Brad says, the pornographic images around, and all of that stuff has been stamped out and they are trying to see more women in engineering and whatever.
(18:19):
But I think more needs to be done on the ground, as well, we need more women working on-sites as well. They can add a lot of value to what we do on-sites. So, how we get to that stage, I think it’s probably the large construction companies that have to stand up and do more.
(18:36):
Mm-hmm (affirmative). Well, it’s great to have the lines of conversation open on that one. Just moving onto, I guess, something a little more news and current. COVID-19, of course, is stressing everyone on the planet out, and been stuck at home for a month now, I’m sure as everyone else has, I’m just wondering, Brad, how maybe the inquiries coming into MATES in Construction have changed and what’s MATES in Construction doing to assist workers and their families now with the added pressure and stresses of the coronavirus?
(19:13):
Yeah, well, as you probably realise, we’ve had to change our focus, Aiden. We can’t train because of the social distancing rules. So we’re stepping up now, we’re not stepping back. In New Zealand at the moment, they’re in lockdown, so the industry, those sites are in lockdown, but in Australia, we’re deemed essential workers, so construction-sites are still open, and they’re still operating, so we have to then stop up as well. And obviously, there’s a lot of anxiety around COVID-19 and it’s a bit double-edged. What we’re hearing on the ground is that the workers are saying to us they’re very grateful to have a job, they’re grateful to have an income, but they’re also worried about exposing themselves, then exposing their families and whatever to the virus. They’re hopping in transport, they’re hopping in trains and buses that are empty, it’s a very weird, it’s not a real sensation, it’s a bit out there. They’re finding that difficult. And then they’re coming to work, and then they’re obviously, whilst they’re social distancing on site, they’re trying to social distance people, in reality, does that really work?
(20:33):
So, what we’re doing is we’re going on-site, we’re offering our services. We’re being invited on-site to offer our services. We’re practicing social distancing. We are there doing toolbox talks, start-up talks if we’re asked to do that. We’re providing material. I got some material with me today, which is some posters about COVID-19, that one is with QR codes, it’s a whole lot of things that they can scan, and they can get advice on, but also, the anxiety-related stress that comes with COVID-19, and there’s a whole heap of stuff that we’re going through there as well. So, we’ve changed the focus, we’re active, we’re open for business, we’re saying we’re trying to help. It is difficult even for my staff, and obviously, we meet on a regular basis via Zoom or whatever, we’re in constant touch.
(21:29):
We’re getting feedback from the industry. The feedback we’re getting is very positive. They’re so happy to see us on-site and offering our services, but it is an unusual situation. We are providing them with stuff like it’s normal to be sad, and stressed, and confused at a time like this. We’re asking them to stay healthy. We’re giving them a lot of tips on that. Getting the facts and being aware that some of the information out there is not the right information, so a bit of fake news as Donald Trump would call it, limiting your worries, spending less time listening and watching media coverage that may help you, drawing upon your skills, not trying to drink a lot of alcohol, be careful with the alcohol or drugs, and we’re there to offer our assistance. So, yeah, certainly, we’ve had to change the focus of what we generally do.
(22:26):
Mm-hmm (affirmative). Okay, Daniel, one for you, I guess, a bit closer to home. Is there any sort of initiatives that Bluey’s been implementing, either since coronavirus, or beforehand, to keep everyone sort of happy and upbeat while working?
(22:46):
Yeah, of course. I think it’s an important part of developing a nice team structure is to ensure that we can all support each other and feel happy during these times. Before the COVID-19 outbreak, we’d already had an initiative which we called Happy Healthy Bluey, where we’re encouraging people to get out and do exercise every day because we recognise that physical activity is a really important part of maintaining good mental health, so we have encouraged, and we actually set a little bit of a competition for people to maintain that every day, and it became really good having some banter around the office of who was out there doing their walks, or their Pilates, or yoga, or whatever it was that they chose to do.
(23:35):
We’ve also implemented a bit of a program for mindfulness, as well, just to ensure that people are taking time out each day to sit and think and clear their heads amongst all the screens, and emails, and messages, and everything we’re faced in with the day, I think it really does put a lot of pressure on our brains to kind of process all of that. So, it’s really important to us that we’re here to support each other and we all take some time out each day. And I truly believe that a happy team is going to be a more effective team, so that’s really important to all of us at Bluey.
(24:13):
Yeah, definitely. And just a final one for you, Brad, is there any initiatives that MATES is looking to bring out in the coming months, or any news you’d like to share to anyone on the webinar today to inform anyone?
(24:27):
Well, just to say that we thought that we’d be inundated with a lot of case management cases, and that hasn’t sort of materialised just yet. We think it may be another six to eight months down the track. While the industry is open, people are just trying to work, and I think a lot of the people in the industry are happy to have a job. There is some new initiatives, so MATES in New Zealand, we launched MATES in New Zealand last year. It’s led by a very dynamic CEO woman by the name of Victoria McArthur. Obviously, they’re locked down in New Zealand, so the industry’s not operating, so they’ve come up with a unique initiative called, well, I think they called it originally the smoko shed, or the smoko room. I think the New Zealand regulator over there said that they had a problem with the term smoko, so I think they call it the lunchroom, or something now. Whereas, that’s virtual like this, using Zoom, in a controlled environment, where they’re getting people to come in and have a chat around some of the anxieties and about what’s next with the industry, all that sort of stuff.
(25:48):
So, we’re going to take that on. It’s a work in progress. We’re looking at the success of that program in New Zealand, and I’ve got to say, to the New Zealanders that are listening in and watching, MATES in New Zealand has been a breath of fresh air. We can actually learn from them. We may have initiated MATES in Construction in Australia, but I think MATES in New Zealand have just taken off. It’s just been amazing. And I was over there when they did their launch last year, and it was amazing. It was just an amazing roll-up of industry and people getting behind it. So, we’ll be looking at some of the stuff they’re doing.
(26:31):
Obviously, we’re having a looking at some of our research that’s starting to come out again. We’re about to initiate an app. We’re doing some research around that at the moment, which hopefully, that’ll be out in the next six to 12 months, and that app will not only allow people to have tips about better mental health and wellbeing, but it’s also a good opportunity to get some really good qualitative research data from as well. So, we’re working on that at the moment. That’s another work in progress. And we’ll continue to adapt to the challenges that are put before us with COVID-19 and the support of the industry. Yeah.
(27:22):
Fantastic, all right, well, thanks for your responses two of you guys. I’ve just posted a link into the chat there for everyone. I’m guessing there’s some online material that you have, Brad, as well-
(27:35):
Yep.
(27:35):
… if you want to send it to me. Everyone, if you would like the information from MATES in Construction, just head to that link there and just select webinar presentation PDF, and I’ll get that information sent around to you this afternoon. But apart from that, thanks everyone for listening in. I hope you’re having a nice Friday at home and a good weekend at home. I was thinking, Friday afternoons isn’t going to be that much fun today, just staying here, but anyway, I hope you all have a good weekend, and thanks for tuning in.
(28:07):
Thank you for having me.
(28:09):
Thanks, Brad. Thanks for joining us, really appreciate it.
(28:11):
Thank you very much.
(28:12):
Thank you.
About this Webinar
In this webinar, we interview four members of the Brisbane Team, matching faces to names. They give us an update of how working in isolation is going and provide a quick look into life at home.
Video Transcription
(00:04):
Morning, everyone. Welcome to our Friday edition of our webinar isolation series. Just letting everyone into the meeting there, give everyone a few seconds just to join through. Thank you for joining us today. We’ve got a bit of a lighter approach today. As you know, Fridays, we don’t take too seriously. We feel like we hammer you enough with technical details during the week, so today we’ve got a bit of a make the team at Bluey, and we’ll have a little chat with all the people behind the administration, logistics, customer service, and the guys that actually make stuff happen at Bluey. And we’ll talk to them about how their coping with isolation and also about their roles at Bluey. I figured it’s a good opportunity to meet some of the guys. Just to let you know, as well, this meeting is being recorded. So it’ll be available on our website later in the day, and also feel free to ask questions of the guys just hop in and unmute yourself, otherwise type something into the chat box and fire away.
(01:09):
Also, I hope you can see everyone at the moment. There is an option just above the little videos of people that you can see to hit grid view. That’s the one within the nine little squares. If you click on that you might be able to see everyone a little bit easier. So I’ll leave that up to all of you to sort out and for now I’ll… it looks like everyone’s in. So I might hand over to Aiden, who’s going to run the webinar today and ask all the hard questions of the crew. Thanks, Aiden.
(01:38):
Thanks for that Daniel. So thanks everyone again for joining us. So I guess we’ll jump straight into it with Heather. Heather, how did you first get involved with Bluey and what is your current role?
(01:55):
All right. So I’m the general manager for Bluey, and I first met Daniel over the phone about 15 years ago, actually, when I was working for an anti corrosion company in Melbourne. He called up on a Friday afternoon looking for a solution that needed to be delivered to site the next day, and I was able to help them out from start to finish despite a few hurdles, such as the three hour window in the Saturday delivery, but we got it done without any trouble, which was fantastic. So he was really appreciative. His client was really appreciative and impressed with the level of customer service. And he had actually quipped at the time if I ever found myself in Sydney to come in and see him. So three months later my husband and I had moved to Sydney and I took Daniel up on that offer and I went in and met him. And 15 years later, we still work really well together, albeit as part of a much larger team now, and I’m still really enjoying the work that I do.
(02:56):
Good stuff. And, okay, we’ll jump over to Cecelia. Cecilia, what is one part of your role that people may not know that you take care of? And if you could also elaborate on your new role itself as well?
(03:10):
Sure. So as customer experience manager, my role is predominantly customer focused. However, a large part of my role also involves managing the day-to-day production forecasting requirements of our blue’s in-product range. And that’s just to ensure that adequate stock holdings are maintained in each of our stock locations. So it’s largely a behind the scenes non-customer facing aspect of my role, but ultimately ensures that we at Bluey can efficiently process, supply and deliver customer orders in a timely and efficient timeframe.
(03:47):
Good stuff. Good stuff. Okay. I’m moving now along to Bryan. Bryan, if you also wouldn’t mind explaining your title and the main people who you deal with on a day-to-day basis.
(03:59):
No worries. I’m the financial controller for Louie day-to-day it will vary on what I’m actually doing. Usually it’s customer service accounts and our accounts receivable, but it will vary depending on what I’m looking at. So could be talking to customers, suppliers, banking institutions, relay to buddies or our excellent accountants, so it will vary a lot, but usually customer service sales guys, and the accounts receivable and accounts payable.
(04:29):
Good stuff. And finally, over to Tash. If you wouldn’t mind explaining your title as well, and give us any information on who you’re locked up with and how you’re going working from home.
(04:43):
Hi guys, I’m Natasha, I like to be called Tash, but I am in customer service and I am locked up at home with mum and dad. So they’re lucky to be working from home with me. I guess, working from home isn’t too bad. I’m used to going to a place of work for a different routine, but it has been good to adapt, especially with technology and the situation we’re all in. It’s not so bad.
(05:18):
Yeah, absolutely. Just before we go on, we’ve got a fair few people, new people jumping into the meeting. So just explain that we are doing not a technical webinar today. We’re just doing a bit of a meet the team to get to know the faces to the names of the people that everyone deals with in customer service in the Queensland team. So, sorry, jump back in now, another one for Heather. How are you going with the lockdown, H? Is there anything that your really restricted from? What have you found that you can’t be doing and how have you kept some hobbies going in this time?
(05:59):
So unfortunately my two favorite hobbies are activities that happen out in the environment. So I ride a cruiser motorcycle if any of you are motorcycle enthusiasts. So I have a Suzuki M109 Boulevard, which has an 8,000 CC engine and weighs that 320 kilos. So we have some fun out in the back sticks of Queensland every fortnight or so. So unfortunately whilst the Queensland government did consider it exercise, you not allowed to exercise outside of your immediate area. So I couldn’t very well explained being 300 clicks away to an officer if he pulled me up. So that’s been parked in the garage. And the other thing that I love to do is scuba dive and can’t do that either. So unfortunately, I tend to just focus on a bit gardening, bit of painting. That’s probably about it. A bit of home reno.
(07:08):
Good stuff. Well, hopefully we’ll be back to normal soon-ish and back again. One for you, Cecelia, what are you most missing about, I guess, normal life and now how’s life different for you in lockdown?
(07:26):
I think most of all, probably like everyone else, missing a human connection and freely being able to get out and about. Being able to connect with friends and colleagues. And I guess when we’re all working full time, we tend to spend more time with our work colleagues than our families quite often, so we are like family. I didn’t realise I’d missed that connection as much as I have. On the upside though, we’re so grateful just to have the technology available to be able to just maintain contact on all of these platforms. So, I openly admit to being technologically challenged at times, but I’ve learnt so much in connecting online and just the variety of ways that we can keep connected, which has been really positive.
(08:17):
Good stuff. One for you again, Tash. Bluey, we always run a healthy, happy Bluey challenge in which we all try to complete two or three different exercise challenges or workouts during the week. Mine was a group PT session. I know some of us had yoga, some of us had Pilates, which has basically all stopped now. So Tash, how are you keeping active and physical now that we’re all locked down at home?
(08:48):
Good question. I was doing touch football, which locked down can’t do anymore. But my gym is fortunate to be doing virtual online sessions and we can get on meetings with their trainers, and then to mix things up if I’ve just bought a bike. So I’ve been exploring around the area to go for bike rides. So add in some physical exercise there. So I’d highly recommend if anyone’s looking for ideas to get a bike.
(09:27):
Good stuff. Maybe you can go around with Heather.
(09:31):
She’s got the engine, so that’s a bit [crosstalk 00:09:33].
(09:36):
One for you, Bryan, the way that work’s changed in lockdown, how do you think this will affect the way you work and the rest of Bluey will be working in the future after the lockdown’s over?
(09:53):
I’m not a hundred percent sure to be honest. I am actually hoping it’s going to push us more towards a paperless environment. In the office hopefully less printing, using more software stuff, that kind of thing. I still prefer the personal interaction face to face. So for me, it was also a bit of a change getting used to using Zoom and direct messaging software. So I think that has changed and we’ll probably use it a bit more in the future just because now we know how to use it and we got used to it over this period. So hopefully more Cloud based, using more software and less paper.
(10:33):
Yeah. Good stuff. Good stuff. Okay. Back to Heather again. Heather, what have been some of the biggest challenges of working from home apart from having the bike in the garage?
(10:47):
Yeah. Thanks. That’s really, the only challenge is just not being able to get out on the bike. No. Look, there’s a couple of challenges, really. I think for me, one of them is about being mindful to switch off work mode. It’s really easy just to keep working or to just work over weekends and things. Days tend to roll in together when you’re stuck inside your house. So I found personally I’ve needed to physically distance myself from my home office. So I do that. Go out, go for a walk, have a workout session or something. But for me having that physical distance is you drive home from work. It’s that time to switch over from work mode to personal mode. So I think it’s important to be mindful to do that.
(11:42):
And the second challenge, I think everyone’s actually touched on it so far, has been the change in internal collaboration. So it, especially for the Brisbane office because we’ve got quite a few people, and I’m sure it’s like that with the other offices as well. But previously you could just walk over to someone else’s office, have a chat, jump up on the white board to brainstorm ideas with your team. And now you just don’t have that same sort of connectivity, that physical aspect of it. So that’s just been a little bit different. You use your online platforms and stuff, but just getting used to that, not having a physical aspect of collaboration.
(12:27):
Yeah. Okay. One for Cecilia. How is the family coping with you being at home? Are they coping better?
(12:37):
Poor things. I would say being a full-time working mom, I’ve often had that the mom guilt of not being able to spend as much time at home as I’d like, but it’s actually really nice to be able to slow down and not feel the pressure to have to go anywhere and just relax and enjoy the simple things. Main thing is not having to rush cooking and your always on top of the washing and you can be a domestic goddess for once in my life. But the fur babies definitely having the best time of their life at the moment being spoiled rotten. So it’s just a really good opportunity to reset and appreciate what we all have, I think.
(13:21):
Definitely. On for you Tash, I guess touching back on what Heather was just mentioning before about communication, have you felt that Zoom and the other methods of communication have been effective? And how are you communicating with everyone even outside of work now that we’re separated?
(13:43):
Yeah, definitely, exactly what H mentioned as well. The communication is probably even more stronger, I feel, just because we’re getting in touch with each other more because of how much… we have great accessibility to Zoom and all these other programs that we can… they’re just a phone call away. But I guess just checking in with everyone, and we’re all in this together, so I think it is effective even though there is no physical aspect. But I think we’ll get through this.
(14:22):
Yeah, no, I think so too. And one for Bryan. Are you looking forward to getting back to the office, Bryan, or are you a happy being at home?
(14:34):
I actually miss the office, to be honest. I like the idea of getting up and getting ready to go somewhere. I really feel that has a certain amount of being professional usually working in an office. Working at home in your pajamas all day you don’t quite feel like you’re being a professional. But it’s been good. But actually being able to work with the girls and the rest of the team, I really do enjoy it. And as Heather said, interaction. Obviously there’s a bit of banter going back and forwards on team and zoom, but it’s not quite the same as their personal face to face telling jokes and talking about a situation or whatever’s going on, so I’m looking forward to getting back to the office and be able to actually use the car and the bike again.
(15:18):
Yeah, absolutely. And one for everyone here, have you guys been tuning into any of these webinars apart from this one, and have you had a favorite? What are your thoughts on the isolation series webinars, what we’ve been doing? Starting with H.
(15:44):
Yeah, I really enjoyed them. I’ve been tuning into to all of them. I don’t have a favorite per se, because I’ve enjoyed them all, but I did really like the tunneling and the GRP one, and that’s because the work and the technology in those spaces is really quite fascinating to me. So I got to learn a lot and peak the interest again.
(16:11):
Good stuff. Cecelia, your favorite?
(16:15):
I’m pretty much on the same page as H. I’m really enjoying the webinars pretty equally, but I was just going to say, just being in the operational side of the business, it’s not often that we get the opportunity to see what’s happening on the technical side of things. So to be able to actually to see how the products work and perform and demonstration or presentations is actually really informative. And it’s been really beneficial for all of us internally I think at Bluey as well as all of our external clients.
(16:52):
Good stuff. Bryan, same question to you.
(16:55):
Honestly, off the bat, I think it’s a fantastic idea interacting with our customers and explaining what we do. I think it’s really good. I mean, from our point of view, I’m usually behind a desk and a computer with the numbers, I don’t actually understand what the products are doing and how they work. So, the information come across is really good. But for me, the main thing is it’s still interacting with the customers and I’m impressed you’ve been reaching a broader customer base with a lower cost, which makes me smile. So I think it’s a fantastic idea.
(17:29):
Good stuff. And Tash, what do you think?
(17:31):
Yeah, I think they’re all great too. I like them all. A few that spoke out like C and H mentioned, it’s nice to know the background information of our partners from EpiMax or the cement mixture technical presentations, that’s really interesting, but I did enjoy the mates in construction one. I think that was good, showing a bit of diversity in our industry, but a bit more personal as well. But I think they’re great, and keep it up.
(18:07):
Good stuff. Thanks guys. For jumping on the call. I had to twist a few arms to get these guys to do this one, but I think we all thought it was an important one to get you guys to know a little bit more about the team, not just work and orders and all the rest, but I’ve got a question here from Nancy. Are you guys finding you’re eating more working from home?
(18:34):
Yes.
(18:39):
Yes. That’s a silly question.
(18:42):
Not that I am. I just wanted to know if you guys are.
(18:46):
I’m drinking less coffee.
(18:51):
What are you replacing it with though?
(18:55):
All right. Thanks for that guys. I really appreciate that. Such a great team we have at Bluey, and I’m really proud of all of you and the way you’ve responded to the current circumstances. But before we go, Aiden, we can’t let you off the hook, tell us what you do. Come on, on the spot.
(19:09):
Oh, what I do. Well, I am the marketing and engagement leader at Bluey. So my job basically involves making sure every touch point, every interaction that anyone has outside of the business is consistent with the branding, the guidelines, what Daniel and the rest of the team have in their head. The design and branding has to be the silent marketer of the company, so that’s mostly my job. I deal with a lot of the digital marketing side of things from the webinars, to PPC advertising, to backend webinars, brochures, and publications. And the engagement side of my job is to keep the team communicating, whether it be through Zoom meetings or through challenges or anything really. So that’s my job on the spot. Thanks for saying that Daniel.
(20:10):
Well done. And have you been eating more working from home, Aiden?
(20:14):
I have. I don’t know if you guys can see, but these buttons are-
(20:18):
That shirts looking pretty tight.
(20:21):
Shirts are getting tighter and the selection of shirts is getting smaller.
(20:29):
We won’t go into that. All right. We’ve probably taken up everyone’s time. I really, really appreciate everyone joining us for that today and getting to meet the team. These are the guys who really make stuff happen behind the scenes and get that product out every day and really care about the customer service at Bluey from beginning to end and making sure that everything we do is professional, and what you see on the surface runs all the way through the company all the way down to the final delivery we hope. But hopefully now you know who to speak to and the faces behind the names, which is great.
(21:03):
So this afternoon at one o’clock Sydney time, we’ve got pumping and mixing of cement products. Greg’s going to be presenting on that. And then we’re back again on Monday after the weekend with a new topic on Monday morning, concrete joints and ceiling. We’ll run through all the different types of joints in concrete. So construction joints, movement joints, expansion joints, how we seal those and address them, and some of the technical aspects around that. And in the afternoon, we’ll be covering for the Southeast Asia participants, grout, mortar, shrinkage control, and measurements. So if you’re in Australia and you miss that, you can join us at one o’clock on Monday for the ground mortar, shrinkage control and measurement as well. Thank you again for joining us. Hope you’re all doing well, and we look forward to seeing you again at another one of our webinars. Thank you everyone.
(21:53):
Thanks.